 Casacrunched
15 Shiplap Accent Wall Ideas That Are Not Just Farmhouse
Shiplap outgrew farmhouse — done right it is clean, architectural, and modern. Fifteen shiplap accent wall ideas with gap-width guidance, paint choices, and styles from classic white to dark and vertical.

Say “shiplap” and most people picture a farmhouse — whitewashed boards, a rustic kitchen, a television show from ten years ago. That picture is out of date. Shiplap outgrew farmhouse years ago: painted dark it reads as moody paneling, run vertically it reads as modern architecture, left natural it reads as warm timber. The style is never in the board itself. It is in three decisions: gap width, plank direction, and paint. Get those three right and a shiplap accent wall is clean, architectural, and modern — in a farmhouse, a condo, or anywhere in between.
Fifteen shiplap ideas, each with gap-width and plank-width guidance, honest costs, and small-room notes — so your wall reads exactly the way you pictured it.
On this page
- Quick comparison table
- 1. Classic white horizontal
- 2. Vertical shiplap
- 3. Dark painted shiplap
- 4. Natural wood shiplap
- 5. Shiplap fireplace wall
- 6. Shiplap behind the bed
- 7. Shiplap behind the TV
- 8. Shiplap bathroom wall
- 9. Shiplap ceiling
- 10. Two-tone shiplap
- 11. Narrow-gap shiplap
- 12. Wide-plank shiplap
- 13. Shiplap + wallpaper combo
- 14. Peel-and-stick faux shiplap
- 15. Shiplap hallway
- Which wall for shiplap?
- Paint guidance
- Renter rules
- 5 mistakes to avoid
- FAQs
Quick comparison: cost, time, gap width, renter score
| # | Idea | Gap width | Cost / wall | Time | Renter-friendly? |
|---|---|---|---|---|---|
| 1 | Classic white horizontal | 1/8–1/4 in | $100–$250 | Weekend | Adhesive: partial |
| 2 | Vertical shiplap | 1/8 in | $100–$250 | Weekend | Adhesive: partial |
| 3 | Dark painted shiplap | 1/8 in | $100–$250 | Weekend | Adhesive: partial |
| 4 | Natural wood shiplap | 1/8–1/4 in | $150–$400 | Weekend | No (nailed) |
| 5 | Shiplap fireplace wall | 1/8 in | $120–$300 | Weekend | No (heat + nails) |
| 6 | Shiplap behind the bed | 1/8–1/4 in | $100–$250 | Weekend | Adhesive: partial |
| 7 | Shiplap behind the TV | 1/8 in | $100–$250 | Weekend | Adhesive: partial |
| 8 | Shiplap bathroom wall | 1/8 in | $120–$300 | Weekend | PVC adhesive: yes |
| 9 | Shiplap ceiling | 1/8 in | $150–$400 | 1–2 weekends | No |
| 10 | Two-tone shiplap | 1/8 in | $100–$250 | Weekend | Adhesive: partial |
| 11 | Narrow-gap shiplap | Nickel (1/16 in) | $100–$250 | Weekend | Adhesive: partial |
| 12 | Wide-plank shiplap | 1/4 in | $150–$350 | Weekend | No (nailed) |
| 13 | Shiplap + wallpaper combo | 1/8 in | $140–$300 | Weekend | Adhesive: partial |
| 14 | Peel-and-stick faux shiplap | Printed | $40–$120 | 2–3 hours | Fully removable |
| 15 | Shiplap hallway | 1/8 in | $80–$200 | Weekend | Adhesive: partial |
Gap width is the single biggest style lever in shiplap. A 1/4-inch gap reads rustic and farmhouse; a nickel-width gap (about 1/16 inch) reads sleek and contemporary. Same boards, completely different room — choose the gap before you buy a single plank.
IDEA 01Classic White Horizontal — the One Everyone Knows
The original, and still the most versatile: horizontal boards painted white, with a visible gap that throws a thin shadow line across the wall. It works because the rhythm is calm — the eye travels along the lines the way it travels along a horizon — and white keeps the texture from competing with furniture, art, or a TV.
Gap and plank guidance: standard 6-inch boards with a 1/8 to 1/4-inch gap. Wider gaps read more farmhouse; tighter gaps read more refined. Paint the wall behind the boards the same white first, so the gaps read as shadow, not as drywall. $100–$250 for a standard wall, one weekend. Best rooms: living rooms, bedrooms, entryways — anywhere you want texture without color commitment.
Paint the boards before installing them, then touch up nail holes after — painting installed boards leaves the gaps full of paint and kills the shadow line that makes shiplap work.
IDEA 02Vertical Shiplap — the Modern Rewrite
Turn the boards ninety degrees and shiplap stops looking like a farmhouse entirely. Vertical lines pull the eye upward, which makes standard 8-foot ceilings feel taller — the single most useful trick in a small room. Vertical shiplap reads as paneling, not barn siding, especially with a tight gap and a non-white color.
Gap and plank guidance: 6-inch boards with a tight 1/8-inch gap; wider gaps break the vertical illusion and pull the eye sideways again. Run boards floor to ceiling with no horizontal break — a mid-wall seam is where vertical shiplap betrays itself. $100–$250, one weekend. Best wall: the bed wall, the sofa wall, or any wall you want to feel taller.
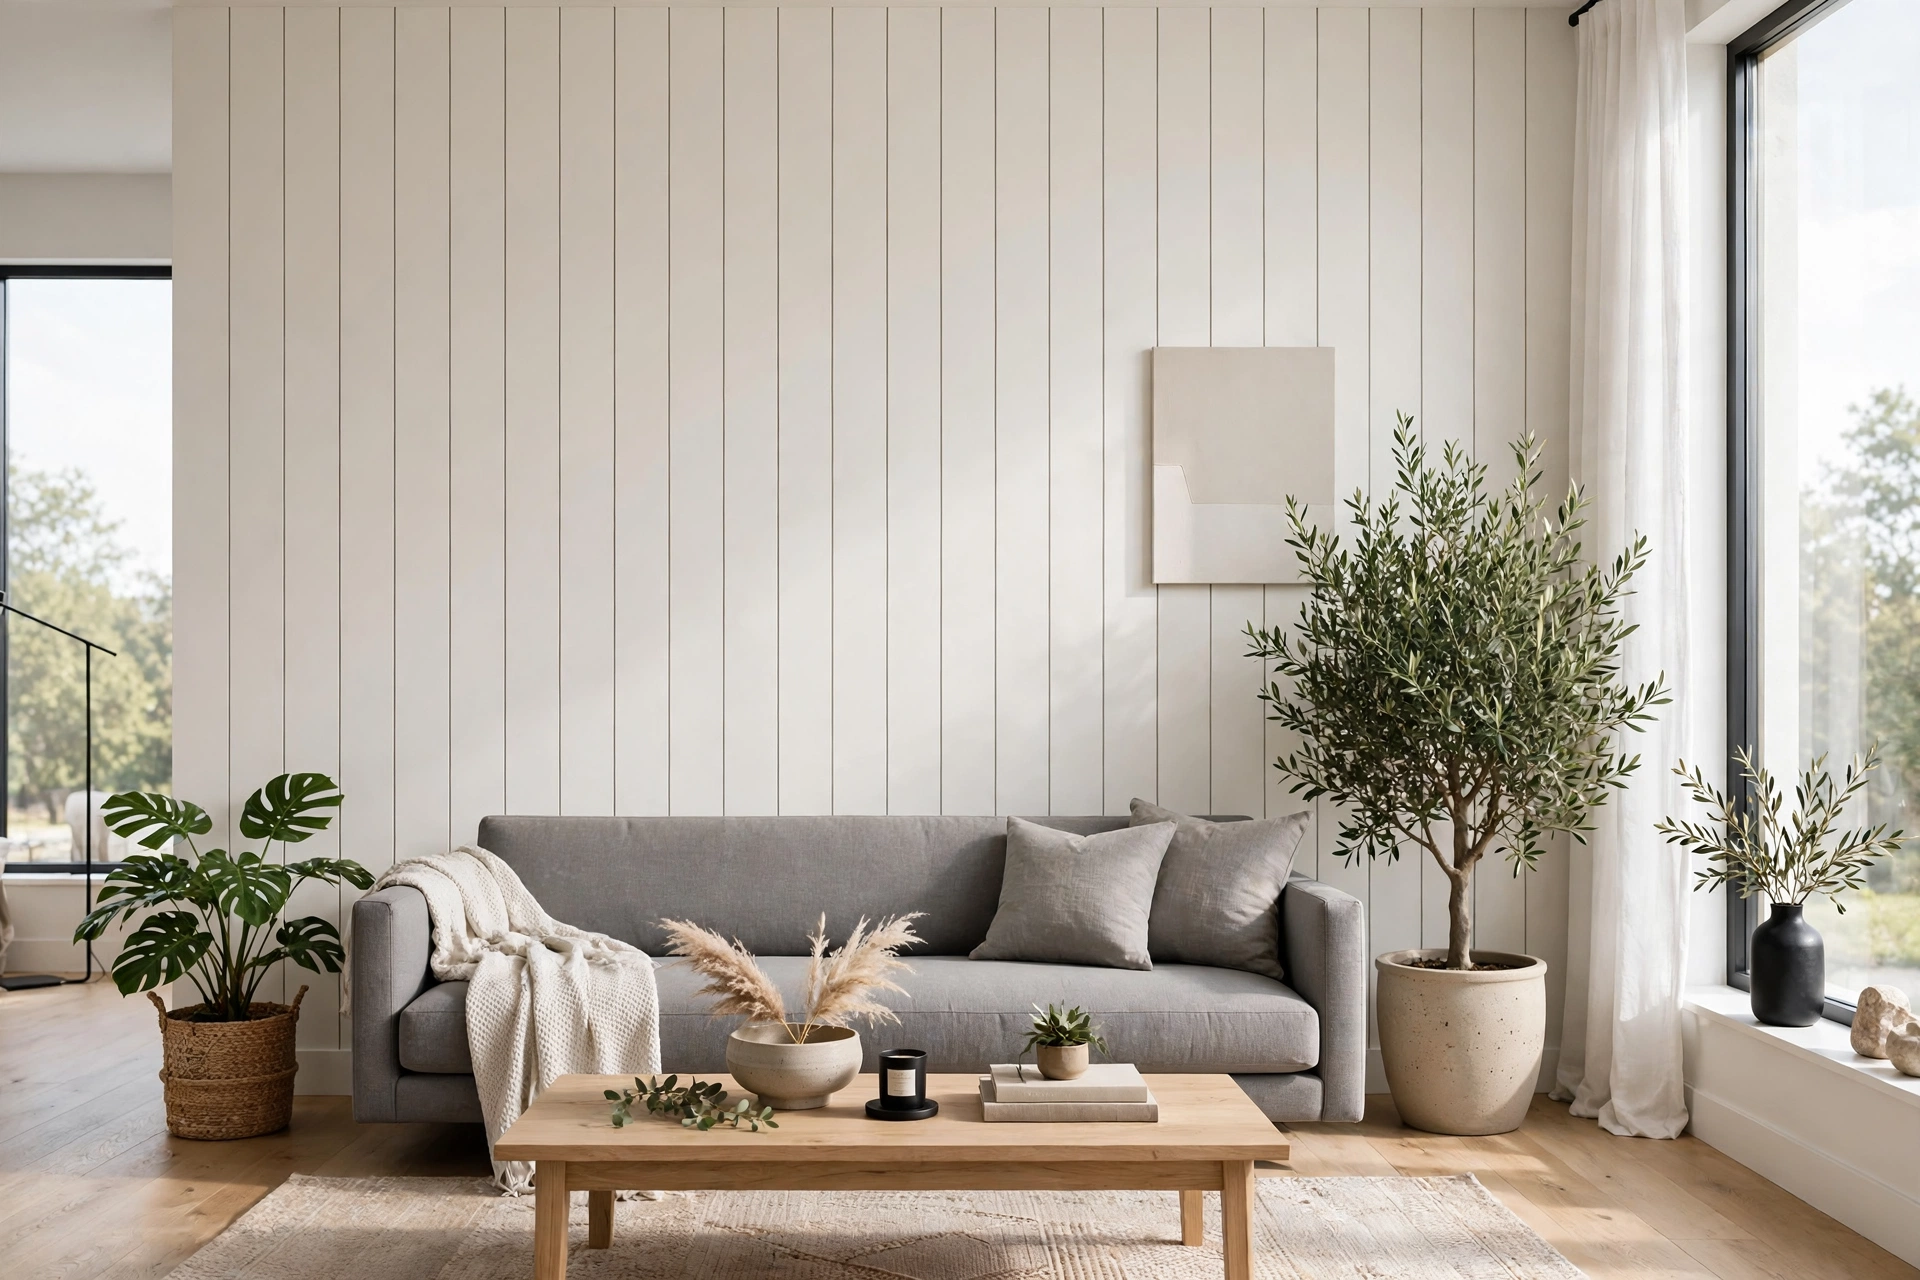
Vertical shiplap on a wall with a window reads as stripes cut in half — pick a windowless wall, or run the boards around the window frame as a deliberate border.
IDEA 03Dark Painted Shiplap — Farmhouse, Gone Moody
Dark paint is the fastest way to rescue shiplap from its farmhouse reputation. Charcoal, navy, or deep green over the same boards reads as tailored paneling — the gaps become shadow lines in a dark field, and the whole wall gains the drama of a painted room with the texture of timber. It is the shiplap for people who love the texture but not the aesthetic.
Gap and plank guidance: tight 1/8-inch gaps — dark paint makes wide gaps look like missing boards. Paint names: Sherwin-Williams Iron Ore (SW 7069) for charcoal, Naval (SW 6244) for navy, Retreat (SW 6207) for deep green. Two coats minimum over primer; dark colors show every thin spot. $100–$250, one weekend. Best rooms: bedrooms, dining rooms, offices — rooms where mood is the point.
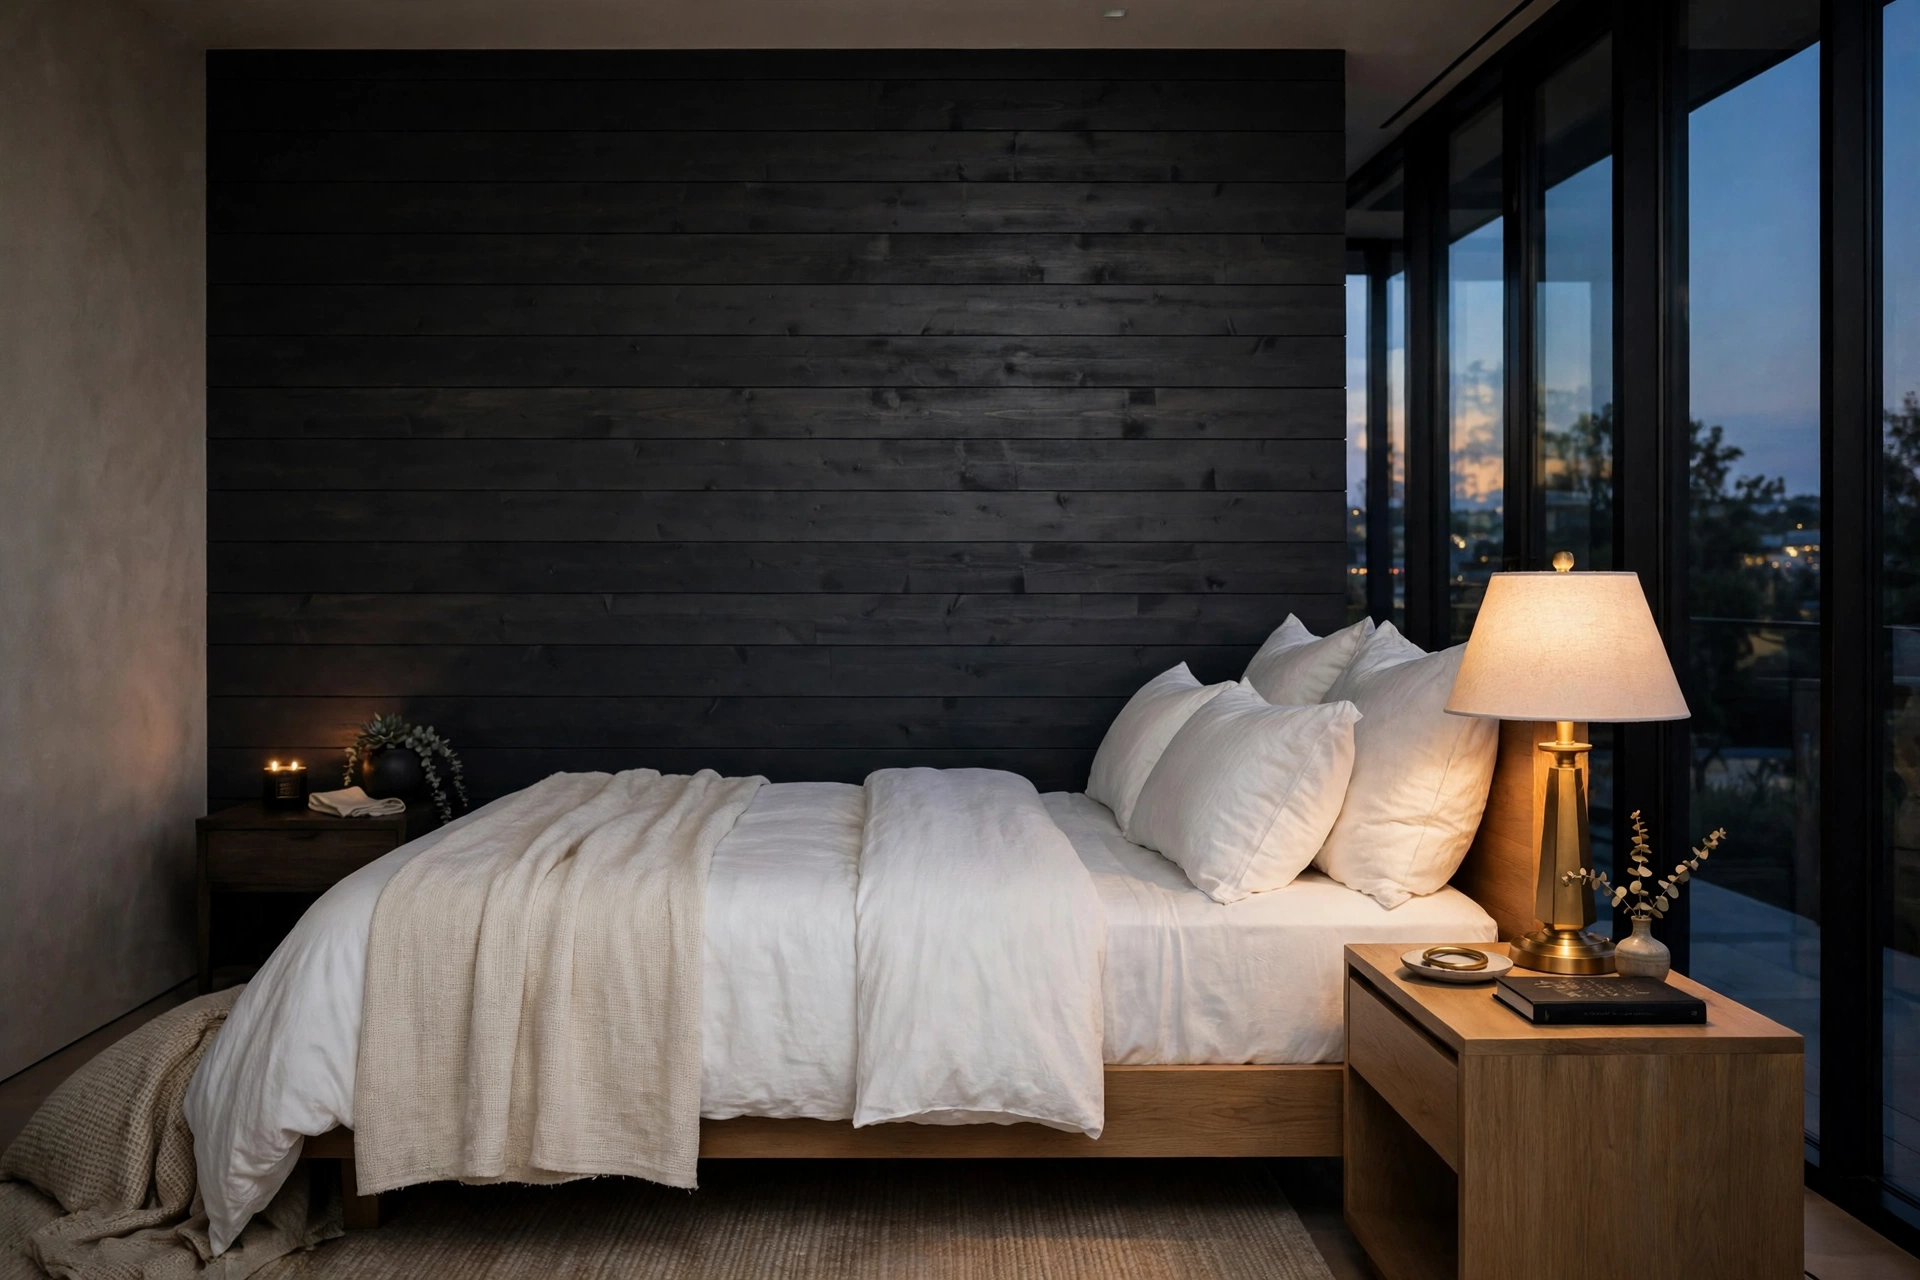
Dark shiplap plus one oversized pale artwork is the highest-impact pairing in this article — the art floats, the wall disappears, and nobody says the word farmhouse.
IDEA 04Natural Wood Shiplap — Let the Grain Do the Talking
Unpainted shiplap trades color for character: pine, cedar, or oak boards sealed clear, with grain, knots, and tone variation doing all the decorating. It is the warmest shiplap on this list and the one that ages best — painted trends come and go, but wood grain never looks dated.
Gap and plank guidance: 1/8 to 1/4-inch gaps, wider if the boards are rough-sawn and you want the rustic read, tighter if they are smooth and you want a refined one. Seal with a clear matte polyurethane — glossy sealant turns a wood wall into a bowling lane. Budget more here: real timber runs $150–$400 a wall, one weekend, and this is a nailed installation, so it is the least renter-friendly idea in this article.
Unsealed natural shiplap in a sunny room yellows unevenly — the boards near the window amber faster than the rest. Seal every board, both faces, before installation.
IDEA 05Shiplap Fireplace Wall — the Classic, Done Right
The fireplace wall is shiplap’s natural home: the boards frame the firebox, draw the eye to the room’s focal point, and give a plain builder-grade fireplace the architecture it was missing. Floor-to-ceiling shiplap above a mantel is the single most photographed shiplap application for a reason — it works.
Gap and plank guidance: tight 1/8-inch gaps, boards running vertically above the mantel for height or horizontally for width, depending on the room. Heat rules: keep shiplap at least 6 inches from the firebox opening, use cement board behind the boards near the firebox, and never run MDF shiplap directly against a hot surface. $120–$300, one weekend.

MDF shiplap near a working fireplace is a fire risk, not a design choice — real wood or cement board backing near the firebox, no exceptions.
IDEA 06Shiplap Behind the Bed — a Headboard the Size of the Wall
A shiplap bed wall is a headboard that never needs replacing: the boards run behind the bed, the pillows sit against texture instead of flat paint, and the whole bedroom gains a focal point that costs less than a statement headboard. It is also the most forgiving shiplap placement — the bed hides the bottom third, so small imperfections at floor level never show.
Gap and plank guidance: 1/8 to 1/4-inch gaps, boards running at least 12 inches wider than the bed on each side — a shiplap field narrower than the bed reads as a mistake. White for bright bedrooms, dark for moody ones, natural wood for warm ones. $100–$250, one weekend. Hang art or sconces through the boards into studs, never into boards alone.
Run the shiplap 12 inches wider than the bed on each side, and hang sconces at pillow height — the wall reads as designed around the bed, not pasted behind it.
IDEA 07Shiplap Behind the TV — Texture That Hides the Screen
A TV on a flat wall is a black rectangle floating in nowhere. A TV on a shiplap wall is a screen inside a composition: the horizontal lines break up the wall’s flatness, the texture gives the eye somewhere to rest, and the whole setup reads as intentional rather than accidental.
Gap and plank guidance: tight 1/8-inch gaps — wide gaps behind a TV create visual noise that competes with the screen. Mount the TV bracket through the boards into studs, and plan cable routing before the boards go up: a channel behind the center boards beats a visible cable every time. Paint: mid-tone or dark shiplap hides the black screen best; white shiplap behind a TV needs the TV framed by art or shelving to avoid the floating-rectangle effect. $100–$250, one weekend.
Never mount a TV into shiplap boards alone — boards pull out under the weight. The bracket must hit studs, or the TV comes down with the wall.
IDEA 08Shiplap Bathroom Wall — Moisture-Safe, Not Soggy
Shiplap in a bathroom looks like a spa — until the first year of steam turns MDF boards into swollen cardboard. The idea works, but only with the right material: PVC or vinyl shiplap is waterproof, paintable, and indistinguishable from wood once installed, and it survives every shower the bathroom can produce.
Gap and plank guidance: tight 1/8-inch gaps, sealed with paintable caulk at every edge — moisture enters through gaps, not through boards. Keep shiplap out of the direct shower spray zone; the wall opposite the shower or the vanity wall is the safe placement. $120–$300 for PVC boards, one weekend. Renters: PVC boards on adhesive strips come down with heat, making this one of the few genuinely renter-friendly shiplap ideas.
MDF shiplap in a bathroom is a one-year wall — it swells, warps, and grows mold at the bottom edge. If the board says MDF, it does not belong in a bathroom.
IDEA 09Shiplap Ceiling — the Fifth Wall
Shiplap on the ceiling is the boldest idea in this article and the one that transforms a room most: the lines draw the eye across the ceiling the way beams do, a low ceiling gains rhythm instead of flatness, and a plain white box of a room suddenly has a designed overhead plane. It is also the hardest installation here — working overhead, every board held against gravity.
Gap and plank guidance: tight 1/8-inch gaps, boards running the long direction of the room to stretch it visually. White or very pale shiplap only — a dark ceiling lowers the room’s perceived height and turns cozy into cramped. $150–$400, one to two weekends, two people minimum, and a brad nailer is not optional. Not a renter idea.
Run ceiling boards the long way down the room — the lines stretch the space the way horizontal wall boards widen a narrow room.
IDEA 10Two-Tone Shiplap — Boards One Color, Gaps Another
Two-tone shiplap is the designer’s trick for making a simple wall look custom: paint the wall behind the boards one color and the boards another, and the gaps become a deliberate second color instead of shadow. White boards over a dark backing read as crisp graphic lines; dark boards over a pale backing read as depth.
Gap and plank guidance: 1/8-inch gaps — the gap color only reads if the gap is consistent, so a spacer is mandatory, not optional. Best combinations: white boards over charcoal backing, sage boards over cream backing, navy boards over white backing. Paint the backing wall first, let it cure fully, then install boards — wet backing paint transfers onto board edges. $100–$250, one weekend.
Two-tone shiplap with uneven gaps reads as a mistake, not a design — if your gaps wander, the second color exposes every wobble. Use a spacer on every single board.
IDEA 11Narrow-Gap Shiplap — the Contemporary Version
Narrow-gap shiplap is how you get shiplap texture in a modern home without anyone calling it farmhouse: the boards sit almost flush, separated by a hairline shadow barely wider than a credit card edge, and the wall reads as refined paneling with a pulse. From across the room it looks like a single paneled surface; up close, the fine lines reward attention.
Gap and plank guidance: a nickel-width gap, about 1/16 inch — use an actual nickel as the spacer, one between every pair of boards. Narrower boards (4-inch) suit narrow gaps best, because more lines mean more rhythm. $100–$250, one weekend, and patience: hairline gaps punish sloppy cuts more than wide ones do, because there is nowhere to hide a wobble.
The nickel trick is literal: drop a nickel between boards as you nail, and every gap in the wall comes out identical. No measuring, no drift.
IDEA 12Wide-Plank Shiplap — Fewer Lines, Bigger Calm
Wide-plank shiplap is the opposite philosophy: 8 to 10-inch boards, fewer lines, and a wall that feels calm and expansive rather than busy. It suits large rooms and high ceilings, where standard 6-inch boards would read as stripes, and it suits minimalist rooms, where the wall should whisper instead of chatter.
Gap and plank guidance: 8 to 10-inch boards with a 1/4-inch gap — the wider gap keeps the few lines visible, or the wall reads as plain paneling. Wide planks demand a flat wall: a bowed board spans a longer distance and shows every wall imperfection. $150–$350 (wide boards cost more per foot), one weekend, nailed into studs.
Wide planks in a small room shrink it — the few, heavy lines dominate a small wall. Under 10 feet wide, stick to standard 6-inch boards.
IDEA 13Shiplap + Wallpaper Combo — Texture Meets Pattern
Shiplap and wallpaper are usually presented as rivals. Together, they are better than either alone: shiplap on the lower half of the wall gives structure and durability where chairs and feet scuff, wallpaper on the upper half gives pattern and color where the eye actually looks. The chair-rail line where they meet becomes the wall’s architecture.
Gap and plank guidance: shiplap on the lower third (chair-rail height, 30–36 inches) with 1/8-inch gaps, wallpaper above, divided by a slim wood chair rail painted to match the shiplap. Keep the wallpaper quiet — a busy pattern above busy boards fights itself; a subtle botanical or tone-on-tone geometric lets the shiplap breathe. $140–$300, one weekend.
Paint the chair rail the shiplap color, not the wallpaper color — the rail belongs to the boards, and the line reads as intentional instead of accidental.
IDEA 14Peel-and-Stick Faux Shiplap for Renters — the Look, Zero Holes
The renter’s shiplap: vinyl peel-and-stick planks or wallpaper printed with shiplap lines, applied like wallpaper and peeled off at move-out. From three feet away — which is how guests see a wall — good faux shiplap is genuinely convincing: the printed shadow lines read as gaps, the matte vinyl reads as painted wood.
Gap and plank guidance: the gap is printed, not real, so choose a print with a 1/8-inch shadow line and a matte finish — glossy faux shiplap reflects light and betrays itself instantly. $40–$120 for a wall, two to three hours, fully removable. Hang with furniture moved out, smooth from the center out, and buy one spare roll: matching dye lots later is a gamble.
Matte finish is the whole trick — glossy faux shiplap reflects like plastic, matte faux shiplap reads like painted wood. Check the finish before you buy.
IDEA 15Shiplap Hallway — the Corridor That Finally Gets Attention
Hallways are the most ignored walls in a home — long, narrow, and passed through without looking. Shiplap fixes that for less than any other idea in this article: one long wall of boards turns a corridor from a passage into a place, and the horizontal lines stretch the hallway visually, making it feel wider than it is.
Gap and plank guidance: 1/8-inch gaps, horizontal boards to widen the corridor, white or pale paint to keep the narrow space bright. Full height is best in a hallway — half-height shiplap in a corridor reads as a wainscot that ran out of budget. $80–$200 for a typical hallway wall, one weekend. Mind the door frames: boards must be scribed or trimmed around every casing, and that trim work is where hallway shiplap earns its time.
Horizontal boards in a hallway must clear every door casing cleanly — a board butted sloppily against a frame is the first thing the eye finds in a narrow space.
Which Wall for Shiplap? Placement Rules
Shiplap is forgiving about rooms but strict about walls, and four rules decide whether it lands. Rule one: the flattest wall. Shiplap follows the wall it sits on — a bowed wall produces bowed boards and gaps that wander. Test with a long level before you buy a single plank, and pick the straightest wall in the room. Rule two: the wall you look at, not the wall behind you. In a bedroom, that is the bed wall; in a living room, the wall the sofa faces or the fireplace wall; in a dining room, the wall the table looks toward. An accent should be what you see.
Rule three: never the window wall. Boards cut around a window read as fragments, not a field, and the window’s light washes out the shadow lines that make shiplap work. Rule four: one wall, full stop. Shiplap’s power is rhythm on a single plane; two shiplap walls read as a theme room, and four read as a cabin. The one exception: a hallway, where one long wall is the whole project anyway — and even there, keep the opposite wall plain.
Stand in the doorway and look in — the first wall your eye lands on is your shiplap wall. If that wall has a window in it, pick the second wall your eye finds.
Shiplap on a textured or damaged wall amplifies every flaw — the boards telegraph bumps instead of hiding them. Fill, sand, and prime first, or pick another wall.
Paint Guidance: White vs. Dark vs. Natural Wood
Shiplap’s paint decision is simpler than most accent walls, because the boards do half the work. White is the default for a reason: it keeps the texture visible without committing to a color, suits every furniture style, and brightens small rooms. Pure white or slightly warm white — never stark blue-white, which makes the shadow lines look cold. Dark (charcoal, navy, deep green) is the modern move: it turns shiplap into paneling, hides a TV beautifully, and suits bedrooms and dining rooms where mood is the point. Dark shiplap needs good light and one pale element for contrast, or it reads as a cave.
Natural wood is the warmest option and the one that ages best — sealed clear, it never looks dated, but it commits the room to warm tones, so cool gray furniture will fight it. Same-color vs. contrast: painting shiplap the same color as the surrounding walls turns it into quiet texture; painting it a contrasting color turns it into a feature. For a first shiplap wall, contrast is the safer bet — quiet texture is easy to miss, and a wall nobody notices was not worth a weekend. Finish: eggshell for living areas (wipes clean), matte for bedrooms and TV walls (zero glare).
The paint test that never fails: paint one board, hold it against the wall at three times of day — morning daylight, afternoon sun, evening lamplight. A color that stays true through all three is a keeper.
Buy sample quarts, not chips, for your final two colors. Chips lie about scale: a shade that looks perfect at 2 inches can overwhelm at 200 square feet.
The most common shiplap paint disaster: painting installed boards and filling the gaps with paint, which kills the shadow line. Paint boards first, touch up nail holes after.
Renter Rules: What You Can and Can’t Do
- Always safe: peel-and-stick faux shiplap (fully removable), PVC boards on adhesive strips (heat to remove), leaning shiplap panels on a French cleat, repainting a wall you already shiplapped back to flat.
- Safe with care: lightweight MDF boards on heavy-duty removable strips (test a hidden spot first — some strips pull paint), adhesive boards in bathrooms (PVC only, never MDF).
- Ask first, in writing: nailed shiplap of any kind, dark-painted shiplap if your lease specifies repainting to the original shade, anything near a fireplace or heat source. Photograph the wall on move-in day.
- Never: nail into a wall you have not checked for pipes and wires, assume adhesive strips hold a full board’s weight on textured walls, or install MDF anywhere damp. Keep the original paint color name for the move-out repaint.
Nailed shiplap is the installation landlords notice most — every nail hole is a patch job at move-out, and a full wall of them is a weekend of filling. Adhesive or cleats, or ask first.
A French-cleat shiplap panel — boards mounted to a plywood backer, hung on a wall cleat — is the renter’s real shiplap: genuine boards, genuine shadow lines, and it lifts off the wall in one piece.
5 Mistakes to Avoid
- Uneven gaps. Shiplap lives or dies on gap consistency — a gap that wanders from 1/16 to 1/4 inch across a wall reads as sloppy no matter how good the paint is. Use a spacer (a nickel for narrow gaps, a tile spacer for wide ones) on every single board, no exceptions.
- Skipping the level. One board installed off-level compounds across the wall: by the tenth board, the whole field slopes visibly. Level the first board, then check every third board — walls are never as straight as they look.
- Wrong plank width for the room. Wide planks in a small room dominate the wall; narrow planks in a large room read as stripes. Standard 6-inch boards suit most rooms; go wide only above 12 feet of wall width.
- Painting before caulking. Uncaulked seams at the ceiling, floor, and corners betray DIY shiplap instantly — the eye finds every dark crack. Caulk every edge, let it cure, then paint.
- Shiplap on every wall. One shiplap wall is architecture; four shiplap walls are a cabin. The restraint is what makes it look designed instead of themed.
FAQs
01What gap width should I use for shiplap?
It depends on the style you want. A 1/8-inch gap is the all-purpose default — visible enough to read as shiplap, tight enough to look refined. A nickel-width gap (about 1/16 inch) reads sleek and contemporary. A 1/4-inch gap reads rustic and farmhouse. Whatever you choose, use a spacer on every board: consistent gaps are what separate a designed wall from a sloppy one.
02Should I install shiplap horizontally or vertically?
Horizontal is the classic: it widens narrow rooms and suits living rooms, hallways, and fireplace walls. Vertical is the modern rewrite: it makes ceilings feel taller and reads as paneling rather than barn siding, so it suits bedrooms and small rooms best. The rule of thumb: horizontal to widen, vertical to lift. Never mix directions on one wall — the eye reads it as a mistake, not a design.
03How much does a shiplap accent wall cost?
For a standard 10-by-12-foot wall, DIY materials run $100–$250 for MDF or pine boards plus paint, $150–$400 for real timber or a ceiling, and $40–$120 for peel-and-stick faux shiplap. A brad nailer rents for $30–$60 a day if you do not own one. Hiring a carpenter roughly doubles the budget. The cheapest shiplap in this article is the hallway wall (idea 15) at $80–$200.
04What are the best renter-friendly shiplap options?
Ranked by realism and reversibility: peel-and-stick faux shiplap (fully removable, most convincing in matte finish), PVC boards on adhesive strips (genuine boards, heat to remove, bathroom-safe), and shiplap panels on a French cleat (real boards on a plywood backer that lifts off the wall in one piece). Nailed shiplap is not renter-friendly — every nail hole is a patch job at move-out.
05Does shiplap work in small rooms?
Yes — with the right choices. Vertical shiplap makes low ceilings feel taller, white or pale shiplap keeps a small room bright, and standard 6-inch boards suit small walls better than wide planks, which dominate them. What fails: dark shiplap in a windowless room, and shiplap on more than one wall in a small space — both shrink the room instead of opening it.
06What is the difference between shiplap and board and batten?
Both are trim-based accent walls, but they read differently. Shiplap is horizontal or vertical boards with a gap between them — the look is lines and rhythm, and it suits coastal, modern, and farmhouse rooms. Board and batten is flat boards plus vertical battens forming a grid — the look is framed panels and architecture, and it suits traditional and transitional rooms. Shiplap is faster to install (boards only, no grid math); board and batten is more tailored. If you want texture, pick shiplap; if you want structure, pick board and batten.
Key takeaways
- Gap width is the style. A shiplap accent wall reads farmhouse at 1/4 inch, refined at 1/8 inch, and contemporary at a nickel width — choose the gap before you buy a single plank.
- Direction decides the room. Horizontal boards widen, vertical boards lift — match the direction to what your room needs.
- Paint decides the era. White is versatile, dark is modern paneling, natural wood is timeless — and painting boards before installing them protects the shadow line.
- One wall, level first board, spacer on every board. Restraint and consistency are what make shiplap look designed instead of themed.