 Casacrunched
15 DIY Accent Wall Makeover Ideas You Can Finish in a Weekend
Roll up your sleeves. Fifteen weekend projects with real materials lists, tools, and costs — every one rated for cost, time, and renter-friendliness.

You don’t need a contractor for a designer-looking wall — just a free Saturday, about $60, and the right plan. These fifteen diy accent wall ideas are genuine weekend projects with real materials lists, tools, honest costs, and a clear skill level each — so you never start something you can’t finish. Most need zero experience.
On this page
- Quick comparison table
- 1. Painted arch
- 2. Board and batten
- 3. Limewash texture
- 4. Peel-and-stick wallpaper panels
- 5. Wood slat starter wall
- 6. Stenciled pattern
- 7. Color-block two-tone
- 8. Picture-frame molding
- 9. Fabric wall panels
- 10. Washi tape geometric
- 11. Pallet wood wall
- 12. Sponge & ragging texture
- 13. Ombre paint blend
- 14. Pegboard accent
- 15. Wallpapered bookcase back
- Which wall should be the accent wall?
- Picking DIY paint colors
- Renter rules
- 5 mistakes to avoid
- FAQs
Quick comparison: cost, time, skill level
Costs are DIY estimates for one standard 10×12 ft wall, materials only. “Beginner” means zero experience needed; “Intermediate” means you’ve held a drill before.
| # | Idea | Cost | Time | Skill | Renter-safe? |
|---|---|---|---|---|---|
| 1 | Painted arch | $30–$60 | 1 afternoon | Beginner | Repaints easily |
| 2 | Board and batten | $60–$150 | 1 weekend | Intermediate | Ask first |
| 3 | Limewash texture | $40–$90 | 1 afternoon | Beginner | Repaints easily |
| 4 | Peel-and-stick wallpaper panels | $60–$150 | 1 afternoon | Beginner | Yes — peels off |
| 5 | Wood slat starter wall | $50–$120 | 1 weekend | Intermediate | With cleats |
| 6 | Stenciled pattern | $25–$60 | 1 afternoon | Beginner | Repaints easily |
| 7 | Color-block two-tone | $40–$80 | 1 afternoon | Beginner | Repaints easily |
| 8 | Picture-frame molding | $50–$120 | 1 weekend | Intermediate | Ask first |
| 9 | Fabric wall panels | $40–$100 | 1 afternoon | Beginner | Yes — no holes |
| 10 | Washi tape geometric | $15–$40 | 2–3 hours | Beginner | Yes — peels off |
| 11 | Pallet wood wall | $0–$50 | 2 weekends | Intermediate | Not really |
| 12 | Sponge & ragging texture | $30–$60 | 1 afternoon | Beginner | Repaints easily |
| 13 | Ombre paint blend | $40–$80 | 1 afternoon | Beginner | Repaints easily |
| 14 | Pegboard accent | $30–$70 | 1 afternoon | Beginner | Few holes |
| 15 | Wallpapered bookcase back | $20–$50 | 2–3 hours | Beginner | Yes — no wall touched |
IDEA 01Painted Arch — the One-Afternoon Statement
The painted arch is the highest-impact beginner diy accent wall: one bold shape, one paint color, zero power tools. Paint a large arch behind a bed, reading chair, or console — the curve breaks up a boxy rental’s rectangles and reads as intentional design from the doorway.
Materials: 1 gallon wall paint ($35–$55), small roller + tray, 2-inch angled brush, painter’s tape, pencil with string (your compass). Steps: pin the string at the arch’s center, sweep the pencil at full stretch for a perfect curve, tape the straight sides, roll two coats, and pull tape while the second coat is still slightly tacky for the crispest line. Total: 3–4 hours including dry time. Skill: beginner. Renter note: just paint — primer plus two coats restores the wall. Keep the arch large (two-thirds of the wall’s width) or it reads as decoration, not architecture.
Pull painter’s tape while the final coat is still slightly tacky — fully dry paint tears and leaves a ragged edge.
Don’t freehand the curve — wobbly hand-drawn arcs are the telltale sign of DIY. The string-and-pencil compass takes 2 minutes and looks perfect.
IDEA 02Board and Batten — Instant Architecture
Board and batten — flat boards with raised vertical battens — adds the architectural trim that makes new-build rentals look custom. The math is simple: vertical battens every 12–16 inches, a horizontal rail top and bottom, caulk, paint.
Materials: 1×3 primed MDF boards ($3–$5 each; 8–12 per wall), 1 gallon paint, caulk + wood filler, 2-inch brad nails. Tools: brad nailer (rent ~$30/day), saw, level, stud finder. Steps: nail top and bottom rails level into studs, space battens evenly with a spacer block, fill nail holes, caulk every seam, then paint everything one color — uniform paint is what makes separate boards read as one wall. Weekend project: Saturday install, Sunday finish. Skill: intermediate — every cut is a straight 90 degrees. Renter note: ask first; most landlords approve with a patch-and-repaint promise.

Cut a spacer block to your gap width and use it between every board — even gaps separate “designed” from “DIY.”
Caulk every seam before painting — uncaulked joints shadow-crack within months and scream amateur.
IDEA 03Limewash Texture — Old-World Walls in an Afternoon
Limewash — crushed limestone paint in loose, overlapping strokes — gives walls the cloudy, suede-like texture of old European plaster. Imperfection is the finish, so there’s no wrong way to apply it.
Materials: 1 gallon real limewash paint ($40–$70), large block brush, drop cloths. Steps: brush on in random crisscross strokes, working 3-foot sections with a wet edge; the cloudiness appears as it dries. Two coats, ~2 hours of painting per wall. Darker colors (terracotta, olive, charcoal) show texture best. Skill: beginner. Renter note: repaints like normal paint — but over glossy existing paint, use the manufacturer’s primer or limewash can peel.
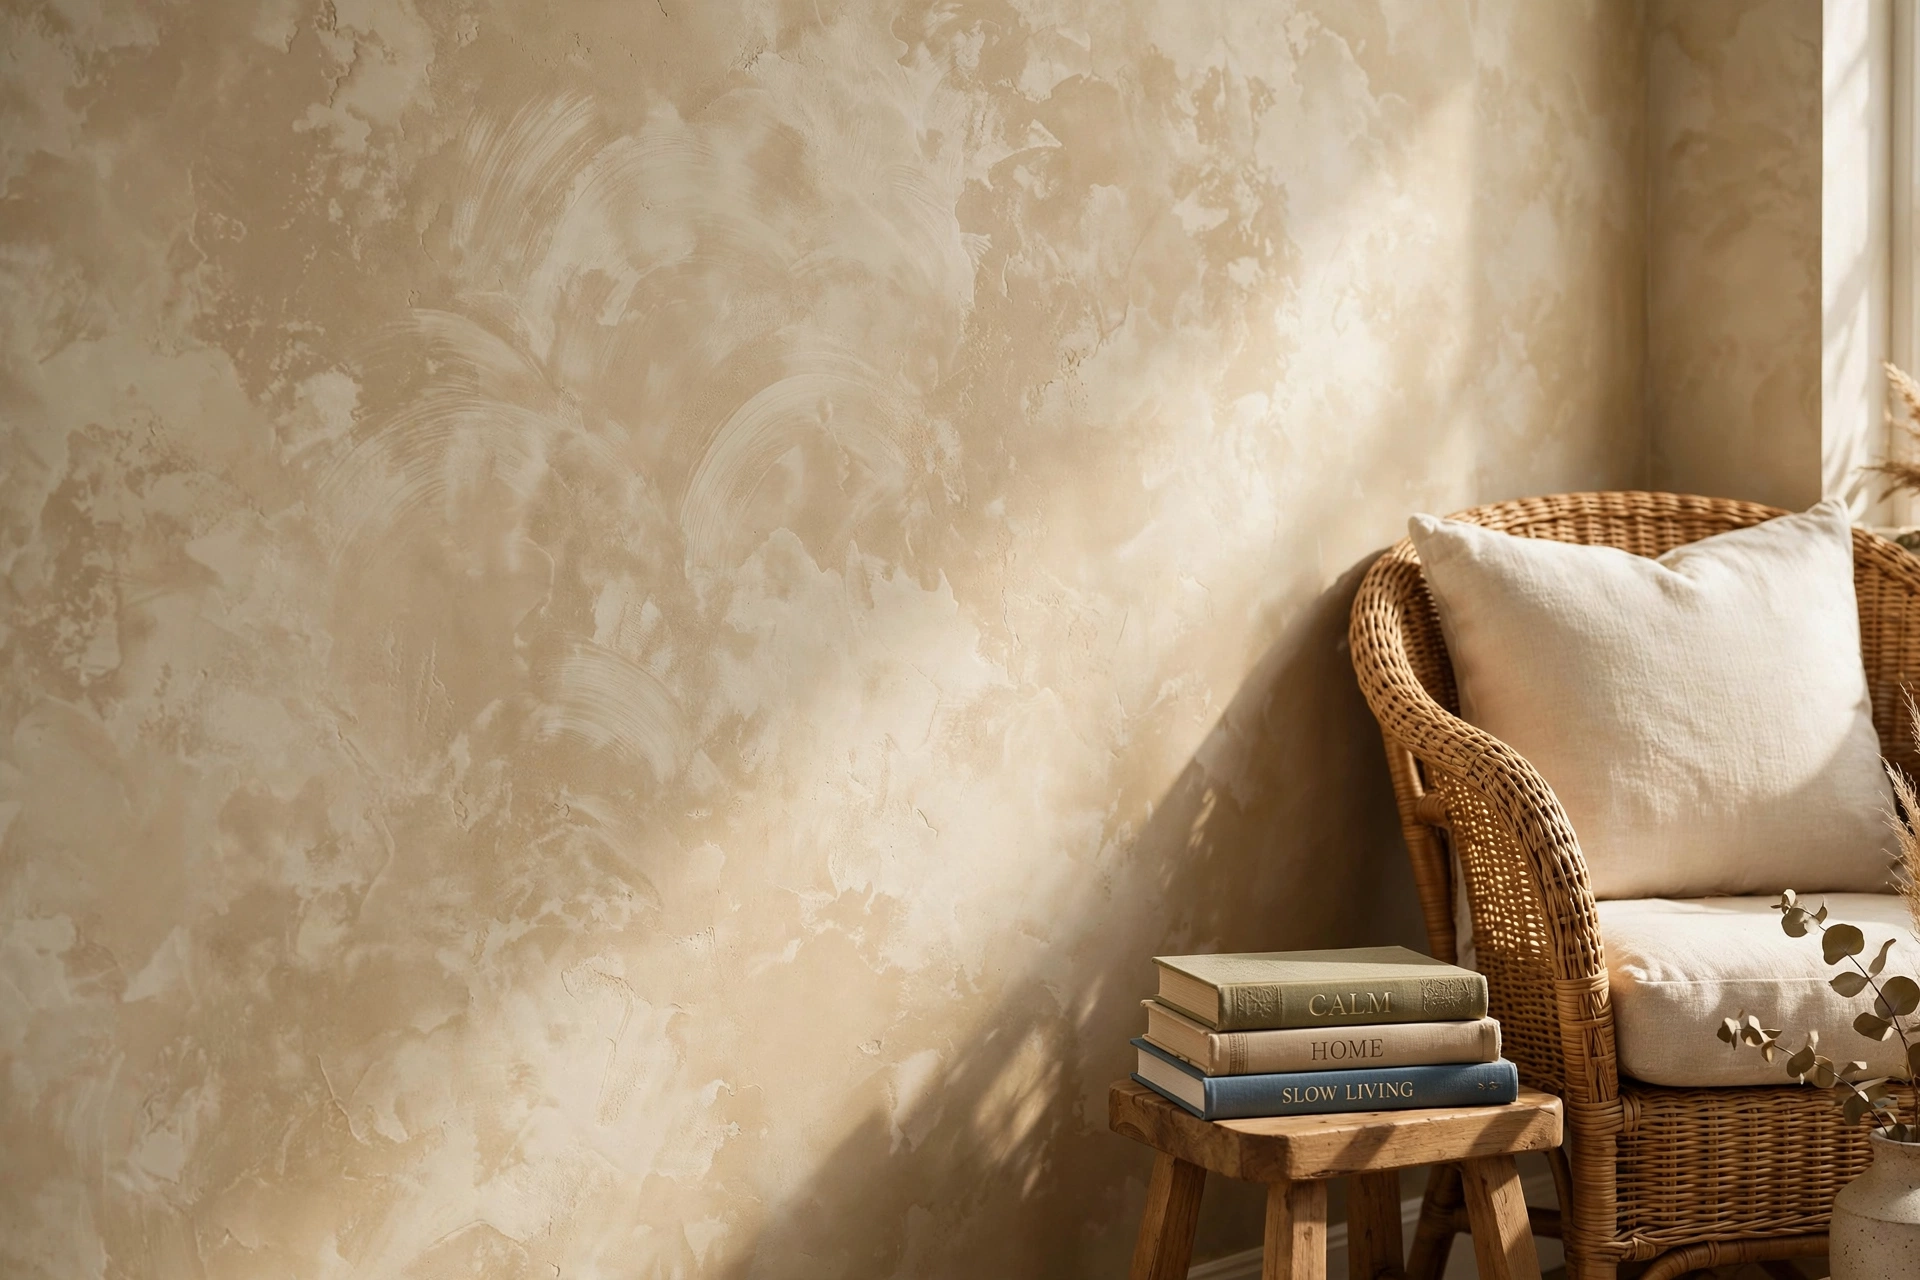
Never go back over a drying section — reworking wet limewash erases the cloudiness you just created.
Buy real limewash, not “limewash-effect” regular paint — only the mineral formula gives authentic suede mottling.
IDEA 04Peel-and-Stick Wallpaper Panels — the Renter’s Power Move
Peel-and-stick wallpaper is the only diy accent wall with zero tools, zero holes, and zero deposit risk — and modern prints look genuinely premium from normal viewing distance. One wall takes 2–4 rolls and a single afternoon.
Materials: peel-and-stick wallpaper ($30–$60/roll; add 10% for pattern matching), smoothing tool, sharp utility knife + fresh blades. Steps: start at the least visible corner, peel 12 inches of backing, stick the top and smooth downward, trim at ceiling and baseboard. Golden rule: never peel the whole backing at once — 12 inches at a time keeps panels controllable and bubble-free. Skill: beginner. Renter note: the gold standard — peels cleanly for years (hairdryer on stubborn spots). Avoid fresh paint under 30 days or heavily textured walls.

Buy 10% more than you measure — pattern matching eats paper, and running one roll short mid-wall is the classic heartbreak.
Never apply over paint less than 30 days old — the adhesive can pull fresh paint clean off at removal.
IDEA 05Wood Slat Starter Wall — the $80 Showpiece
Vertical wood slats over a dark-painted backing wall deliver the trendiest diy accent wall look for shockingly little: the dark gaps between slats are what make it look architectural instead of crafty.
Materials: 20–30 pine 1×2 strips ($50–$90), 1 quart dark paint (charcoal/near-black) for the backing, stain or sealant, brad nails. Tools: brad nailer (rent ~$30/day), level, saw. Steps: paint the wall dark and let it cure; nail slats vertically into studs with a half-inch spacer block between each; stain or seal. Saturday install, Sunday finish. Skill: intermediate. Renter note: build slats on plywood panels hung with French cleats — two screws per panel, patched in minutes.
Paint the backing wall dark first — the shadow gaps are 90% of what makes slats look expensive.
Skip the dark backing and slats read as “fence.” That quart of charcoal paint is the highest-ROI step in the project.
IDEA 06Stenciled Pattern — Wallpaper Looks for $40
A large wall stencil gives you patterned-wallpaper looks — Moroccan tile, art deco fans, oversized botanicals — for the price of a quart of paint. Modern laser-cut stencils tile seamlessly and fool guests from six feet away.
Materials: 1 large wall stencil ($20–$40), 1 quart accent paint, dense foam roller (critical — regular rollers bleed under edges), repositionable spray adhesive. Steps: position level, mist the back with adhesive, roll almost dry — offload most paint onto a rag first — in light passes, reposition using registration marks. The entire technique is “dry roller, light pressure.” Skill: beginner. Renter note: just paint; start behind furniture where your first practice repeats hide.
Roll with a nearly-dry foam roller — bleed happens when the roller is too wet, never when it’s too dry.
Start the pattern behind furniture — your first few repeats are practice, and nobody inspects the wall behind the sofa.
IDEA 07Color-Block Two-Tone — Geometry in Two Cans
Two-tone color blocking — a bold shape in a second color over your base wall — is the graphic designer’s diy accent wall: circles, half-walls, diagonal splits, oversized rectangles framing a bed or desk. Two cans of paint, one roll of tape, done by dinner.
Materials: 1–2 gallons paint ($35–$70), quality painter’s tape, small roller, angled brush. Steps: pencil the shape, press tape firmly (run a credit card along it to seal), roll two coats, pull tape while tacky. Popular moves: half-wall split at chair-rail height, a big circle behind a round mirror, a diagonal that “lifts” a low ceiling. Skill: beginner. Renter note: pure paint, fully reversible. Keep the 70/30 rule: one dominant color, one accent — equal halves look indecisive.
Seal tape edges with a credit card before painting — pressed tape gives razor lines; loose tape gives fuzzy ones.
The 70/30 rule: one dominant color, one accent. Equal halves of two bold colors look indecisive, not designed.
IDEA 08Picture-Frame Molding — Parisian Walls, DIY Price
Picture-frame molding — thin trim boxes painted the same color as the wall — is how Parisian apartments get their paneled look. Same-color paint is the trick: the molding reads as architecture, not decoration.
Materials: panel molding strips ($1–$2/ft; 40–60 ft per wall), 1 gallon paint (wall color), caulk, wood filler, brad nails. Tools: brad nailer (rent ~$30/day), miter saw or miter box, level. Steps: sketch the box layout first (equal margins everywhere — symmetry is the whole look), cut 45° miters, nail boxes level, fill and caulk every joint, paint wall and molding one uniform color. Saturday build, Sunday finish. Skill: intermediate — mitered corners are the only new skill, and caulk forgives small gaps. Renter note: ask first; it patches like any nail holes, but get approval in writing.
Paint molding and wall the exact same color — contrasting trim reads “craft project”; uniform color reads “architecture.”
Dry-fit every box on the floor first — miter corners are the make-or-break, and caulk only hides the last 1/16th inch.
IDEA 09Fabric Wall Panels — Upholstered Walls, Zero Holes
Stretched fabric panels — canvas or linen pulled over wooden frames — give you a soft, sound-dampening accent wall with zero wall damage. The textile answer to the slat wall, and a real acoustic upgrade in echoey rentals.
Materials: 2–3 yards fabric per 2×4 ft panel ($15–$40/yd; check remnant bins), 1×2 lumber for frames, staple gun + staples, heavy-duty adhesive hanging strips. Steps: build rectangular frames, stretch fabric drum-tight like a canvas (staple centers first, work to corners), trim, and hang in a grid with adhesive strips — no nails. Three panels make a wall; six make a statement. Skill: beginner. Renter note: the friendliest “built” option — strips remove cleanly.
Stretch like a canvas: staple the middle of each side first, then work toward the corners — drum-tight, zero wrinkles.
Shop remnant bins and curtain panels for fabric — you need yards, not bolts, and remnants run half price.
IDEA 10Washi Tape Geometric — the $20 Experiment
Washi tape peels off cleanly, making it the ultimate zero-commitment diy accent wall: chevron stripes, oversized diamonds, thin-line grids, directly on the painted wall — graphic impact for the price of lunch.
Materials: 3–6 rolls washi tape in 1–2 coordinating patterns ($3–$6/roll), level, scissors. Steps: pencil faint guidelines, press tape along them, burnish edges with your thumb. Two to three hours for a full wall. It’s also the perfect rehearsal: live with a taped geometric for a month to learn exactly which painted pattern you’d commit to. Skill: beginner. Renter note: the safest project here — lifts cleanly even after months. Keep it out of steamy bathrooms.
Use it as a rehearsal: live with a taped pattern for a month before committing to paint — you’ll learn what you actually like.
Press every tape edge firmly — lifted edges collect dust and curl within weeks, ruining the crisp look.
IDEA 11Pallet Wood Wall — Free Lumber, Real Sweat Equity
Pallets are free lumber behind grocery stores and on marketplace listings — a full accent wall for $0–$50 in sandpaper, nails, and sealant. Rough, varied, full of character: the ultimate rustic diy accent wall for nearly nothing.
Materials: 6–10 pallets (free), sandpaper (60 then 120 grit), brad nails, matte polyurethane. Tools: pry bar, hammer, saw, sander, brad nailer. Steps: break pallets down, pull every nail, sand to 120 grit, sort by tone, nail up in staggered courses. Budget honestly: a full weekend of prep before one board goes up — pallets are splinter factories. Skill: intermediate. Renter note: heavy and nailed — owners only. Safety: only HT-stamped pallets (heat-treated); MB stamps mean methyl bromide — never indoors. A whitewash keeps texture while lifting the tone.
HT stamp = heat-treated and safe. MB stamp = fumigated — leave those pallets where you found them.
A full weekend of prep (de-nailing, sanding, sorting) comes before installation. The wall itself is the easy part.
IDEA 12Sponge & Ragging Texture — Faux Finishes That Work
Sponging and ragging — dabbing glaze over a base coat — deserve a comeback done right: with today’s muted palettes (two tones of the same family), they create subtle cloudy texture that reads as expensive plaster from a few feet away.
Materials: 1 gallon base paint + 1 quart glaze tinted one shade darker, natural sea sponge ($8) or lint-free rags. Steps: roll the base coat and let it cure; load the sponge sparsely, dab off excess, and pounce over the wall in random rotation — never the same orientation twice. For ragging: roll glaze on, drag a bunched rag through it vertically. Work 3-foot sections; step back every 10 minutes. Skill: beginner — randomness is the technique. Renter note: all paint, restores normally. Keep tones close — high contrast is what dated the technique.
Keep the two tones in the same family, one step apart — close tones read as texture, contrasting tones read as 1994.
Rotate the sponge with every dab — a repeated orientation creates a visible stamped pattern instead of organic texture.
IDEA 13Ombre Paint Blend — the Gradient Wall
An ombre wall — color melting from deep at the bottom to pale at the top — is the most artistic diy accent wall here and easier than it looks: with the right technique there are no visible stripes, just a slow dissolve that makes ceilings feel higher.
Materials: 2–3 gallons in a gradient of one color (dark, medium, light), large rollers, big soft blending brush or dry roller. Steps: divide the wall into horizontal bands, roll each band’s color, then — while everything is wet — blend seams with long horizontal strokes of a dry roller, feathering 12–18 inches into each neighbor. Work fast, one wall at a time: the wet edge is everything. Skill: beginner — gradients hide mistakes. Renter note: paint-only, fully reversible. Dark-to-light bottom-to-top grounds furniture and lifts the ceiling.
Blend while everything is wet — dry-roller feathering across a wet seam is the entire technique. Once paint skins over, blending stops working.
Don’t stop mid-blend — a dried seam line between sessions is nearly impossible to feather out.
IDEA 14Pegboard Accent — Storage That Looks Designed
Painted pegboard panels hung with hooks, shelves, and plants turn dead wall space into flexible storage that looks intentional — the diy accent wall for small homes that need every inch working: entryways, offices, craft corners.
Materials: 2–3 pegboard panels ($15–$25 each), 1 quart bold paint (pegboard looks best painted — raw brown reads “workshop”), 1×2 furring strips, screws, hooks and small shelves. Tools: drill, level, saw. Steps: paint panels first (both sides — edges show), mount furring strips to studs, screw panels on leaving a 3/4-inch gap behind for hooks, then style it: trailing plants, small art, baskets. The styling is half the project — curate, don’t clutter. Skill: beginner. Renter note: a few screw holes per panel; ask first. Paint it bold — charcoal, forest green, terracotta.
Paint the pegboard a bold color before hanging — painted pegboard reads as design, raw brown reads as workshop.
Mount on furring strips with a 3/4-inch gap behind — hooks need that space, and flat-mounted pegboard is just a brown wall.
IDEA 15Wallpapered Bookcase Back — the Zero-Risk Accent
Not ready for a whole wall? Wallpaper the back panel of a bookcase: one roll of bold peel-and-stick behind your books creates a framed accent moment with literally zero wall touched. The training-wheels diy accent wall — and it looks fantastic.
Materials: 1 roll peel-and-stick wallpaper ($30–$50 — go bold, it’s a small area), scissors or utility knife, smoothing tool. Steps: empty the shelves, measure each back section, cut with an inch of excess, stick top-down smoothing as you go, trim flush. Two to three hours. The bold move: paint the bookcase frame a deep color first (charcoal, forest green) so frame and paper work together. Skill: beginner — the easiest here. Renter note: zero risk — the wall is never touched, and the bookcase moves with you.
Go bold with the pattern — a small area is where big prints shine without overwhelming the room.
Paint the bookcase frame a deep color first — charcoal or forest green — and the papered back reads as custom furniture.
Which Wall Should Be the Accent Wall?
The best diy accent wall sits where the room already looks: behind the bed (the #1 accent wall in small homes), behind the sofa or TV, or the entryway wall that makes the first impression. Let furniture pick the wall; don’t invent a focal point where none exists.
Skip the window wall (daylight flattens texture into glare), walls chopped up by doors, and — in open plans — test by standing in the doorway: the wall your eye lands on first is the one. One wall only: two accent walls in a small room compete instead of complement.
Stand in the doorway and notice where your eye lands first — that’s your accent wall. If nothing pulls your eye, the room doesn’t need one yet.
In open-plan spaces, pick the wall visible from the main seating — accent walls work on sight lines, not floor plans.
Picking DIY Paint Colors (Without Regret)
Paint is the cheapest part of any diy accent wall and the easiest to get wrong. Three rules prevent 90% of color regret. One: test big. Paint a 2×2 ft poster board and live with it 48 hours — morning, noon, lamplight. Two: go one shade deeper than instinct. Colors dry lighter and read paler across a full wall. Three: check undertones in your light, not the store’s — north rooms turn everything cooler, warm lamplight turns everything yellower.
Finish matters too: eggshell/satin for most accent walls (wipeable, soft sheen), matte for textured looks (hides flaws), never high-gloss on DIY (spotlights every roller mark). And buy good paint — the $55 gallon covers in two coats what the $30 gallon needs four for, so “cheap” paint costs more in time and extra gallons.
Test on a 2×2 ft poster board for 48 hours — move it around the room and check it in morning, noon, and lamplight.
When torn between two shades, pick the deeper one — colors dry lighter and read paler across a full wall.
Eggshell/satin for most walls; matte for texture. Quality paint in two coats beats budget paint in four.
Renter Rules: What You Can and Can’t Do
- Always safe: peel-and-stick wallpaper, washi tape, fabric panels on adhesive strips, wallpapered bookcase backs — zero holes, zero paint, zero deposit risk
- Safe with one repaint: painted arches, limewash, stencils, color-blocking, ombre, sponge texture — primer plus two coats restores the wall
- Ask first: anything nailed or screwed — board and batten, picture-frame molding, pegboard, slat walls; many landlords approve with a written patch-and-repaint promise
- Never: construction adhesive on a rental wall — it tears drywall paper on removal, and that’s a skim-coat repair, not a spackle job
Construction adhesive is the renter’s trap: it holds beautifully and destroys drywall on removal. Nails and screws patch; adhesive doesn’t.
Get “yes” in writing — a text from your landlord beats a verbal memory at move-out inspection.
5 Mistakes to Avoid
- Skipping prep. Fill holes, sand bumps, wipe dust, tape properly — an hour of prep is the difference between “designed” and “DIY.” Prep is 70% of a paint job.
- Wrong paint finish. Flat paint in a hallway scuffs within months; gloss on a wavy DIY wall spotlights every flaw. Default to eggshell/satin unless the technique wants matte.
- No primer over dark colors. Light over dark without primer takes four coats and still ghosts. One $20 primer coat saves two topcoats.
- Measuring once. Add 10% extra to every material estimate for mistakes and pattern matching — the second store trip mid-project is the most expensive one, and dye lots vary.
- Rushing dry time. Second coats over tacky first coats, tape pulled over wet paint, furniture back too soon — impatience ruins more DIY walls than lack of skill. Humidity doubles recoat times.
FAQs
01What is the cheapest DIY accent wall I can build?
The washi tape geometric at $15–$40 — a full graphic wall for the price of lunch, and it peels off. Next: the wallpapered bookcase back at $20–$50 with zero wall touched. Cheapest painted option: a stenciled pattern at $25–$60. All three finish in an afternoon, need no experience, and risk nothing on your deposit.
02What are the best no-tools DIY accent wall options?
Four projects need zero power tools: peel-and-stick wallpaper, painted arches and color-blocking, washi tape geometrics, and the wallpapered bookcase back. The painted arch is the standout — highest visual impact of any no-tool project. If you own nothing, start there.
03How long does a DIY accent wall actually take?
Paint-only projects (arch, limewash, stencil, color-block, ombre, sponge): one afternoon, 3–5 hours including dry time. Peel-and-stick wallpaper: 3–6 hours depending on pattern matching. Board and batten, molding, slat walls: a full weekend — Saturday build, Sunday finish. Pallet wood: two weekends, because prep is a project of its own. Add 50% to your first estimate — beginners run slower than tutorials suggest.
04What is the biggest beginner mistake with DIY accent walls?
Skipping prep — unfilled holes, unsanded bumps, sloppy taping all show in the final wall. Second: too-wet tools — overloaded rollers bleed under stencils and tape. The pro move: offload paint before touching the wall. Two thin coats always beat one thick one — they dry faster, look smoother, and don’t drip.
05Which DIY accent walls are safe for renters?
Zero-risk: peel-and-stick wallpaper, washi tape, fabric panels on adhesive strips, wallpapered bookcase back. Repaint tier: arches, limewash, stencils, color-blocking, ombre, sponge texture — restored with primer and two coats. Ask-first: board and batten, molding, pegboard, slat walls — get written approval. Universal rule: never construction adhesive on a rental wall — it tears drywall paper on removal.
06Should I DIY with paint or wallpaper for my accent wall?
Paint wins on budget (a $40 arch transforms a room), unlimited color, and textured walls wallpaper won’t stick to. Peel-and-stick wallpaper wins on pattern without painting skill, cleanest renter removal, and zero dry time. The hybrid most people love: paint an arch or color-block, then wallpaper inside it — pattern plus crisp geometry. Or rehearse with the wallpapered bookcase back before committing to a whole wall.
Key takeaways
- Start with paint. A $40 arch or color-block gives the biggest transformation per dollar — no tools, one afternoon.
- Prep is 70% of the job. Fill, sand, tape — every shortcut shows in the final wall.
- Renters: peel-and-stick, washi tape, and fabric panels are zero-risk; painted projects restore with primer; never construction adhesive.
- Buy 10% extra materials and respect recoat times — rushing dry time ruins more DIY walls than lack of skill.