 Casacrunched
15 Wood Accent Wall Ideas That Add Warmth to Small Spaces
Nothing warms a small room like wood. Fifteen ideas from budget lath strips to walnut panels — every one rated for cost, time, and renter-friendliness.
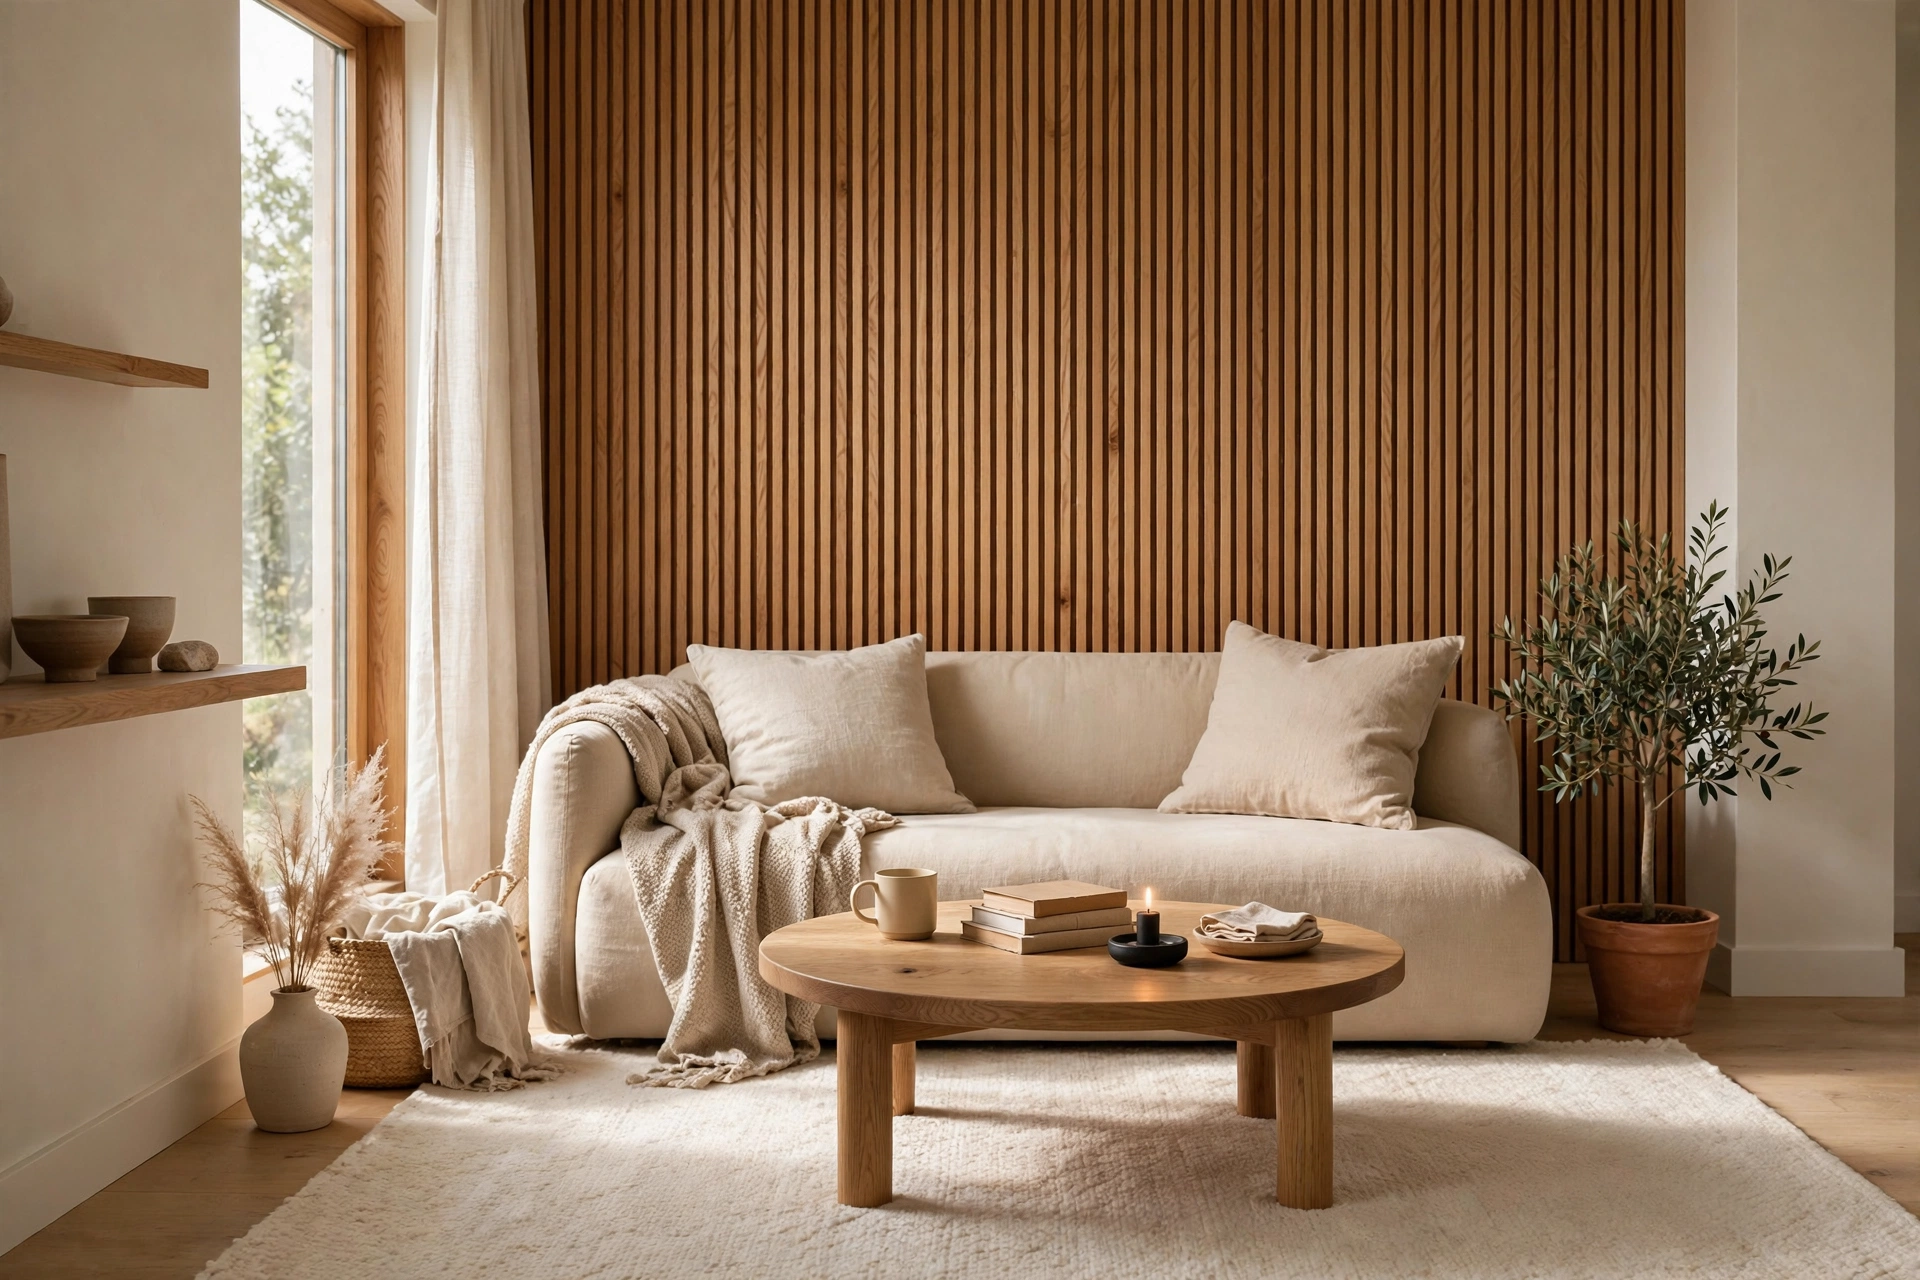
Nothing makes a small room look designed faster than wood on a wall. Paint is flat; wood has grain, shadow, and warmth you can feel from the doorway. These fifteen wood accent wall ideas cover every budget — from free pallet wood to renter-safe peel-and-stick — with honest costs, real DIY difficulty, and small-space guidance for each. Pick your wall this weekend; be admiring it by Sunday night.
On this page
- Quick comparison table
- 1. Vertical wood slats
- 2. Reclaimed barn wood
- 3. Dark walnut panels
- 4. Light oak geometric
- 5. Shiplap
- 6. Beadboard
- 7. Wood + paint combo
- 8. Plywood arch
- 9. Fluted panels
- 10. Herringbone wood
- 11. Faux wood wallpaper
- 12. Pallet wood wall
- 13. Thin lath strips
- 14. Wood headboard wall
- 15. Wood ceiling accent
- Where wood accent walls work best
- Wood tones: warm vs. cool
- Renter rules
- 5 mistakes to avoid
- FAQs
Quick comparison: cost, time, renter-friendliness
All costs are DIY estimates for one standard 10×12 ft wall, materials only — lumber or panels, fasteners or adhesive, plus stain or sealant where noted. Tool costs (a brad nailer runs $30–$60 to rent for a day) are not included. Hiring a carpenter roughly doubles the budgets below.
| # | Idea | Cost | Time | Renter-safe? |
|---|---|---|---|---|
| 1 | Vertical wood slats | $80–$250 | 1 weekend | With French cleats |
| 2 | Reclaimed barn wood | $150–$400 | 1–2 weekends | Ask first |
| 3 | Dark walnut panels | $120–$300 | 1 weekend | Ask first |
| 4 | Light oak geometric | $60–$150 | 1 weekend | Ask first |
| 5 | Shiplap | $100–$250 | 1 weekend | Ask first |
| 6 | Beadboard | $50–$120 | 1 afternoon | Ask first |
| 7 | Wood + paint combo | $40–$100 | 1 afternoon | Repaint + patch |
| 8 | Plywood arch | $40–$80 | 1 afternoon | Ask first |
| 9 | Fluted panels | $100–$200 | 1 afternoon | With cleats |
| 10 | Herringbone wood | $100–$250 | 2 weekends | Not really |
| 11 | Faux wood wallpaper | $80–$180 | 1 afternoon | Yes — peels off |
| 12 | Pallet wood wall | $0–$50 | 2 weekends | Not really |
| 13 | Thin lath strips | $30–$70 | 1 afternoon | With cleats |
| 14 | Wood headboard wall | $80–$200 | 1 weekend | With cleats |
| 15 | Wood ceiling accent | $100–$300 | 1–2 weekends | Not really |
IDEA 01Vertical Wood Slats — the Modern Classic
Vertical slats are the wood accent wall of the decade for a reason: the rhythm of wood-groove-wood-groove adds architecture to a flat rental wall, and the vertical lines pull the eye upward, making standard 8-foot ceilings feel taller. Two routes: DIY pine 1×2 furring strips ($2–$4 each) spaced with half-inch gaps over a dark-painted backing wall — the dark gaps are what make slats look expensive — or pre-made acoustic slat panels (wood veneer on felt) that go up in an afternoon for $150–$300 a wall.
Why it works in small spaces: slats add texture without bulk — the wall stays flat, so you lose zero floor space, unlike board-and-batten or deep paneling. Behind a sofa, TV, or bed, slats create a focal point that calms the rest of the room by comparison. Keep slats slim (1–2 inches) in compact rooms; chunky 4-inch slats belong in lofts. Renters: mount slats on plywood panels hung with French cleats — two screws per panel, patched in minutes at move-out.
Paint the wall behind the slats near-black or charcoal first — the dark shadow gaps are what make slat walls look architectural instead of crafty.
IDEA 02Reclaimed Barn Wood — Instant History
Reclaimed wood — weathered boards from barns, fences, old buildings — brings what new lumber can’t: patina. Every board differs in tone, nail holes, saw marks, so the wall looks collected over decades, not installed Saturday. In small spaces that character does heavy lifting: one reclaimed wall makes IKEA furniture look intentional and gives a plain rental a loft’s soul.
Genuine reclaimed boards run $5–$12 per square foot ($150–$400 a wall), and every board needs inspecting — pull old nails, sand splinters, seal it, because barn wood harbors dust and the occasional insect. The shortcut is peel-and-stick reclaimed-look planks ($100–$200), which photograph nearly identically and come down cleanly. Mix tones deliberately — all-gray looks flat, gray-brown-cream looks authentic — and keep the other three walls quiet. Reclaimed wood is the loudest texture on this list.
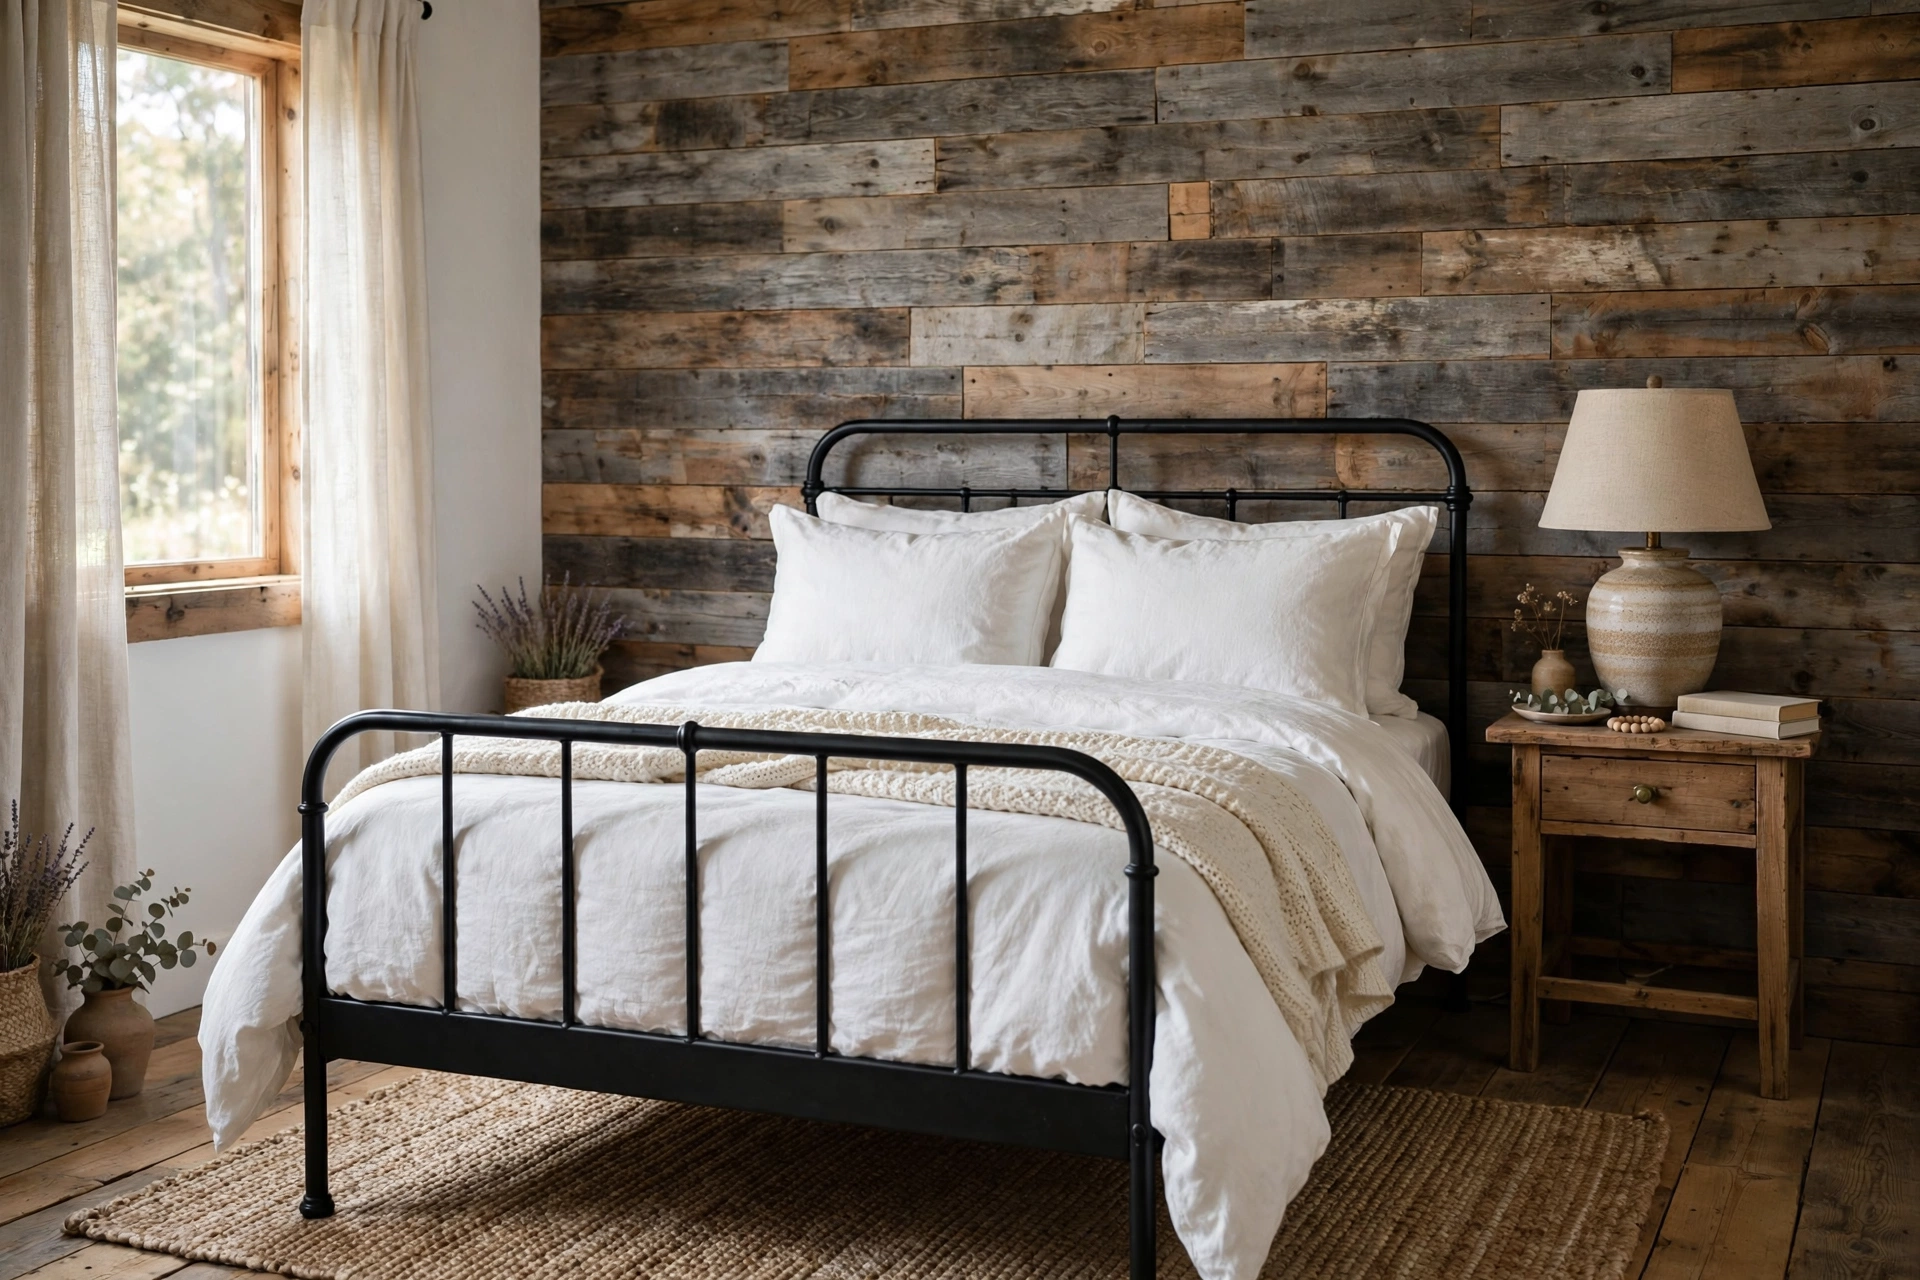
Seal reclaimed boards with matte polyurethane before install — it locks in dust, kills the musty barn smell, and makes the wall wipeable.
Inspect every reclaimed board: pull all old nails, sand splinters smooth, and skip any board with soft rot — it will crumble within a year.
IDEA 03Dark Walnut Panels — the Moody Luxe
Dark walnut is the tuxedo of wood accent walls: rich, formal, and quietly expensive-looking. Real walnut lumber is brutally priced, so the smart move is walnut-veneer plywood panels or MDF panels with a walnut stain — at $120–$300 for a wall, you get 90% of the look for a fraction of the cost. Install as large panels with slim black reveals between them for a tailored, architectural grid.
In small spaces walnut does the dark-wall trick with a bonus: like forest green or navy paint it visually recedes and adds depth — but the grain keeps it warm where dark paint goes cold. It’s magnificent behind a bed or in a home office with brass lighting. The rule is light: walnut needs a lamp washing the wall or a sunlit room, or it goes murky. Keep the ceiling bright white and soft furnishings pale — dark wood plus dark furniture in a small room is a cave.

Use walnut-veneer plywood, not solid walnut — a 4×8 sheet runs about $80 versus hundreds for the real boards, and nobody can tell on a wall.
Walnut needs light — in a dim north-facing room it flattens to near-black. Add a picture light or floor lamp aimed at the wall.
IDEA 04Light Oak Geometric — Scandinavian Precision
Light oak in a geometric pattern — chevron bands, oversized hexagons, offset rectangles — is the Scandinavian answer to the wood accent wall: pale, precise, airy. Use thin oak-veneer plywood strips or pine lath in a natural oak stain; the pattern does the talking, so the wood can be the cheapest straight-grained stock. Simple grids are a one-weekend project; true chevron needs a miter saw and patience.
This is the best wood option for rooms you’re afraid to darken. Pale oak reflects light instead of absorbing it, so the wall adds interest without the visual weight of walnut or barn wood — perfect for north-facing rooms, tiny bedrooms, and rentals where you want texture without drama. Keep the geometry large-scale: in a small room, small fussy patterns read as busy, while three or four big shapes read as architecture. Finish with matte water-based polyurethane so the oak stays pale — oil-based finishes amber it yellow within a year.
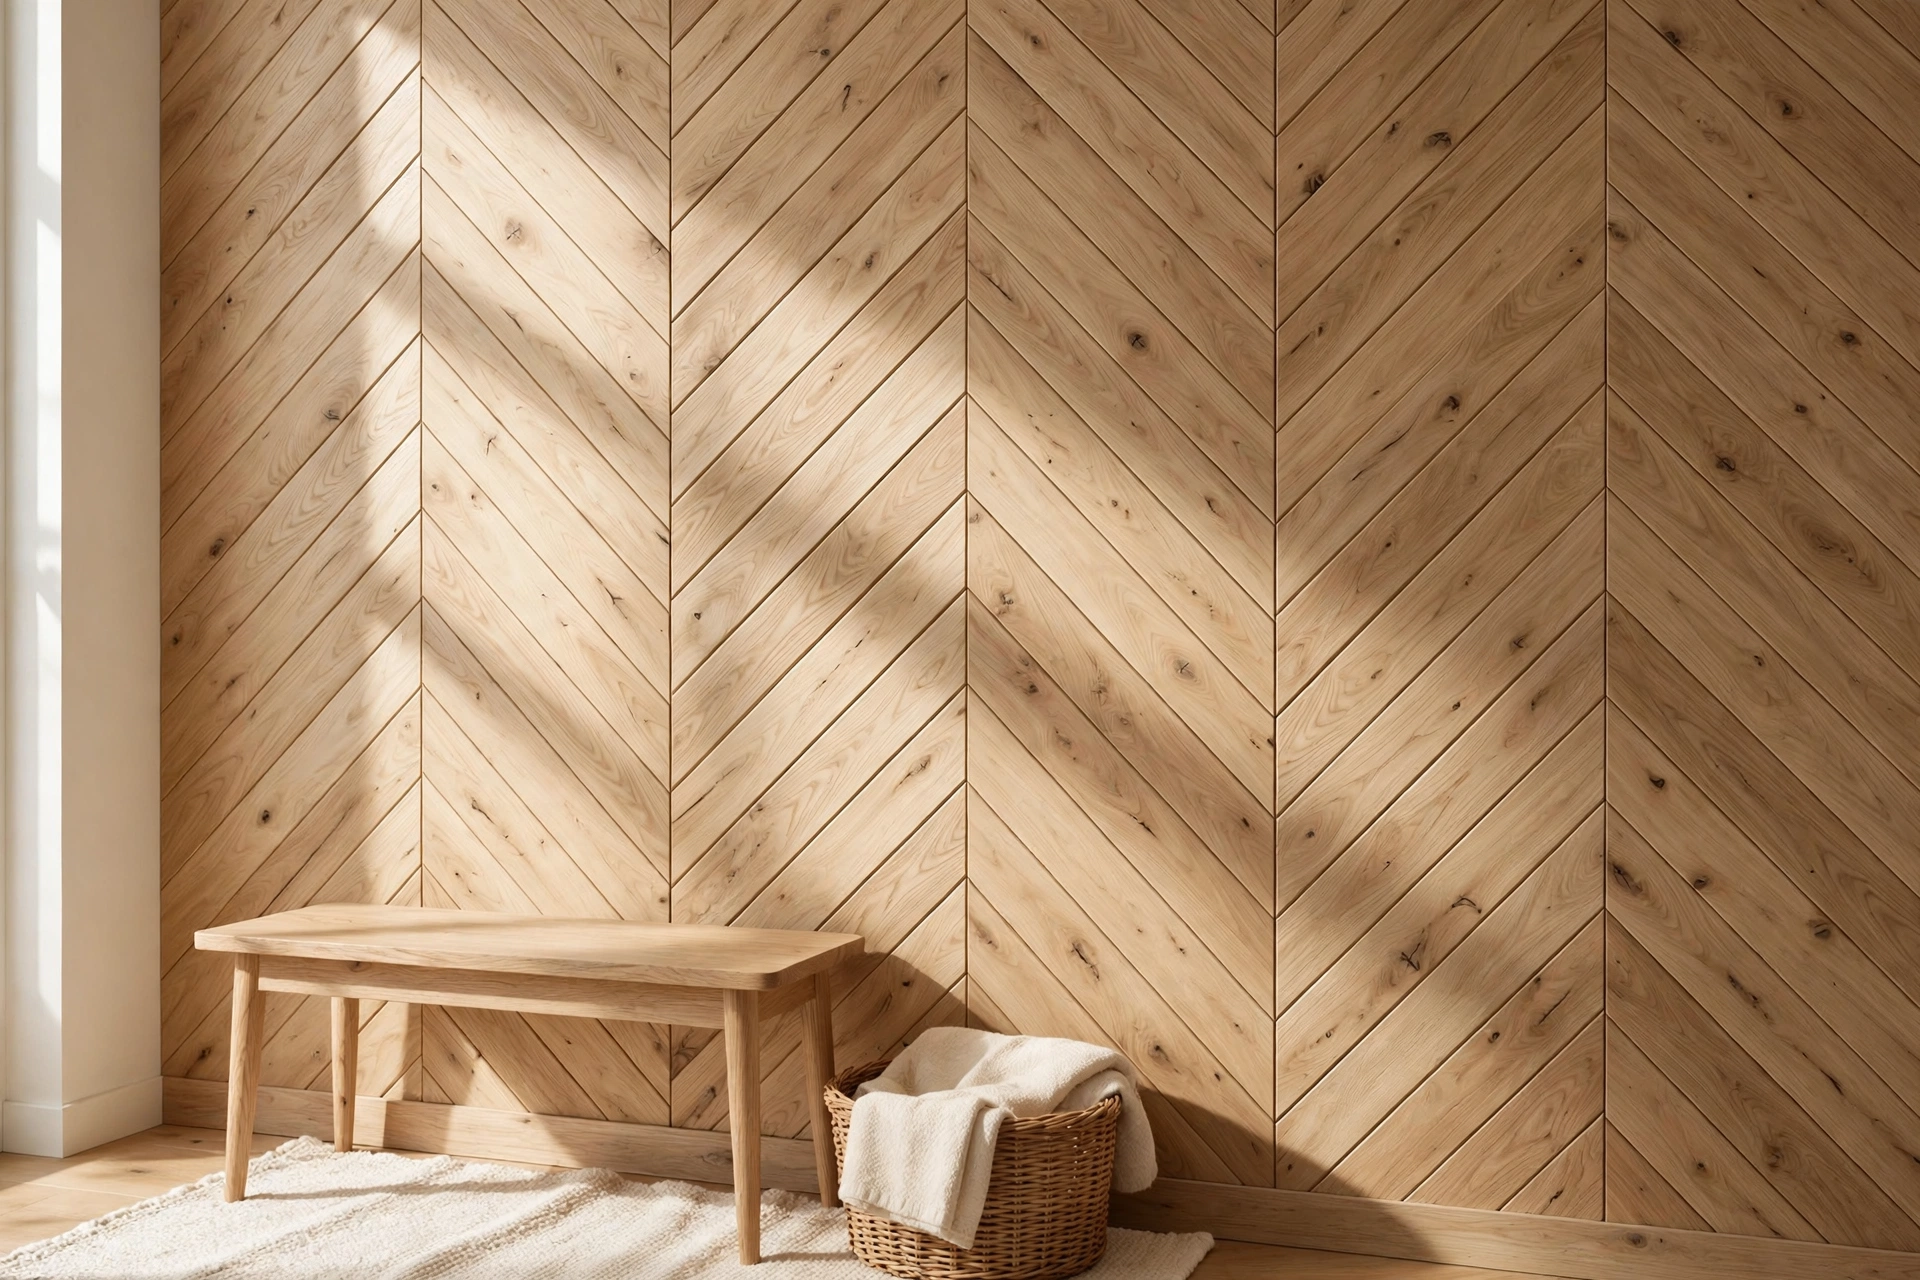
Finish pale oak with water-based matte poly, never oil-based — oil ambers light wood yellow within a year.
IDEA 05Shiplap — the Modern Farmhouse Workhorse
Shiplap — horizontal boards with a small groove between them — went from barns to every renovation show for good reason: it’s forgiving, affordable, and instantly makes a flat wall look finished. Real pine shiplap runs about $1–$2 per square foot; MDF shiplap panels are even cheaper and come pre-primed. Installation is the friendliest on this list: boards butt together, a brad nailer does the work, and caulk hides every imperfect cut.
Run shiplap horizontally to widen a narrow room, or vertically to stretch a low ceiling — orientation is a free design tool. Paint it white for the coastal look that bounces light, or leave pine natural for cabin warmth. One caution: full-room shiplap in a tiny space feels like a box — one wall only. It’s also the best wood wall for hiding sins: wavy drywall and bad patches vanish behind the grooves.
Horizontal shiplap widens a narrow room; vertical shiplap raises a low ceiling — pick the orientation that fixes your room’s worst proportion.
One wall only in small rooms — shiplap on all four walls turns a compact bedroom into a wooden box.
IDEA 06Beadboard — Cottage Charm in an Afternoon
Beadboard — narrow vertical planks with a tiny bead groove — is shiplap’s daintier cousin and the fastest wood accent wall you can build. It comes in 4×8 sheets for $25–$40 each, so a full wall costs $50–$120, and two sheets cover most accent walls in a single afternoon with basic tools. Paint it: white for cottage, sage or dusty blue for color, charcoal for drama.
Beadboard shines where other wood walls don’t — bathrooms, laundry corners, mudrooms, kids’ rooms. The grooves add just enough texture without competing with a busy small room. Try a half wall (chair-rail height) with paint above: wood texture at furniture level, light airy upper wall. In bathrooms use PVC beadboard or seal thoroughly — steam destroys raw MDF.
In bathrooms use PVC beadboard or marine-grade sealant — standard MDF swells and crumbles in steam within months.
IDEA 07Wood + Paint Combo — Half the Wood, All the Look
Can’t decide between paint and wood? Do both. The wood-and-paint combo — a wood lower wall with paint above, or wood trim framing a painted panel — delivers the texture of a wood accent wall at a fraction of the cost and commitment. A chair-rail-height beadboard or slat section ($40–$70 in materials) topped with a painted upper wall reads as a fully designed wall for half the lumber.
The paint does the mood (sage for calm, charcoal for drama); the wood adds tactile warmth paint can’t. It’s the most renter-tolerant real-wood option — the painted upper restores with one coat, the wood section patches with a few nail holes. It also solves “too much wood”: wood on the lower third grounds furniture while paint keeps the upper wall light.
Paint the upper wall first, install the wood second — crisp lines with zero taping along the wood edge.
IDEA 08Plywood Arch — the Sculptural Shortcut
One sheet of plywood, one jigsaw curve, one architectural moment. The plywood arch — a large arched panel mounted on the wall, stained or painted — gives you the trendy arch look with genuine wood warmth for $40–$80. Cut the arch with a jigsaw (or have the lumber yard cut it), sand the edge smooth, finish with stain or paint, and mount it like art.
Arches are small-space magic: the curve breaks up the relentless rectangles of a boxy rental, and the eye reads it as a feature, not just a wall. Behind a bed it replaces a headboard; in an entryway it frames a console; in a living room it anchors a reading chair. Keep it large — at least two-thirds of the wall’s width — or it reads as decoration, not architecture. Stain for warmth, or paint bold for the arch trend with wood texture underneath.
Go big: an arch spanning two-thirds of the wall reads as architecture; a small arch reads as a craft project.
IDEA 09Fluted Panels — Tambour Texture
Fluted panels — tight vertical half-round reeds, also sold as pole wrap or tambour — are the most tactile wood wall on this list. Run your hand across it: the ridges catch light and shadow in a rhythm that flat slats can’t match. Pole wrap comes in rolls ($50–$80 each) that unroll and adhere to the wall or a backing panel; two to three rolls cover an accent wall for $100–$200.
Fluting is the designer’s secret for small luxury: boutique-hotel millwork that installs in an afternoon. It’s perfect behind a bar cart, bathroom vanity, or dresser — anywhere you want a jewelry-box moment. The reeds are thin, so the wall stays flat and eats no floor space. Stain walnut for drama, leave natural for Scandinavian calm. Renters: apply pole wrap to plywood panels on French cleats — the whole wall comes down in pieces.
Stain fluted panels before install — stain pools in the grooves if you brush it on after, and wiping it out of a hundred reeds is a special kind of misery.
Pole wrap adhesive is strong — never stick it directly to a rental wall. Mount it on plywood panels with French cleats instead.
IDEA 10Herringbone Wood — Maximum Craft
Herringbone — rectangular planks laid in broken zigzag — is the most labor-intensive wood wall here and the most rewarding. The pattern creates movement that makes a flat wall feel almost three-dimensional; light rakes across the angled joints and the wall seems to shift as you walk past. Use flooring planks, cut plywood strips, or even paint stirrers for a craft-scale version; materials run $100–$250.
Be honest: herringbone is a two-weekend project with real math — every cut 45 degrees, every row level, the first row determining everything. Start from the center and work outward for symmetrical edges. Keep planks narrow (2–3 inches) and tones light to medium; wide dark herringbone overwhelms tiny rooms. The payoff is a wall that looks like it cost thousands — attempt it only if you enjoy the process, because the fiddliness is the project.
Start herringbone from the center, not a corner — centered layout keeps cut pieces symmetrical at both edges and hides mistakes.
Herringbone is a two-weekend, high-patience project. If you want wood texture by Sunday, pick slats or fluting instead.
IDEA 11Faux Wood Wallpaper — the Renter’s Superpower
Peel-and-stick wallpaper that looks like wood — weathered planks, whitewashed boards, dark walnut — is the only wood accent wall with zero tools, zero holes, and zero deposit risk. Modern prints are convincingly textured: from six feet away, quality faux-wood paper fools even designers. A wall costs $80–$180 and goes up in one afternoon with a smoothing tool and a utility knife.
This answers every “but I rent” objection — and it’s the fastest way to test living with a wood wall before committing to lumber: a full-scale sample. Realism rules: varied plank tones (uniform prints look fake), align pattern at eye level, wrap slightly around one corner so edges don’t scream “sticker.” At move-out it peels cleanly — hairdryer on stubborn spots.
Pick prints with varied plank tones — uniform, repeating wood grain is what gives faux finishes away.
IDEA 12Pallet Wood Wall — Free Lumber, Real Character
Pallets are free lumber hiding in plain sight — behind grocery stores, on marketplace listings, at construction sites. Each yields a dozen-plus usable boards: a full accent wall for $0–$50 (sandpaper, nails, sealant). Rough, varied, full of character — the ultimate rustic wood wall for nearly nothing.
The price is right; the labor is real. Every board needs de-nailing, sanding (pallets are splinter factories), and sorting — expect a full weekend of prep before a single board goes up. Be picky about your pallets: look for the HT stamp (heat-treated, safe) and avoid MB stamps (methyl bromide fumigated — never bring those indoors). Sand to 120 grit, seal with matte polyurethane, and the wall is safe, smooth, and storied. In small spaces, a whitewash over pallet wood keeps the texture while lifting the tone — raw pallet wood can go dark and heavy fast.
Only take HT-stamped pallets (heat-treated) — MB-stamped ones were fumigated with methyl bromide and should never come indoors.
Budget a full weekend just for prep: de-nailing, sanding, and sorting every board. The wall itself is the easy part.
IDEA 13Thin Lath Strips — the Budget Slat Wall
Love the slat-wall look but not the slat-wall price? Thin wood lath — the skinny strips sold for garden stakes and plaster backing, about $1 each — delivers the same vertical rhythm for $30–$70 total. Space them a finger-width apart over a dark backing wall and from three feet away nobody can tell it isn’t the $250 version.
Lath is the democratizer of this list: the materials cost less than a takeout dinner, the tools are a brad nailer (rent one for $30) and a level, and the install is genuinely a single afternoon. The thin profile is actually an advantage in small rooms — delicate strips read as texture, not bulk. Stain them in one consistent tone (variation looks accidental at this scale, not rustic), keep the gaps even with a spacer block, and seal lightly. This is the wood wall for skeptics: if you hate it, you’re out $50 and a Saturday.
Use a spacer block — a scrap of wood cut to your gap width — between every strip. Even gaps are what separate “designed” from “DIY.”
IDEA 14Wood Headboard Wall — the Built-In Look
Instead of buying a headboard, build the wall as the headboard: wood panels, slats, or planks running floor-to-ceiling (or a few feet above the mattress) directly behind the bed. It’s the most functional wood accent wall here — it replaces a $200–$500 furniture purchase while giving the bedroom the built-in, custom feel of a boutique hotel.
Keep it bedroom-scaled: span the bed’s width plus a foot or two each side — a 6–8 foot section, not the whole wall. Vertical slats or fluted panels shine here; add a slim floating shelf as a nightstand ledge plus wall sconces, and two furniture pieces leave the small bedroom. Warm tones (oak, walnut, honey pine) flatter skin in lamplight; cool gray stains behind a bed feel clinical by morning. Renters: build it as a leaning panel or cleat-hung sections.
Add a slim floating shelf at mattress height as a nightstand ledge — the wood wall plus shelf eliminates bulky nightstands from a small bedroom.
Skip cool gray stains behind the bed — gray wood in morning light can feel clinical. Warm oak, walnut, or honey pine flatter skin tones.
IDEA 15Wood Ceiling Accent — the Fifth Wall
Everyone accents walls; almost nobody accents the ceiling — which is exactly why it works. A wood ceiling accent — planks, beadboard, or faux beams on the ceiling of a bedroom, entryway, or dining nook — wraps the room in warmth and makes standard 8-foot ceilings feel intentional instead of default. It’s the most surprising idea on this list, and guests always look up.
Ceilings are the hardest surface — everything overhead, so budget extra time and a helper. Faux beams (hollow boxes, $30–$60 each) give the timber look at a fraction of the weight; three across a small bedroom ceiling transform it in a weekend. Keep tones light to medium: dark wood overhead presses down, warm pine or whitewash lifts. This one’s for owners, not renters — ceiling work means serious fastening. The payoff: a room that feels architecturally finished like paint never could.
Faux hollow beams ($30–$60 each) give the timber look at a tenth of the weight — three across a small bedroom ceiling is a one-weekend transformation.
Keep ceiling wood light to medium — dark wood overhead presses a small room down, while warm pine or whitewash lifts it.
Where Wood Accent Walls Work Best
Wood is heavier visually than paint, so placement matters more. The best wood accent wall ideas sit where furniture already creates a natural focal point: behind the bed (the headboard wall is the #1 wood wall in small homes), behind the TV or sofa, and in the entryway where a small wood section makes the first impression. These are walls you face, not walls you brush past.
Vertical boards stretch low ceilings — the default for 8-foot rentals. Horizontal boards widen narrow rooms — hallways, galley bedrooms. One hard rule: never wood the window wall — daylight flattens grain into glare, curtains fight the texture, and nobody looks at that wall anyway.
Let furniture pick the wall: if a wall already holds the bed, the TV, or the sofa, it’s your wood wall. Don’t invent a focal point where none exists.
Vertical wood makes ceilings feel taller; horizontal wood makes narrow rooms feel wider. Match the orientation to your room’s worst proportion.
Wood Tones: Warm vs. Cool & Matching Your Floors
Wood has undertones like paint does. Warm woods — oak, pine, cedar, walnut — glow golden and make rooms feel cozy; the default for small spaces. Cool woods — gray-washed oak, weathered barn wood, ebonized finishes — read modern but chilly in dim rooms. When in doubt, go warm: cool wood in a north-facing room is how cozy plans die.
The floor rule: don’t match your wood wall to your wood floor — identical tones blur together and the room looks like a wooden box. Go two shades lighter or darker than the floor, or contrast warm floors with a cooler wall tone (and vice versa). And decide stain vs. paint honestly: stain shows grain and celebrates the wood; paint (especially deep greens, navies, and blacks over wood texture) gives you color plus texture — the best of both worlds when the wood itself is cheap pine.
Go two shades lighter or darker than your floors — matching the wall to the floor exactly turns the room into a wooden box.
Cheap pine takes stain blotchy. Either use pre-stain conditioner ($10, worth every cent) or paint it — painted texture beats blotchy stain every time.
Stain celebrates the grain; paint over wood gives you color plus texture. On cheap pine, paint is usually the smarter choice.
Renter Rules: What You Can and Can’t Do
- Always safe: faux wood peel-and-stick wallpaper — the only zero-hole, zero-tool wood wall; removes cleanly for years
- Safe with cleats: slats, fluted panels, lath strips, or headboard sections mounted on plywood panels hung with French cleats — a few small screw holes per panel, patched in minutes
- Ask first: anything nailed directly into the wall — shiplap, beadboard, barn wood; many landlords say yes when you promise to patch and repaint
- Never: construction adhesive or Liquid Nails on a rental wall — it tears drywall paper on removal and that’s a full-wall skim-coat repair
Construction adhesive is the renter’s trap: it holds wood beautifully and destroys drywall on removal. French cleats and brad nails patch; adhesive doesn’t.
The French cleat math: a $10 aluminum cleat holds 50+ pounds. Two cleats per panel, two small holes per cleat — a dab of spackle each at move-out.
5 Mistakes to Avoid
- Wrong-scale slats. Chunky 4-inch slats with wide gaps belong in lofts; in a 10-foot bedroom they read as a fence. Keep slats 1–2 inches wide with half-inch gaps in compact rooms.
- Ignoring wood movement. Real wood expands and contracts with humidity. Leave a 1/8-inch gap at edges and don’t glue boards tight edge-to-edge — they’ll buckle by summer.
- Dark wood in a dark room. Walnut in a north-facing bedroom with one small window goes murky. Dark woods need daylight or dedicated wall lighting — otherwise go light oak.
- Glue instead of nails. Construction adhesive feels fast and permanent, which is exactly the problem: removal tears drywall paper and turns a weekend project into a plaster repair. Brad nails patch; glue destroys.
- Skipping the finish. Raw wood absorbs hand oils, cooking grease, and dust, and it grays unevenly. One coat of matte polyurethane or hardwax oil takes an hour and adds years.
FAQs
01What is the cheapest wood accent wall I can build?
The thin lath strip wall at $30–$70: skinny strips over a dark backing wall give the slat look for less than a dinner out. Second is the pallet wood wall at $0–$50 — free pallets plus sandpaper — though you trade money for a prep weekend. Cheapest effort: faux wood peel-and-stick ($80–$180), no tools at all. All three look genuinely good; the difference is labor, not looks.
02What are the best renter-friendly wood accent wall options?
Three tiers. Tier one, zero risk: faux wood peel-and-stick wallpaper — no tools, no holes, peels off cleanly. Tier two, minimal holes: build slats, fluting, or a headboard section on plywood panels and hang them with French cleats — a few small screw holes that spackle in minutes. Tier three, ask first: nail shiplap or beadboard directly, with a written promise to patch and repaint. The one hard rule across all tiers: never use construction adhesive on a rental wall — it tears drywall paper on removal and turns a reversible project into a repair bill.
03Does a wood accent wall make a small room feel smaller?
Done wrong, yes; done right, it adds depth. Keep it to one wall, choose light to medium tones (oak, pine, whitewash) unless the room gets strong daylight, and prefer vertical orientation — vertical lines lift ceilings. Texture helps: shadows in slats and fluting give depth cues flat paint can’t, so the wall reads further away. What shrinks rooms: wood on multiple walls, dark wood in dim rooms, chunky deep profiles.
04Should I stain or paint my wood accent wall?
Stain when the wood is worth showing off — oak, walnut veneer, cedar, or reclaimed boards with real character. Paint when the wood is cheap pine or MDF — paint over texture gives you color plus dimension, and it hides pine’s blotchy stain absorption. The hybrid move: stain the wood a natural tone, then you always have the option to paint over it later — but you can’t go back from paint to stain without brutal sanding. One practical note: cheap pine needs pre-stain conditioner ($10) or it stains blotchy; skipping it is the most common stain regret.
05Can I put a wood accent wall in a bathroom?
Yes, with the right materials. Bathrooms punish wood with steam, so never use raw MDF or unsealed pine — they swell and crumble. The safe picks: PVC beadboard (looks like wood, laughs at moisture), cedar or teak (naturally moisture-resistant), or any wood sealed with marine-grade polyurethane or spar varnish. Ventilation matters as much as material: a working exhaust fan is non-negotiable. Faux wood peel-and-stick also survives bathrooms surprisingly well — just avoid direct shower splash zones.
06How do I remove a wood accent wall without damaging the wall?
It depends how it went up. Brad-nailed boards: pry gently, tap nails through from the back; small holes spackle in an afternoon. French-cleat panels: lift off, unscrew, spackle — the cleanest removal there is. Peel-and-stick: warm with a hairdryer, pull slowly at a low angle. Construction adhesive: the painful one — torn drywall paper needing oil-based primer and a skim coat. Hence the renter rule: cleats and nails, never glue.
Key takeaways
- One wall, vertical, light-to-medium tone is the small-space formula for wood accent wall ideas — texture adds depth instead of bulk.
- Renters: peel-and-stick for zero risk, French-cleat panels for real wood — never construction adhesive.
- Don’t match the floor. Go two shades lighter or darker than your flooring, or the room becomes a wooden box.
- Finish everything. One coat of matte polyurethane takes an hour and adds years to any wood wall.