 Casacrunched
15 Board and Batten Accent Wall Ideas With Spacing That Actually Works
Board and batten is architecture you can build in a weekend — if the math is right. Fifteen board and batten accent wall ideas with exact spacing, material choices, and paint guidance.

Board and batten is architecture you can build in a weekend — thin trim boards laid out in a grid that turns a flat wall into something that looks designed, even custom-built. No contractor, no drywall work: a saw, a nail gun or even a hammer, and about $60–$150 of trim. But here is the honest part: board and batten lives or dies on math. Uneven spacing is visible from the doorway, and a grid too tall or too wide for the wall looks wrong in a way paint never does. Get the spacing right and a board and batten accent wall is the highest-impact weekend project in this whole cluster.
Fifteen board and batten ideas, each with exact spacing measurements, material notes, honest costs, and renter options — so your grid looks measured, not guessed.
On this page
- Quick comparison table
- 1. Classic white grid
- 2. Dark moody grid
- 3. Full-height grid
- 4. Half-wall chair-rail grid
- 5. Bedroom headboard grid
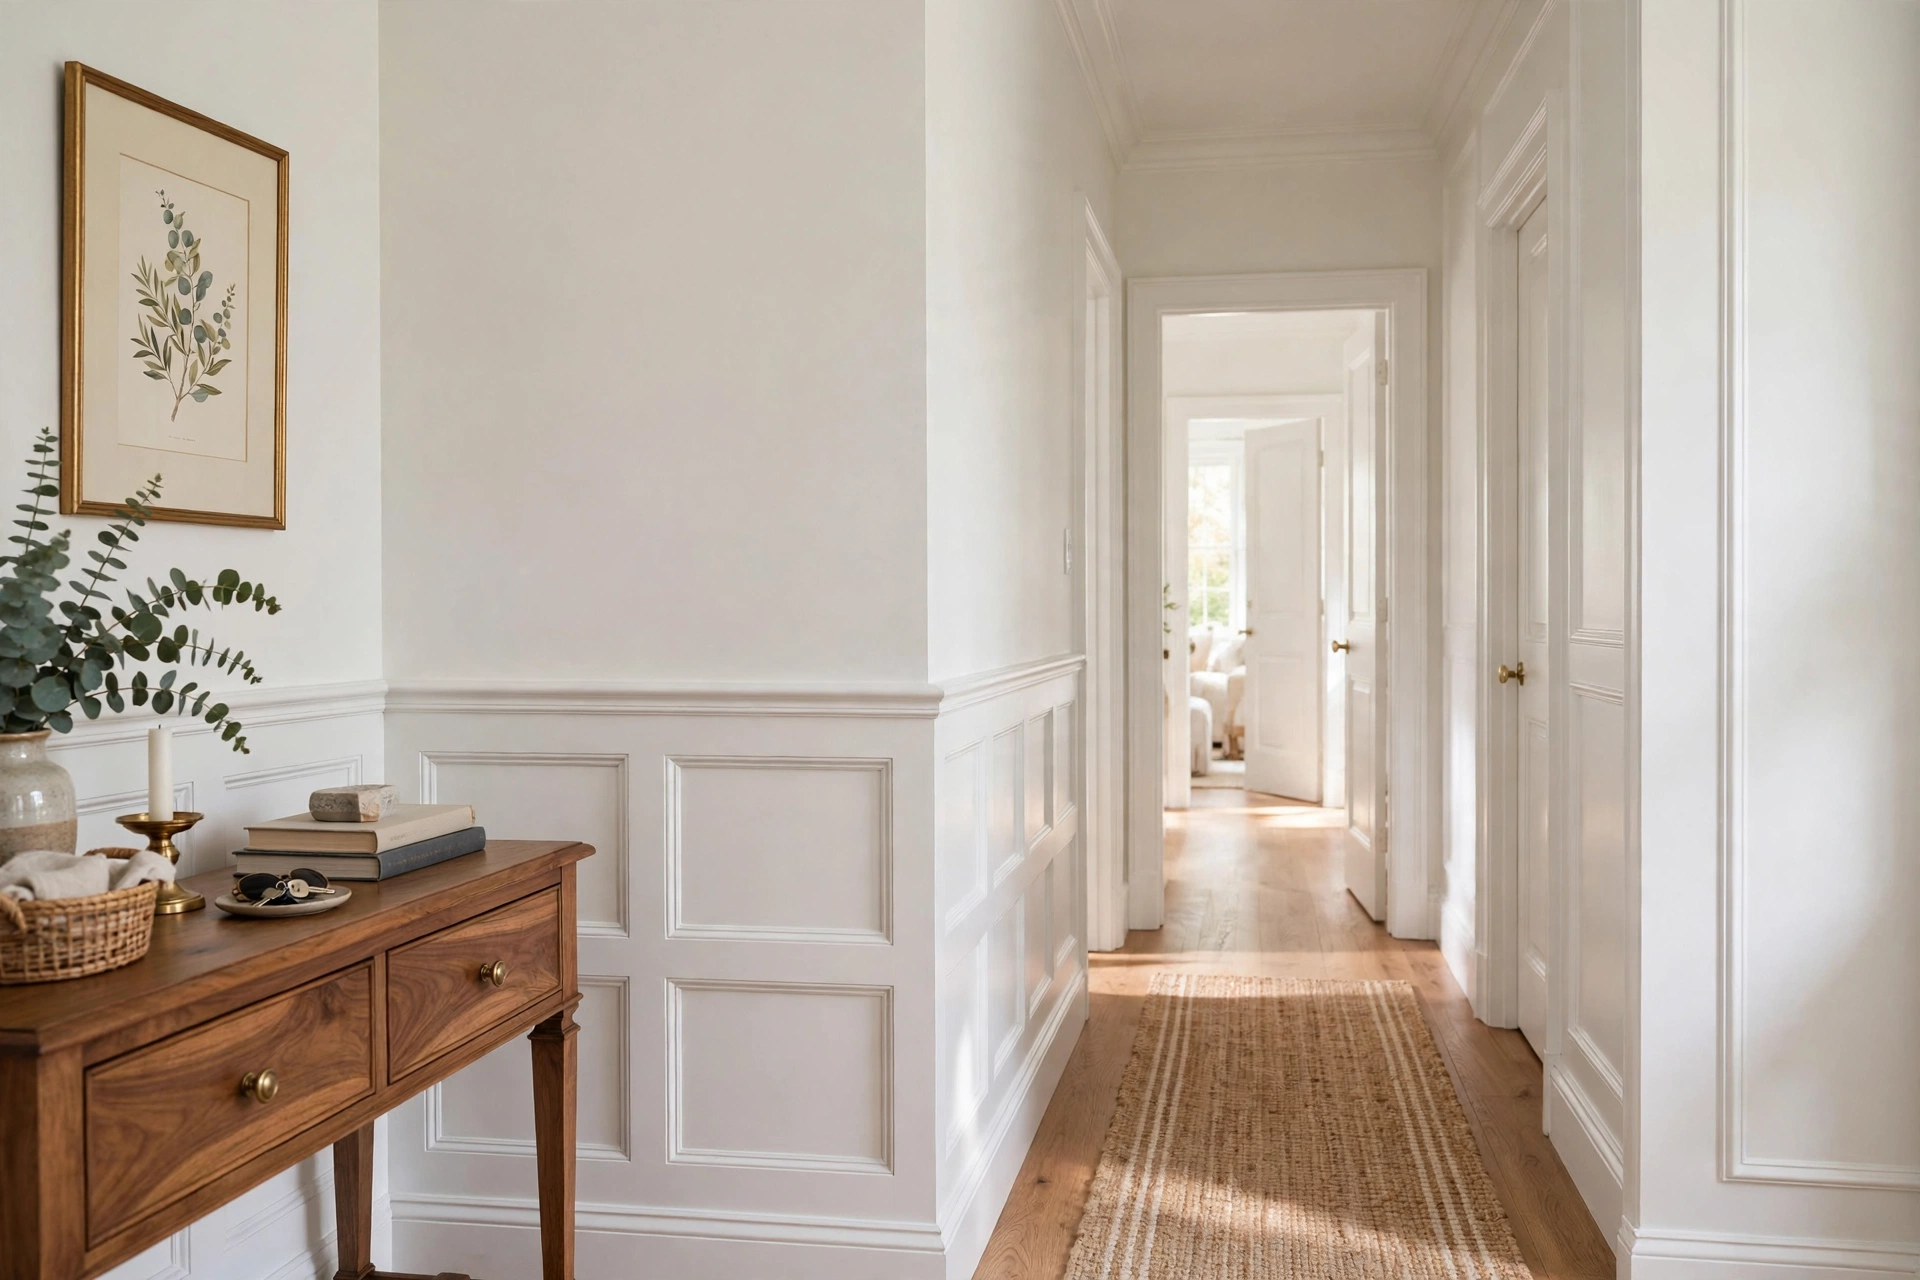
- 6. Hallway grid
- 7. Bathroom grid
- 8. Two-tone grid
- 9. Vertical-only battens
- 10. Grid + wallpaper inside panels
- 11. Grid + wood stain
- 12. Living room feature grid
- 13. Grid with picture ledge
- 14. Peel-and-stick faux grid for renters
- 15. Narrow-spacing modern grid
- Which wall for board and batten?
- Paint guidance
- Renter rules
- 5 mistakes to avoid
- FAQs
Quick comparison: cost, time, spacing, renter score
| # | Idea | Spacing | Cost / wall | Time | Renter-friendly? |
|---|---|---|---|---|---|
| 1 | Classic white grid | 16–18 in on center | $60–$150 | Full day | Removable trim: yes |
| 2 | Dark moody grid | 16–18 in on center | $60–$150 | Full day | Removable trim: yes |
| 3 | Full-height grid | 18–24 in on center | $100–$220 | Full weekend | No |
| 4 | Half-wall chair-rail grid | 16–20 in on center | $50–$120 | Full day | Removable trim: yes |
| 5 | Bedroom headboard grid | Bed width + 12 in | $60–$150 | Full day | Removable trim: yes |
| 6 | Hallway grid | 14–16 in on center | $80–$180 | Full weekend | No |
| 7 | Bathroom grid | 16–18 in on center | $80–$180 | Full day | PVC: partial |
| 8 | Two-tone grid | 16–18 in on center | $70–$160 | Full day | Removable trim: yes |
| 9 | Vertical-only battens | 12–16 in on center | $50–$120 | Half–full day | Removable trim: yes |
| 10 | Grid + wallpaper inside panels | 18–24 in on center | $100–$220 | Full weekend | Peel-and-stick: yes |
| 11 | Grid + wood stain | 16–18 in on center | $90–$200 | Full day | No |
| 12 | Living room feature grid | 18–24 in on center | $100–$220 | Full weekend | No |
| 13 | Grid with picture ledge | 16–18 in on center | $80–$180 | Full day | Removable trim: yes |
| 14 | Peel-and-stick faux grid for renters | 16–18 in on center | $40–$100 | 2–4 hours | Fully removable |
| 15 | Narrow-spacing modern grid | 8–12 in on center | $90–$200 | Full day | Removable trim: yes |
IDEA 01Classic White Grid — the One That Started It All
The classic: white trim boxes on a white or pale wall, where the grid reads through shadow rather than color. It is the most forgiving board and batten there is — white hides small spacing sins, suits every style from farmhouse to transitional, and makes a builder-grade room look like it has millwork.
Spacing: 16–18 inches on center — the distance from the middle of one vertical batten to the middle of the next. The formula that matters: measure the wall, subtract total batten width, divide the remainder into equal panels. Never eyeball the last panel — a panel 2 inches narrower than its neighbors is the first thing guests notice. Material: primed MDF — cheap, perfectly straight, paints beautifully. Batten width: 3 inches is classic; 2 reads modern, 4 reads traditional. $60–$150, a full day.
Do the spacing math on paper before you cut a single board: wall width minus total batten width, divided by the number of panels. Equal panels are the whole job.
White grid on a textured wall shows every gap behind the battens — caulk every edge, or the shadows turn into dark lines.
IDEA 02Dark Moody Grid — Navy or Charcoal, Full Drama
Paint wall and trim in the same dark color and board and batten becomes drama instead of decoration. Navy and charcoal grids are the moodiest walls here: trim catches light, panels fall into shadow, and the room gains depth flat dark paint alone never achieves.
Spacing: same 16–18 inches on center as the classic, but dark grids punish uneven spacing harder — shadows exaggerate every gap, so measure twice. Paint: Benjamin Moore Hale Navy (HC-154) or Sherwin-Williams Iron Ore (SW 7069), wall and trim identical, eggshell finish so trim wipes clean. Dark grids need light: one strong lamp or window, plus one pale element (white bedding, cream sofa) for contrast. $60–$150, a full day.

Same color on wall and trim is what makes a dark grid read as architecture instead of striped wallpaper — two different darks break the illusion.
Dark grid in a windowless room with warm bulbs turns into a cave. If the room is dark, pick idea 1 or 8 instead.
IDEA 03Full-Height Grid — Floor to Ceiling, No Half Measures
Full-height board and batten runs the grid from baseboard to ceiling, usually in two stacked rows of panels. It is the most architectural option here — the wall reads as paneled millwork, not decoration — and the best choice for a feature wall that has to carry a whole room: behind a sofa, behind a bed, or as a dining-room statement.
Spacing: 18–24 inches on center horizontally, with the horizontal rail at roughly two-thirds height (modern) or chair-rail height (traditional). On standard 8-foot ceilings, two rows of roughly 4-foot panels keep proportions sane. Material: MDF for paint-grade, pine if you plan to stain (idea 11). $100–$220, a full weekend — twice the trim, twice the caulk, twice the paint. Not a renter project: this much trim means this many nail holes.
The horizontal rail placement is the design decision: two-thirds height reads modern, chair-rail height reads traditional. Pick one before you measure anything.
Full-height grids on walls under 8 feet can feel like a cage — if the ceiling is low, stop at idea 4 instead.
IDEA 04Half-Wall Chair-Rail Grid — the Traditional Favorite
The half-wall grid stops at chair-rail height — 32–36 inches — with a cap rail on top, and paint or wallpaper above. It is the most traditional board and batten, the cheapest (half the trim), and the most forgiving: a half-wall grid hides scuffs, chair bumps, and kid-height damage, and the cap rail doubles as a display shelf.
Spacing: 16–20 inches on center; wider panels suit the shorter height. The cap rail is the detail that matters — a 1×4 or 1×6 board with a rounded edge, slightly proud of the battens, so it reads as a ledge rather than a stripe. Paint: wall and trim the same color for quiet luxury, or trim white against a colored upper wall for contrast. $50–$120, a full day. Renters: the least trim of any real grid, so the fewest holes to patch.
The cap rail should overhang the battens by about half an inch — flush cap rails disappear, and the ledge is half the point.
IDEA 05Bedroom Headboard Grid — the Wall Behind the Bed
The bed wall is board and batten’s natural home: the grid frames the bed the way a headboard does, only bigger and cheaper. A headboard grid turns a plain bed into a designed bedroom — and solves the “blank wall above the pillows” problem permanently.
Spacing: size the grid to the bed, not the wall — the outer battens should land at least 6 inches wider than the bed on each side, so the grid reads as a frame rather than a stripe behind the mattress. For a queen bed (60 inches wide), that means a grid at least 72 inches wide; for a king, at least 88. Center the grid on the bed, not the wall — if the bed is off-center, the grid follows the bed. $60–$150, a full day.
Center the grid on the bed’s centerline, not the wall’s — a grid centered on the wall while the bed sits off-center looks like a measuring error.
A headboard grid narrower than the bed looks like a mistake — wider is always safer than narrower.
IDEA 06Hallway Grid — the Corridor That Finally Gets Attention
Hallways are the most ignored walls in a house — long, narrow, and usually blank. A board and batten grid turns a hallway into a gallery corridor: panels give rhythm to a long wall, trim catches light as you walk past, and the whole passage feels intentional instead of leftover.
Spacing: 14–16 inches on center — tighter than a living room, because narrow hallways need more panels to create rhythm. Run full-height (idea 3) or half-wall (idea 4); half-wall is the hallway classic, since it protects the wall from scuffs and bags. Long walls need a layout plan: measure the full run, divide into equal panels, and hide the narrowest panel behind a door frame if you can. $80–$180 for a typical hallway run, a full weekend.
On a long hallway, start the layout from the center and work outward — the end panels end up equal, and any odd remainder hides behind door trim.
IDEA 07Bathroom Grid — Moisture-Safe, Not MDF-Soggy
Bathrooms love board and batten — the grid suits the room’s traditional character, and a half-wall grid protects the lower wall from splashes. But bathrooms punish the wrong material: standard MDF swells and crumbles in humidity, and a bathroom grid built from it is a countdown to replacement.
Material: moisture-resistant MDF (green-core) at minimum, or PVC trim boards for the safest option — PVC never swells, never rots, and paints like MDF. Pine is the third option but needs full sealing on every cut edge. Spacing: 16–18 inches on center, half-wall height (idea 4). Paint: bathroom-grade satin or semi-gloss, which wipes clean and resists moisture. $80–$180, a full day. Keep the grid off the shower wall itself — direct spray defeats even PVC’s caulk lines eventually.
Seal every cut edge of moisture-resistant MDF with primer before install — the factory face resists moisture, the cut edge drinks it.
Standard MDF in a bathroom is the one material mistake on this list that guarantees a redo — check the core color before you buy.
IDEA 08Two-Tone Grid — Trim One Color, Wall Another
Two-tone board and batten flips the classic: the wall one color, the trim another — white trim on a sage wall, black trim on a white wall, wood-tone trim on a cream wall. The contrast makes the grid pop in a way same-color grids never do, and it lets you use color on the wall without committing the whole room to it.
Spacing: 16–18 inches on center; contrast grids read best with slightly wider panels, since the color boundary is the design. Best combinations: white trim on any mid-tone wall (sage, navy, dusty blue), black trim on white (modern, high contrast), natural wood trim on warm white (Scandi). Paint order: wall first, trim second — or spray the trim before install for the cleanest lines. $70–$160, a full day.
Spray or pre-paint trim before install for two-tone grids — cutting in by hand along every batten edge is where two-tone jobs go wobbly.
Two-tone with two strong colors fights itself — one color should be neutral (white, cream, black) or the grid reads as a flag.
IDEA 09Vertical-Only Battens — the Modern Shortcut
Skip the boxes entirely: vertical battens only, no horizontal rails, running floor to ceiling or chair-rail to ceiling. The result reads as modern paneling — clean vertical rhythm, no grid fuss, and roughly half the cutting of a full box layout. It is the fastest real board and batten and the best fit for modern and minimalist rooms.
Spacing: 12–16 inches on center — tighter than box grids, because vertical lines alone need density to read as a design. Batten width: 2–3 inches; narrower reads more modern. No horizontal rails means no panel math — just equal spacing across the wall, which is why this is the beginner-friendliest grid here. Paint: same color as the wall for subtle texture, or contrasting trim for a bolder read. $50–$120, half to a full day.
Vertical-only battens visually lift a low ceiling — the eye follows the lines upward, which is why this is the small-room grid of choice.
IDEA 10Grid + Wallpaper Inside Panels — Pattern in a Frame
Wallpaper inside board and batten panels is the framed-art version of both: trim boxes act as frames, wallpaper inside each panel acts as the art. A bold botanical, a subtle grasscloth look, or a geometric print gains structure from the grid, and the grid gains interest from the pattern — neither works this well alone.
Spacing: 18–24 inches on center — wider panels suit wallpaper, since narrow panels chop the pattern into confetti. Install order: wallpaper first, trim second, so trim edges cover the wallpaper’s cut edges — no fussy trimming inside the boxes. Pattern scale: large motifs for large panels, small prints for small panels. $100–$220 (trim plus 2–3 rolls), a full weekend. Renters: peel-and-stick wallpaper inside removable trim panels comes down clean.

Wallpaper first, trim second — the trim hides every wallpaper edge, so you never have to cut paper perfectly inside a box.
Wallpaper inside narrow panels chops the pattern into confetti — if panels are under 18 inches wide, pick a texture instead of a print.
IDEA 11Grid + Wood Stain — Natural Timber, No Paint
Skip paint entirely: pine battens, stained, on a painted wall — or stained battens on natural plaster for the warmest version. Stained grids read as woodwork rather than trim, and they suit rooms where paint-grade MDF would feel flat: living rooms with oak floors, bedrooms with walnut furniture, anywhere wood already leads.
Spacing: 16–18 inches on center, classic box layout. Material: clear pine or poplar — MDF cannot be stained, so this is the one idea where pine is mandatory. Stain before install for even color, seal with two coats of polyurethane, and accept that wood grain varies board to board — that variation is the point, not a flaw. $90–$200, a full day. Not renter-friendly: stained pine is a permanent commitment.
Stain and seal before install — staining installed battens leaves lap marks at every joint, and sealing after install misses the backs.
MDF cannot be stained, full stop — if the boards are MDF, the stain will blotch and the project is ruined. Check the material before you buy.
IDEA 12Living Room Feature Grid — the Wall the Sofa Faces
The living room feature grid is the full-height grid (idea 3) sized for the room’s main wall — usually the wall the sofa faces, often the TV wall. It gives the living room a designed focal point without a fireplace or built-ins, and anchors everything else: sofa, rug, art all orient to the grid.
Spacing: 18–24 inches on center, with the grid sized to the furniture below — outer battens should extend at least 12 inches beyond the sofa or media console on each side, so the grid frames the furniture rather than floating above it. If the TV mounts on the grid wall, plan the layout around the mount: the TV should sit centered in one large panel, never straddling a batten. $100–$220, a full weekend. Cable tip: run cables behind the battens before install for the cleanest result.
Plan the TV mount before the grid layout — a TV straddling a batten is the living-room grid mistake you cannot unsee.
IDEA 13Grid With Picture Ledge — Display Built Into the Wall
Add a picture ledge — a shallow shelf, 3–4 inches deep — along the top rail of a half-wall or full-height grid, and the wall becomes display space: framed prints leaned against the grid, small plants, books, candles. The ledge turns trim into furniture, and the grid behind it makes everything on the shelf look curated.
Spacing: 16–18 inches on center for the grid below; the ledge itself runs the full grid width. Ledge depth: 3.5 inches holds standard frames leaned at a slight angle; deeper than 4 inches collects clutter and shadows the grid. Mount the ledge into studs — leaned frames plus books get heavy, and a ledge pulling off the wall takes the grid with it. $80–$180, a full day. Renters: a ledge on removable trim still needs stud anchors for safety, so this one is a judgment call.
Lean frames, don’t hang them, on a picture ledge — leaning is the look, and it lets you swap art without new holes.
A picture ledge mounted only into drywall will pull out under books and frames — studs or proper toggle anchors, no exceptions.
IDEA 14Peel-and-Stick Faux Grid for Renters — the Look, Zero Holes
The renter’s grid: adhesive trim strips, foam molding, or vinyl batten decals laid out in the classic box pattern — no nails, no holes, no landlord conversation. From three feet away, a well-done faux grid reads as real trim; from three inches, it reads as what it is, and that trade is worth it for a deposit-safe accent wall.
Spacing: 16–18 inches on center, same math as the real thing — layout rules do not change just because the material does. Best materials: rigid adhesive trim strips (paintable, most realistic), foam crown-style molding (lightest, easiest to remove), or pre-cut vinyl batten kits (fastest, least realistic). Paintable strips take wall paint and blend best; vinyl kits come pre-colored. $40–$100, 2–4 hours. Removal: heat softens adhesive; test a hidden spot first, since some adhesives lift paint on removal.
Paintable adhesive strips, painted the wall color after install, are the most convincing faux grid — the paint hides the adhesive edge.
Test removal on a hidden spot first — some strong adhesives lift paint, and a peeled paint patch costs more than the grid saved.
IDEA 15Narrow-Spacing Modern Grid — Dense Lines, Contemporary Feel
Tighten the spacing and the grid goes modern: battens every 8–12 inches, thin 2-inch battens, same color as the wall. The dense vertical rhythm reads as contemporary paneling — closer to fluted wall panels than farmhouse trim — and suits minimalist, modern, and Japandi rooms where a wide classic grid would feel too traditional.
Spacing: 8–12 inches on center with 2-inch battens; the math is the same equal-panel formula, just with more panels — measure carefully, because a 1-inch error compounds across ten panels into visible drift. Batten width: 2 inches maximum; wider battens at narrow spacing look crowded, not modern. Paint: same color as the wall, matte or eggshell — contrast kills the subtle rhythm. $90–$200 (more battens than any other grid here), a full day.
Narrow spacing compounds measuring errors — mark every batten position on the wall with painter’s tape before installing a single board.
Narrow grids collect dust between battens — a microfiber duster weekly, or the modern look turns into a dusty one.
Which Wall for Board and Batten? Placement Rules
Board and batten is pickier about placement than paint, because trim is permanent in a way paint is not. Rule one: the flattest wall. Trim follows the wall’s surface — a bowed wall leaves gaps behind battens that caulk can only partly hide. Run a straightedge along candidate walls; the flattest one wins. Rule two: the headboard wall in bedrooms, the sofa wall in living rooms. The grid should frame furniture, not float beside it.
Rule three: never the window wall. Battens chopped up by a window frame read as fragments, and trimming around a window cleanly is advanced work. Rule four: one wall, full stop. Board and batten on two walls reads as a theme park — the one exception is a hallway, where both sides can carry a half-wall grid. And check baseboards first: tall existing baseboards (over 5 inches) fight with a new grid’s bottom rail — either remove them or design the grid to sit above them.
Stand in the doorway and look in — the first flat wall your eye lands on, with furniture anchored to it, is your board and batten wall.
Trim on a bowed wall is the grid mistake caulk cannot fix — if the straightedge rocks, pick another wall or shim the battens.
Paint Guidance: White vs. Dark vs. Two-Tone
Three paint strategies, three different rooms. Same color as the walls — trim and wall identical — reads as architecture: quiet, tailored, expensive-looking, and the safest choice for a first grid. White trim on a colored wall reads as classic contrast: the grid pops, the wall color leads, and the combination suits farmhouse, coastal, and traditional rooms. Dark trim on a light wall (or a dark grid entirely) reads as drama: modern, bold, best for a feature wall that has to carry a room — but it demands good light and one pale element for contrast.
Finish: eggshell or satin for trim everywhere — trim takes scuffs, and matte shows every touch. Walls behind the grid can stay matte. And the order question, answered fully in the FAQs below: paint the wall first, install the trim, caulk, then paint the trim — caulk before trim paint, always, because paint over uncaulked seams cracks within months.
One gallon covers a standard accent wall plus its trim with room to spare — buy the gallon, not the quart, because trim drinks paint at edges and ends.
Caulk is not optional and it is not cosmetic — paintable acrylic latex caulk on every trim joint, smoothed with a wet finger, before any trim paint goes on.
Painting trim before caulking is the single most common board and batten mistake — paint seals the seam, caulk never bonds, and the joint cracks within a season.
Renter Rules: What You Can and Can’t Do
- Always safe: peel-and-stick faux grids (idea 14), leaning panels, adhesive trim strips tested on a hidden spot, wallpaper inside removable frames.
- Safe with care: real MDF trim on heavy-duty removable strips or minimal brad nails — a dozen small holes patch with a dab of filler, but photograph the wall on move-in day and keep the original paint color name.
- Ask first, in writing: full-height grids, hallway runs, anything involving baseboard removal, dark paint colors if the lease specifies repainting to the original shade.
- Never: assume trim removal is damage-free — pry gently with a putty knife behind the batten, never yank, and expect to touch up paint along every batten line.
A full-height grid means dozens of nail holes — in a rental, that is a full afternoon of patching at move-out. Half-wall or faux grids are the renter’s honest choice.
5 Mistakes to Avoid
- Uneven spacing. Panels that differ by even an inch are visible from the doorway — the eye is ruthless about rhythm. Do the math on paper first (wall width minus total batten width, divided into equal panels), mark every batten position with painter’s tape, and never eyeball the last panel.
- Skipping caulk. Uncaulked trim joints show as dark shadow lines, collect dust, and crack paint within months. Every joint, every edge, paintable acrylic latex caulk, smoothed before it skins — caulk is what separates a DIY grid from a professional one.
- Wrong batten width. Battens too wide (over 4 inches) read as chunky and dated; too narrow (under 2 inches) disappear on a large wall. The safe band: 3 inches for classic grids, 2 inches for modern narrow grids, 4 inches only for tall traditional rooms.
- Painting before caulking. Paint seals the seam, caulk never bonds properly, and the joint cracks within a season. Order: wall paint, install trim, caulk, trim paint. No shortcuts, no exceptions.
- Grid too tall for the room. A full-height grid on a low ceiling feels like a cage; a half-wall grid on a tall wall feels unfinished. Match grid height to ceiling height — half-wall for standard 8-foot ceilings, full-height for 9 feet and up, never a full grid on a wall under 8 feet.
FAQs
01How do I calculate board and batten spacing?
Use one formula: wall width minus total batten width, divided by the number of panels. Example: a 120-inch wall with six 3-inch battens — 120 minus 18 equals 102, divided by 5 panels equals 20.4 inches of open space per panel, or roughly 23.4 inches on center. Mark every batten position with painter’s tape before installing anything, and always divide into equal panels — never eyeball the last one, because a panel even 2 inches narrower than its neighbors is visible from the doorway.
02Should I use MDF or wood battens?
Primed MDF is the default for painted grids — cheap, perfectly straight, and it paints beautifully. Pine or poplar is mandatory only if you plan to stain (idea 11), since MDF cannot be stained. PVC trim is the bathroom pick — it never swells or rots in humidity. Avoid standard MDF in bathrooms entirely: it swells and crumbles, and the grid will need replacing. For most painted walls, MDF wins on price, straightness, and ease of cutting.
03How much does a board and batten accent wall cost?
For a standard 10–12 foot wall: $50–$150 for a half-wall or classic grid in primed MDF plus paint, $100–$220 for a full-height or wallpaper-panel grid, and $40–$100 for a peel-and-stick faux grid. The trim itself is usually $30–$80; paint, caulk, and nails make up the rest. Pine and stain (idea 11) runs higher at $90–$200. The hidden cost is tools — a brad nailer saves hours over a hammer, and most home stores rent one for under $30 a day.
04What is the best renter-friendly board and batten option?
Ranked by realism and reversibility: paintable adhesive trim strips (idea 14) are the most convincing faux grid and come down with heat; foam molding is the lightest and easiest to remove; real MDF on minimal brad nails is the most realistic option, with a dozen small holes to patch at move-out. Test any adhesive on a hidden spot first — some strong adhesives lift paint on removal. Photograph the wall on move-in day and keep the original paint color name for touch-ups.
05Does board and batten work in small rooms?
Yes — with the right scale. Half-wall grids (idea 4) and vertical-only battens (idea 9) suit small rooms best: the half-wall keeps the upper wall open, and vertical lines visually lift a low ceiling. Avoid full-height wide grids in small rooms — they can feel like a cage. Keep battens at 2–3 inches wide, panels at 16–18 inches on center, and paint the grid the same color as the walls so it reads as texture rather than a heavy feature.
06Should I paint before or after installing battens?
Both — in this order: paint the wall first, install the trim, caulk every joint, then paint the trim. Painting the wall first means you never have to cut in around installed battens. Caulking before trim paint is non-negotiable — paint over uncaulked seams seals the joint shut, the caulk never bonds, and the seam cracks within a season. For two-tone grids, pre-paint or spray the trim before install for the cleanest color lines, then touch up nail holes and caulk lines after.
Key takeaways
- Spacing is the whole job. A board and batten accent wall succeeds or fails on equal panels — wall width minus batten width, divided evenly, marked with tape before a single board goes up.
- Caulk before trim paint, always. Every joint, every edge, paintable caulk smoothed before it skins — caulk is what separates a DIY grid from a professional one.
- Match material to room. Primed MDF for painted walls, pine for stain, PVC or moisture-resistant MDF for bathrooms — standard MDF in a bathroom guarantees a redo.
- One wall, right height, right batten width. Half-wall for standard ceilings, full-height for 9 feet and up, 3-inch battens for classic grids, 2-inch for modern — restraint is what makes trim look designed.