 Casacrunched
15 Peel and Stick Accent Wall Ideas That Look Real, Not Temporary
Peel-and-stick is the renter’s power move — real style, zero holes, zero deposit risk. Fifteen peel and stick accent wall ideas, from wood planks to brick to tile, with surface rules that make them look real.

Peel-and-stick is the renter’s power move: real style, zero holes, zero deposit risk. A peel and stick accent wall goes up in an afternoon, transforms the whole room by dinner, and peels off clean on move-out day — no landlord conversation, no repainting weekend, no “please don’t charge me for that” anxiety. The technology has outgrown its bargain-bin reputation: today’s vinyls and foam planks mimic wood grain, brick, stone, and grasscloth convincingly enough to fool guests at arm’s length.
Fifteen peel-and-stick ideas, each with adhesion and surface guidance (what it sticks to, what it fails on), honest costs, and renter nuance — so your commitment-free wall looks like a design choice, not a temporary fix.
On this page
- Quick comparison table
- 1. Wallpaper feature wall
- 2. Wood planks
- 3. Brick
- 4. Stone
- 5. Tiles
- 6. Shiplap
- 7. Board and batten look
- 8. Geometric pattern
- 9. Mural
- 10. Grasscloth
- 11. Behind the bed
- 12. Behind the sofa
- 13. In the bathroom
- 14. In the kitchen
- 15. Ceiling accent
- Which wall for peel-and-stick?
- What looks real vs. cheap?
- Renter rules
- 5 mistakes to avoid
- FAQs
Quick comparison: surface, cost, time, renter score
| # | Idea | Surface compatibility | Cost / wall | Time | Renter-friendly? |
|---|---|---|---|---|---|
| 1 | Wallpaper feature wall | Smooth painted drywall | $60–$180 | 2–4 hours | Fully removable |
| 2 | Wood planks | Smooth painted drywall | $80–$200 | Half day | Fully removable |
| 3 | Brick | Smooth drywall (not textured) | $70–$180 | Half day | Fully removable |
| 4 | Stone | Smooth drywall, low-steam zones | $90–$220 | Half day | Fully removable |
| 5 | Tiles | Smooth backsplash / tile | $40–$120 | 2–3 hours | Fully removable |
| 6 | Shiplap | Smooth drywall | $80–$200 | Half day | Fully removable |
| 7 | Board and batten look | Smooth drywall | $60–$160 | Half day | Fully removable |
| 8 | Geometric pattern | Smooth drywall | $60–$180 | 2–4 hours | Fully removable |
| 9 | Mural | Smooth drywall | $120–$300 | Half day | Fully removable |
| 10 | Grasscloth | Smooth drywall | $90–$220 | 2–4 hours | Fully removable |
| 11 | Behind the bed | Smooth drywall | $60–$180 | 2–4 hours | Fully removable |
| 12 | Behind the sofa | Smooth drywall | $60–$180 | 2–4 hours | Fully removable |
| 13 | In the bathroom | Smooth tile / glass, not raw drywall | $50–$150 | 2–3 hours | Fully removable |
| 14 | In the kitchen | Smooth backsplash, not behind stove | $40–$120 | 2–3 hours | Fully removable |
| 15 | Ceiling accent | Smooth flat ceiling | $90–$220 | Full day | Fully removable |
All costs are DIY estimates for one standard 10×12 ft wall (about 100 sq ft). A standard peel-and-stick roll covers roughly 28 sq ft (20.5 in × 16.5 ft), so one accent wall needs 3–4 rolls — always buy one extra for pattern matching and mistakes.
IDEA 01Peel-and-Stick Wallpaper Feature Wall — the Classic Renter Move
This is where most peel-and-stick journeys start, and for good reason: a single patterned wall does the work of a full redecoration. Botanicals, geometrics, chinoiserie, dark florals — the range is enormous now, and the best vinyls print at a resolution that reads as real paper from a normal standing distance. Pick one wall, hang it straight, and the room has a focal point by dinner.
Adhesion guidance: smooth, painted drywall only — eggshell or satin paint grips best. Matte flat paint can shed micro-dust and weaken the bond; textured or orange-peel walls defeat the adhesive outright (see mistake 1). Peel-and-stick hates fresh paint too: wait 4 weeks for new paint to cure before applying, or the vinyl can lift the paint with it. $60–$180 for 3–4 rolls, 2–4 hours.
Order every roll from the same dye lot and keep one spare — a mid-wall repair with a mismatched lot is more visible than the damage it fixes.
IDEA 02Peel-and-Stick Wood Planks — Warmth Without a Single Nail
Foam and vinyl wood planks deliver the warm, linear look of a timber accent wall with none of the tools: peel, press, stagger the seams like real boards, done. The grain printing on quality planks is convincing at arm’s length, and the slight 3D relief of foam planks catches light the way real timber does. Behind a bed or a sofa, they add instant warmth to rooms that feel flat and white.
Adhesion guidance: planks are heavier than wallpaper, so the wall matters more — smooth, clean, painted drywall is the only safe bet, and the wall must be dust-free or the foam edges curl within weeks. Stagger joints by at least 6 inches, like brickwork, or the grid pattern gives the game away. $80–$200, half a day.
Cheap foam planks with repeating grain — the same knot every third board — are the fastest way to make a wall look fake. Mix two packs or two shades to break the repetition.
IDEA 03Peel-and-Stick Brick — Industrial Character, Zero Mortar
Faux brick is the industrial shortcut: a brick accent wall behind the sofa or the bed reads as loft character without the weight, the dust, or the landlord’s horror. The best versions use 3D foam brick with real relief — the shadows between bricks sell the illusion far better than any flat print. Whitewashed brick is the safest choice for small rooms; classic red brick needs a bigger room and darker furniture to balance it.
Adhesion guidance: foam brick is the heaviest peel-and-stick on this list, so it demands smooth, primed drywall and a wall that never gets damp. It fails on textured walls, on brick-look paint, and anywhere steam reaches it. Press each brick firmly for a full 10 seconds — foam needs contact time that wallpaper doesn’t. $70–$180, half a day.

Whitewashed brick behind a light sofa is the small-room version of this idea — it adds texture without the visual weight of red brick.
IDEA 04Peel-and-Stick Stone — the Fireplace Look, Renter Edition
Stacked-stone panels in peel-and-stick form bring the fireplace-wall drama of a mountain lodge to a rental living room. The trick is scale: stone reads best in large, irregular shapes with varied tones, not in neat uniform rectangles — uniformity is what makes fake stone look like a cartoon. One stone wall, kept to the fireplace surround or a single feature wall, is plenty.
Adhesion guidance: stone panels are thick and heavy for adhesive, so they belong on smooth drywall in low-steam zones only — never a bathroom, never directly above a working fireplace’s heat zone (check the panel’s heat rating first). Support the bottom row while the adhesive sets, or gravity peels it overnight. $90–$220, half a day.
Stone panels above a real fireplace need a heat rating — unrated foam near a firebox is a fire risk, not a design choice. When in doubt, stone the wall beside the fireplace, not above it.
IDEA 05Peel-and-Stick Tiles — a Backsplash Without Grout
Peel-and-stick tiles are the kitchen and bathroom cheat code: subway, mosaic, Moroccan, marble-look — all in self-adhesive sheets that go over existing tile or smooth drywall in an afternoon. No grout, no thinset, no tiler, and the whole backsplash peels off when the lease ends. For renters with a dated beige backsplash, this single idea changes the room more than any other on the list.
Adhesion guidance: tiles grip best on smooth existing tile, glass, or painted drywall — and they fail on grout lines they can’t bridge, so either fill deep grout first or accept visible ridges. Keep them away from direct stove heat and constant standing water; a tile sheet behind a faucet is fine, a tile sheet inside a shower is not. $40–$120, 2–3 hours.
Wipe the existing tile with rubbing alcohol first — kitchen grease is invisible and it is the number one reason tile sheets peel within a month.
IDEA 06Peel-and-Stick Shiplap — Clean Lines, No Saw
Shiplap’s clean horizontal lines translate beautifully to peel-and-stick: vinyl planks with a printed gap line give you the architectural rhythm of real boards with zero cutting, zero studs, and zero sawdust. White shiplap brightens a dark hallway; natural-wood shiplap warms a bedroom. The gap line is the whole illusion — pick planks where the gap reads as shadow, not as a printed stripe.
Adhesion guidance: same rules as wood planks — smooth, dust-free painted drywall, staggered joints, firm pressure along every edge. Because shiplap’s look depends on perfectly level lines, a laser level or a long spirit level is not optional here; a 1-degree drift across a 10-foot wall is visible from the doorway. $80–$200, half a day.
A shiplap wall that drifts off level reads as a mistake, not a style — snap a chalk line at the first row and check every third row against it.
IDEA 07Peel-and-Stick Board and Batten Look — Architecture in a Roll
Board and batten’s trim grid can be faked convincingly with peel-and-stick: vinyl strips applied as battens over a painted wall, or a single printed wallpaper that mimics the grid. The strip version wins up close — real relief, real shadow lines — while the printed version wins on speed. Either way, you get tailored architecture with nothing nailed to the wall.
Adhesion guidance: strips are narrow, so each one lives or dies by its bond — smooth drywall, cleaned with a damp cloth and fully dried, is non-negotiable, and every strip needs a level check before pressing. Spacing math matters as much as with real batten: measure the wall, divide into equal panels, and mark every batten position in pencil before sticking anything. $60–$160, half a day.
Paint the wall first in the trim color, then apply strips in a slightly different shade — same-color walls and strips lose the grid entirely.
IDEA 08Peel-and-Stick Geometric Pattern — Bold, at Renter Scale
Geometric peel-and-stick is where renters get to be bold: arches, diamonds, terrazzo, art-deco fans — patterns that would feel like a lifetime commitment in paint become a one-season experiment. The key is scale: in a small room, pick a medium repeat — tiny busy geometrics shimmer and distract, while oversized motifs swallow the wall. One geometric wall, with the rest of the room quiet, is the formula.
Adhesion guidance: geometrics punish misalignment more than any other pattern — a 2-millimeter drift at the first panel compounds across the wall into a visibly crooked grid. Hang the first panel dead plumb (see mistake 4), and overlap pattern-matched panels exactly on the printed repeat line, never by eye. $60–$180, 2–4 hours.
Geometric patterns with a strong repeat show every seam — if your wall is longer than two panels, budget a spare roll for re-hanging the panel that drifts.
IDEA 09Peel-and-Stick Mural — One Wall, One Scene
A mural turns one wall into a landscape, a botanical canopy, or an abstract wash of color — the single highest-impact peel-and-stick move, and the one guests actually photograph. Unlike repeating wallpaper, a mural is one continuous image across numbered panels, so it reads as art rather than decoration. Bedrooms and dining rooms suit murals best: rooms where you sit and look at the wall.
Adhesion guidance: murals are panel-sequenced — hang panel 1 exactly plumb, because every later panel inherits its error, and the image only lines up if the first panel is true. Smooth drywall only, and never trim a mural panel to fit a corner until the whole image is up — a trimmed edge mid-image is unfixable. $120–$300, half a day.
Unroll the whole mural on the floor first and check the panel order and the image flow — discovering a misprinted panel mid-hang is a ruined afternoon.
IDEA 10Peel-and-Stick Grasscloth — Texture That Reads Expensive
Grasscloth-look vinyl is the quiet luxury of peel-and-stick: woven texture, tonal variation, and a matte finish that reads as high-end paper rather than plastic. It suits bedrooms and dining rooms where the wall should feel warm and tactile rather than patterned. Because grasscloth has no repeat to match, it is also the most forgiving peel-and-stick to hang — seams disappear into the weave.
Adhesion guidance: grasscloth vinyl is thicker than standard wallpaper, so it needs firm, even pressure across the whole panel — a plastic smoother, not just hands — and a wall free of dust and grease. Its matte finish hides seams beautifully but shows every fingerprint during install, so wear clean cotton gloves. $90–$220, 2–4 hours.
Real grasscloth is pasted, pricey, and permanent — peel-and-stick grasscloth-look vinyl is the only version a renter should ever buy, and guests will not know the difference.
IDEA 11Peel-and-Stick Behind the Bed — the Bedroom Shortcut
The bed wall is peel-and-stick’s natural home: one wall, one focal point, and the bed itself hides the bottom edge where installs get messy. A botanical wallpaper, wood planks, or grasscloth behind the bed turns a plain bedroom into a designed one in a single afternoon — and because the bed anchors the wall, the pattern never has to carry the room alone.
Adhesion guidance: the bed wall is usually the smoothest wall in a bedroom, which is half the battle won — but check for texture behind the headboard before ordering, because builders often skip finishing the wall a headboard will hide. Move the bed fully out (never paper around a mounted headboard — seams show), and keep the pattern’s scale in proportion to the bed: big beds carry big prints. $60–$180, 2–4 hours.
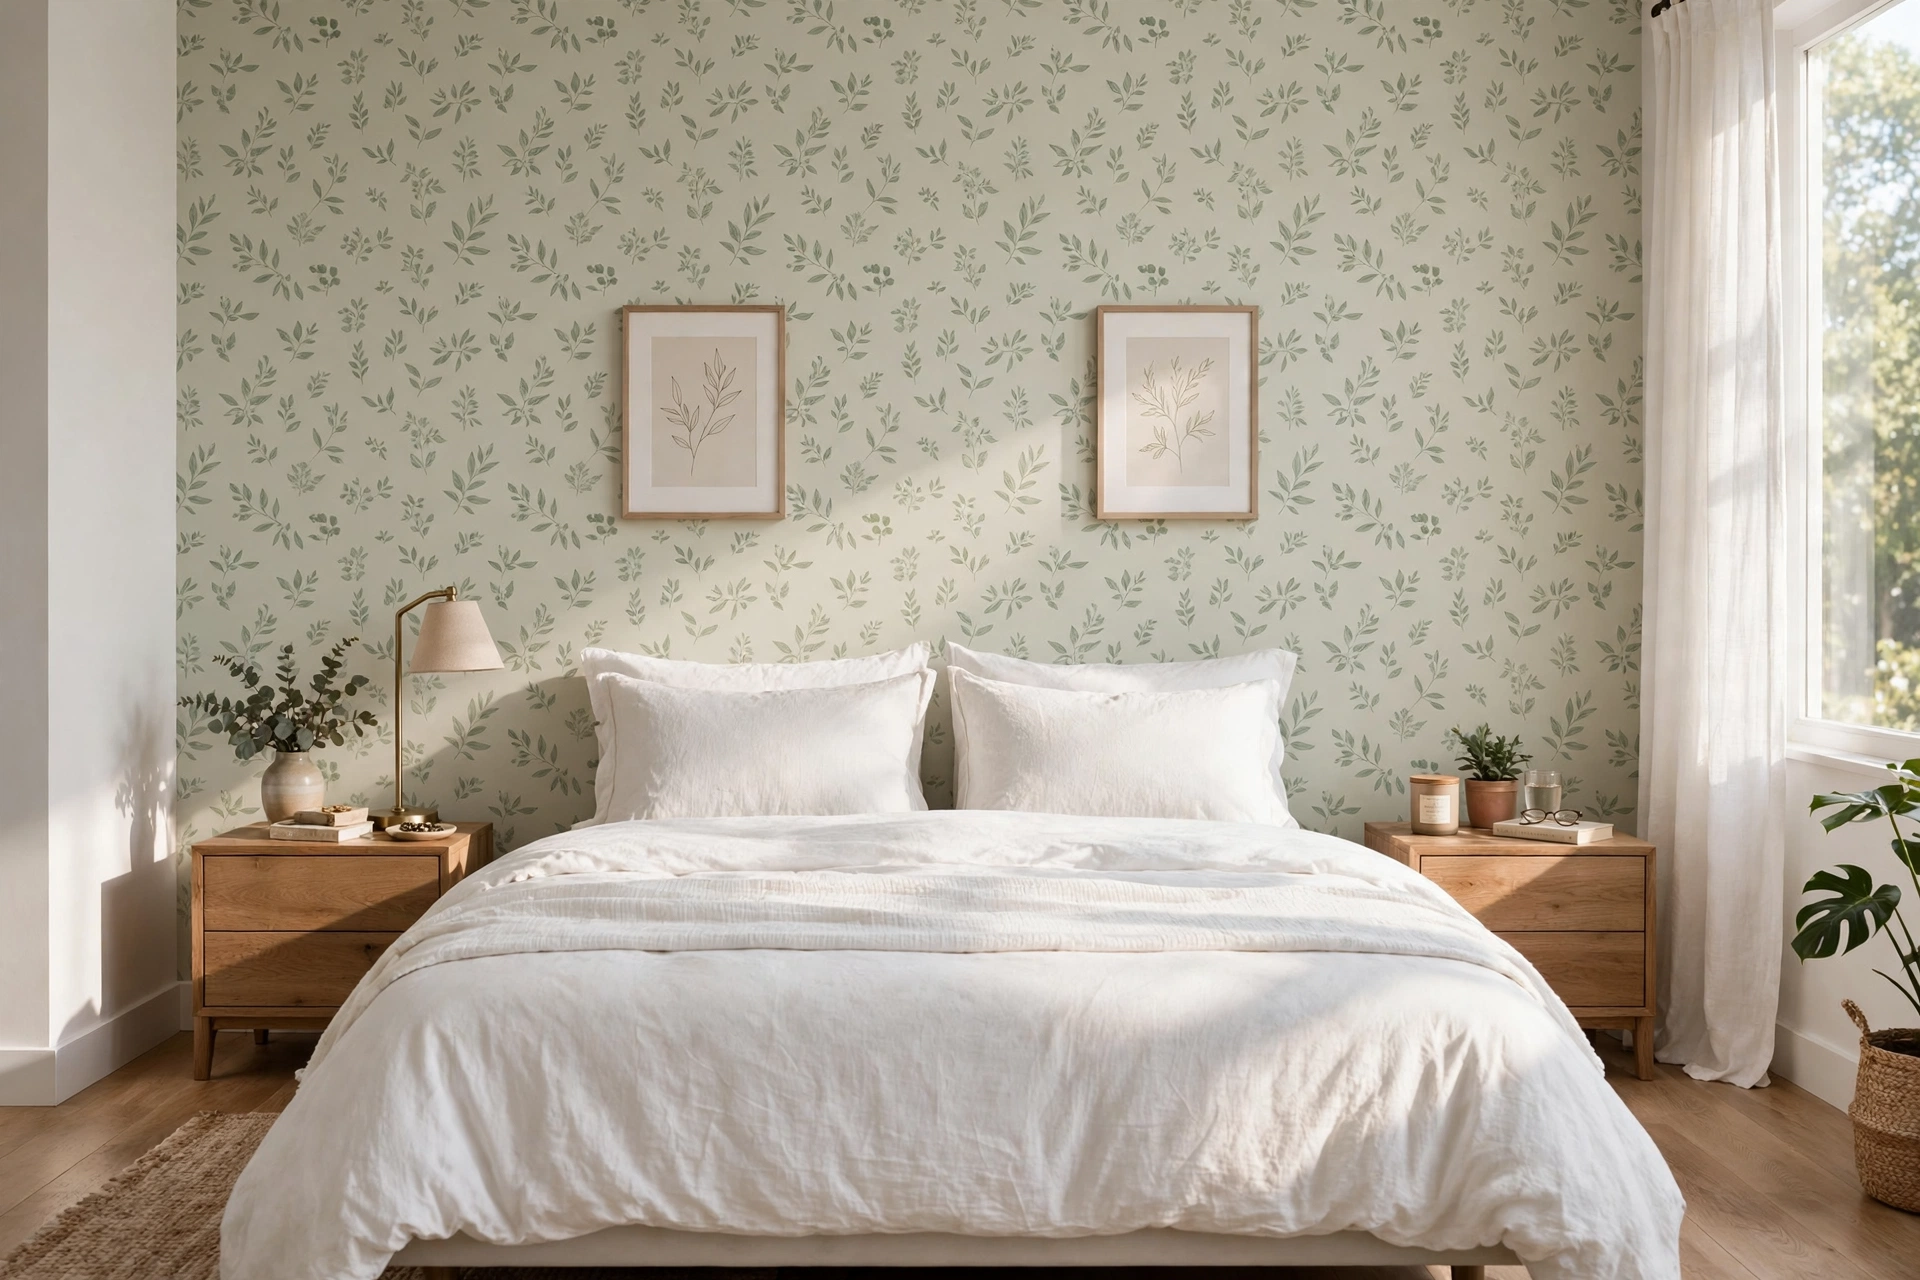
Center the pattern’s hero motif on the bed’s centerline — a botanical stem or geometric medallion aligned with the headboard reads as intentional, not accidental.
IDEA 12Peel-and-Stick Behind the Sofa — the Living Room Face
The sofa wall is the living room’s face — what you see from the doorway — and peel-and-stick is the fastest way to give it one. Brick, wood planks, or a bold geometric behind the sofa all work, with one rule that matters more than the material: the treatment must be wider than the sofa, or the wall looks like a postage stamp behind the furniture. Extend at least 6 inches past each arm.
Adhesion guidance: sofa walls take knocks — vacuum bumps, cushion throws, kids — so press every edge firmly and choose thicker vinyl or foam over thin paper-look films, which scuff and lift at the edges. Keep art and shelves off the peel-and-stick itself; hang them on the bare wall above or beside it instead. $60–$180, 2–4 hours.
A peel-and-stick panel narrower than the sofa reads as a mistake from the doorway — measure the sofa first, then order enough material to clear both arms.
IDEA 13Peel-and-Stick in the Bathroom — Humidity Rules Apply
Bathrooms are peel-and-stick’s hardest room — and its most rewarding, because a dated bathroom transforms completely with one tiled or patterned wall. The catch is humidity: standard vinyl loosens in constant steam, so bathroom peel-and-stick must be explicitly rated for high humidity, and it belongs on smooth tile, glass, or a painted wall outside the shower — never inside it.
Adhesion guidance: clean with rubbing alcohol, let the wall dry fully, and seal the edges with a thin bead of clear silicone caulk where water splashes — the caulk line is what keeps steam from creeping under the vinyl. Ventilate the bathroom for 24 hours after install while the adhesive cures. If the bathroom has no fan and no window, skip peel-and-stick here entirely. $50–$150, 2–3 hours.
Standard vinyl in a steamy bathroom peels within weeks — and a peeled edge in a bathroom looks worse than the dated tile it covered. Humidity-rated or nothing.
IDEA 14Peel-and-Stick in the Kitchen — Grease, Steam, and Second Chances
Kitchens give peel-and-stick two enemies — grease and steam — and one huge advantage: the backsplash is small, so a full transformation costs under $120 and one afternoon. Subway tiles, marble-look sheets, and Moroccan patterns all work as backsplashes, and because the area is contained, even a bold pattern stays tasteful.
Adhesion guidance: degrease the backsplash with rubbing alcohol or a TSP substitute and let it dry completely — kitchen grease is invisible and it is the number one reason tile sheets peel. Keep peel-and-stick away from direct stove heat (at least 6 inches from burners, more for gas) and off the wall directly behind a kettle’s steam path. Wipeable vinyls survive kitchens; matte paper-look films stain. $40–$120, 2–3 hours.

Run a bead of clear silicone caulk along the counter-to-backsplash seam after install — it stops cooking splashes from creeping under the bottom row.
IDEA 15Peel-and-Stick Ceiling Accent — the Fifth Wall, Commitment-Free
The ceiling is the accent wall most people forget, and peel-and-stick makes it renter-possible: wood planks, subtle wallpaper, or tin-look tiles overhead turn a flat white ceiling into a feature without a single screw. It works best in bedrooms and dining rooms, where you actually look up — and in small rooms, a ceiling accent draws the eye up and makes the space feel taller.
Adhesion guidance: ceilings fight gravity, so this is the one peel-and-stick job where lightweight vinyl beats foam — foam planks sag and peel overhead. The ceiling must be smooth, flat, and dust-free, and every panel needs firm pressure plus a second pass with a smoother after 10 minutes. Work with a partner: holding a panel overhead alone is how alignment dies. $90–$220, a full day.
Never use foam planks overhead — gravity plus foam weight equals a panel on your pillow at 3 a.m. Lightweight vinyl only, and check every edge the next morning.
Which Wall for Peel-and-Stick? Placement Rules
Peel-and-stick is forgiving about style and strict about surface — four rules decide whether it lands. Rule one: smooth walls only. Run your palm across the wall: if you feel orange-peel texture, knockdown, or heavy brush strokes, peel-and-stick will fail there — the adhesive only grips the high points, and the panel peels within weeks. Pick the smoothest wall in the room, or skim-coat the chosen one first. Rule two: the flattest wall. Bumps, nail pops, and patched areas telegraph through thin vinyl; fill and sand them before you start.
Rule three: never the window wall. A window cut into a peel-and-stick wall means fussy trimming around the frame, and sunlight through the window heats the vinyl and weakens the bond over time. Rule four: one wall, full stop. Peel-and-stick’s power is a single bold statement; two peel-and-stick walls read as a vinyl box, not a design choice. And the curing rule that governs everything: never apply over paint less than 4 weeks old — uncured paint lifts with the vinyl at removal, which is exactly the deposit damage you bought peel-and-stick to avoid.
Test before you commit: stick one sample panel on the wall for 48 hours, then peel it. If it holds firm and the paint stays put, the wall is safe. If it curls or lifts paint, you just saved yourself a ruined weekend.
Textured walls are the number one peel-and-stick failure — and the failure looks like your fault, not the product’s. If the wall has texture, pick a different wall or a different idea.
What Looks Real vs. Cheap? The Peel-and-Stick Quality Guide
The difference between a peel-and-stick wall that fools guests and one that screams “temporary” comes down to four choices. Finish first: matte beats gloss, always. High-gloss vinyl catches light and announces itself as plastic from across the room; matte and eggshell finishes read as paper, plaster, or timber. Color second: muted tones beat bright ones. Muted sage, warm white, charcoal, and weathered wood look like real materials; neon brights and oversaturated prints look like a sticker sheet.
Pattern third: repetition is the giveaway. Real brick, wood, and stone never repeat exactly — so any peel-and-stick with an obvious repeating knot, brick, or motif betrays itself within a few feet. Mix two packs, rotate panels, or pick designs with varied tones. Scale fourth: match the motif to the room. Small rooms want medium repeats; oversized motifs swallow a small wall, and tiny busy patterns shimmer. And always order a sample swatch first — check it on the wall, in your light, before committing to 4 rolls. A $5 sample prevents a $150 mistake.
The arm’s-length test: step back 3 feet from a sample panel. If you can’t tell it’s vinyl, it will pass in the room. If you can, no amount of careful hanging will save it.
Buy from brands that print at high resolution and show real-room photos, not renders. A product page with only digital mockups is hiding how the vinyl actually looks.
Shiny vinyl, oversized fake mortar lines, and neon colors are the three cheapest looks in peel-and-stick — avoid all three and most designs pass as real.
Renter Rules: What You Can and Can’t Do
- Always safe: peel-and-stick wallpaper, planks, tiles, and panels on smooth painted drywall or existing tile — fully removable, no landlord conversation needed. Photograph the wall on move-in day.
- Safe with care: foam brick and stone panels (heavy — test adhesion first), bathroom sheets (humidity-rated only, sealed edges), ceiling vinyl (lightweight only, partner install).
- Ask first, in writing: peel-and-stick on freshly painted walls (under 4 weeks cured), on walls you suspect have lead paint, or anywhere the lease bans adhesives outright. Some leases do — read yours.
- Never: apply over textured walls, over uncured paint, inside a shower, above a stove’s direct heat, or on a wall you haven’t test-patched. And never leave peel-and-stick up for years (see mistake 5) — the adhesive hardens and the clean removal you counted on disappears.
A lease that bans adhesives bans peel-and-stick too — check the clause before ordering. Most landlords accept it, but the ones who don’t will charge for removal.
Keep the original paint color name and one spare roll. At move-out, peel slowly at a low angle with gentle heat from a hair dryer — and if any paint does lift, the spare roll’s color match makes the touch-up invisible.
5 Mistakes to Avoid
- Applying on textured walls. Orange-peel, knockdown, or heavy brush texture defeats the adhesive — the panel grips only the high points and peels within weeks. Smooth walls only, or skim-coat first.
- Skipping wall cleaning. Dust, grease, and cooking film are invisible and they are the number one cause of peeling. Wipe every wall with a damp cloth (rubbing alcohol in kitchens and bathrooms), let it dry completely, and only then start sticking.
- Stretching the material. Pulling vinyl taut to force alignment stretches it — and stretched vinyl slowly shrinks back, opening gaps at every seam. Lay panels flat, align without tension, and trim excess instead of stretching to fit.
- Misaligning the first panel. Every later panel inherits the first panel’s error, and patterns compound it across the wall. Hang panel one dead plumb with a level, not by eye, and check every third panel against it.
- Leaving it up for years. Peel-and-stick adhesive hardens over time — after 2–3 years it can bond permanently, tearing paint at removal. Plan removal within 18 months, or replace panels on a schedule if the look is staying long-term.
FAQs
01Does peel and stick damage walls?
On the right wall, no. Peel-and-stick on smooth, fully cured painted drywall peels off clean, especially if you warm it gently with a hair dryer and pull slowly at a low angle. Damage happens on the wrong surfaces: textured walls, paint less than 4 weeks old, and walls where the vinyl sat for years and the adhesive hardened. Test-patch one panel for 48 hours before committing to a whole wall.
02Can I use peel and stick on textured walls?
No — this is the most common peel-and-stick failure. Textured walls like orange-peel or knockdown give the adhesive only the high points to grip, so panels curl and peel within weeks. Your options: pick the smoothest wall in the room, skim-coat the textured wall first, or choose a different idea entirely (leaning panels or a painted accent). Light texture sometimes works with thick foam panels, but thin vinyl never does.
03How long does peel and stick last?
On a smooth, clean wall indoors, 1–3 years is realistic for quality vinyl — longer in dry rooms, shorter in steamy bathrooms. The catch is removal: adhesive hardens over time, so panels left up for 3+ years can tear paint on removal. Plan to remove or replace within 18 months if you want the clean exit peel-and-stick promises. Humidity-rated sheets last longer in bathrooms; standard vinyl does not.
04Does peel and stick work in bathrooms?
Yes, with two conditions. First, use sheets explicitly rated for high humidity — standard vinyl peels in constant steam within weeks. Second, apply only on smooth tile, glass, or painted walls outside the shower, and seal exposed edges with clear silicone caulk where water splashes. Bathrooms with no fan and no window are the one place to skip peel-and-stick entirely.
05How do I remove peel and stick wallpaper without damage?
Warm each panel gently with a hair dryer on low heat, then peel slowly downward at a low angle, close to the wall — never yank outward, which lifts paint. Work panel by panel, reheating stubborn spots. Any leftover adhesive wipes off with warm soapy water or rubbing alcohol. If a small paint chip does lift, touch it up with the original paint color — which is why keeping that color name matters.
06Peel and stick vs real wallpaper — which should I choose?
Renters should choose peel-and-stick: it goes up faster, costs less, and removes cleanly. Real pasted wallpaper looks richer up close and lasts decades, but it needs paste, professional skill, and a steamer to remove — a landlord’s nightmare. The gap has narrowed: quality peel-and-stick now mimics grasscloth, wood, and brick convincingly at arm’s length. Choose real wallpaper only if you own the home and want the wall to last 10+ years.
Key takeaways
- Smooth walls only. A peel and stick accent wall lives or dies on its surface — smooth, clean, fully cured painted drywall, or smooth existing tile. Texture is the number one failure.
- Matte and muted look real; gloss and neon look cheap. Finish, color, and pattern repetition are what separate a designed wall from a sticker sheet.
- Panel one must be plumb. Every later panel inherits the first panel’s error — level it, don’t eyeball it, and never stretch vinyl to force alignment.
- Remove within 18 months. Adhesive hardens over time; the clean exit peel-and-stick promises depends on not leaving it up for years.