 Casacrunched
How to Paint an Accent Wall: 15 Steps to a Flawless Finish
Painting an accent wall is the cheapest room makeover there is — if you do it right. Fifteen steps from wall choice to final styling, with the pro techniques that separate crisp from sloppy.

A fresh coat of paint is the cheapest transformation a room can get — and painting an accent wall is a genuine one-day project: one wall, one gallon, zero experience required. These fifteen steps walk you through the whole process in order, from choosing the wall to styling the finished result — with the pro details (recoat timing, cutting-in technique, tape removal) that separate a crisp designer look from a weekend mess.
On this page
- Quick step overview
- 1. Choosing the right wall
- 2. Picking your paint color
- 3. Choosing the finish
- 4. Tools and materials checklist
- 5. Prepping the room
- 6. Cleaning the wall
- 7. Primer: when you need it
- 8. Cutting in the edges
- 9. Rolling like a pro
- 10. Timing the second coat
- 11. Removing tape cleanly
- 12. Touch-ups that disappear
- 13. Drying vs. curing
- 14. Cleanup and paint storage
- 15. Styling the finished wall
- Which wall should be the accent wall?
- Paint colors for small rooms
- Renter rules
- 5 mistakes to avoid
- FAQs
Quick step overview
Times assume one standard 10×12 ft wall. “Easy” steps need no experience; “Careful” steps reward a steady hand. Total active work: about 4–5 hours spread over one day.
| # | Step | What you do | Time | Difficulty |
|---|---|---|---|---|
| 1 | Choose the wall | Pick the focal wall | 15 min | Easy |
| 2 | Pick the color | Sample and test | 1–2 days | Easy |
| 3 | Choose the finish | Matte vs. eggshell vs. satin | 10 min | Easy |
| 4 | Gather tools | Buy or borrow everything | 30 min | Easy |
| 5 | Prep the room | Move, cover, tape | 45 min | Easy |
| 6 | Clean the wall | Wash and dry | 20 min | Easy |
| 7 | Prime if needed | One sealing coat | 30 min + dry | Easy |
| 8 | Cut in edges | Brush the borders | 30–45 min | Careful |
| 9 | Roll the wall | First full coat | 20–30 min | Easy |
| 10 | Second coat | Recoat after drying | 20–30 min | Easy |
| 11 | Remove the tape | Pull at 45 degrees | 10 min | Careful |
| 12 | Touch up | Fix bleeds and misses | 15 min | Careful |
| 13 | Let it cure | Hands off the wall | 2–4 weeks | Easy |
| 14 | Clean up | Wash tools, store paint | 20 min | Easy |
| 15 | Style the wall | Hang, arrange, enjoy | 30 min | Easy |
STEP 01Choosing the Right Wall
Before buying a drop of paint, pick the wall. The best candidate for painting an accent wall is the wall the room already stares at: behind the bed, behind the sofa or TV, or the entryway wall. Let the furniture choose — the accent wall should anchor something, not float alone.
Skip the window wall (daylight washes color into glare), walls chopped up by doors, and in open plans, the wall visible from the main seating. Stand in the doorway: the wall your eye lands on first is almost always the right one. One wall only — two painted walls in a small room compete instead of complement.
Photograph the room from the doorway, then draw the color on the photo with a marker — a 30-second mockup beats an hour of indecision.
Don’t default to the biggest wall — the biggest wall is rarely the focal wall. Follow the furniture, not the square footage.
STEP 02Picking Your Paint Color
Color is the cheapest part of painting an accent wall and the easiest to get wrong. Buy sample pots ($5–$8) of your top contenders and paint them on poster boards — move the boards around the room for 48 hours, checking morning, noon, and lamplight.
Three rules prevent nearly all color regret. One: when torn between two shades, go deeper — colors dry lighter across a full wall. Two: check undertones in your light; north rooms turn everything cooler, warm bulbs turn everything yellower. Three: judge the color against your largest furniture piece. For small rooms, saturated mid-tones (deep sage, terracotta, dusty navy) give drama without the cave effect of near-black.
Paint samples on poster boards, not the wall — you can move them, compare side by side, and the wall stays pristine.
A color that looks perfect at noon can turn muddy under warm evening bulbs. The 48-hour test is the whole secret.
STEP 03Choosing the Finish: Matte, Eggshell, or Satin
Matte/flat hides every roller mark and gives rich, velvety color — ideal for bedrooms and moody dark walls — but scuffs more easily. Eggshell is the sweet spot: slight sheen, washable, hides minor flaws. Satin suits hallways and kids’ rooms but shows bumps more. Semi-gloss and gloss: skip for DIY — they magnify every imperfection.
Default to eggshell unless the wall has texture you want to showcase (matte) or traffic that needs scrubbing (satin).
Never gloss on a DIY accent wall — high sheen turns every roller lap mark and wall bump into a visible flaw.
STEP 04Tools and Materials Checklist
Buy everything before you start — the second store trip mid-project kills momentum. For one accent wall: 1 gallon of paint (~350–400 sq ft coverage; one wall needs two coats of ~120 sq ft), 9-inch roller frame + 3/8-inch nap covers, a 2 to 2.5-inch angled sash brush, a paint tray with liner, painter’s tape (1.5-inch), a canvas drop cloth (stays put; plastic slides), a 5-in-1 painter’s tool, and a stir stick.
Optional but worth it: an extension pole for the roller (saves your back, evens pressure). Total: $60–$100 from scratch, $35–$55 for paint alone. And buy good paint — the $55 gallon covers in two coats what the $30 gallon needs four for.
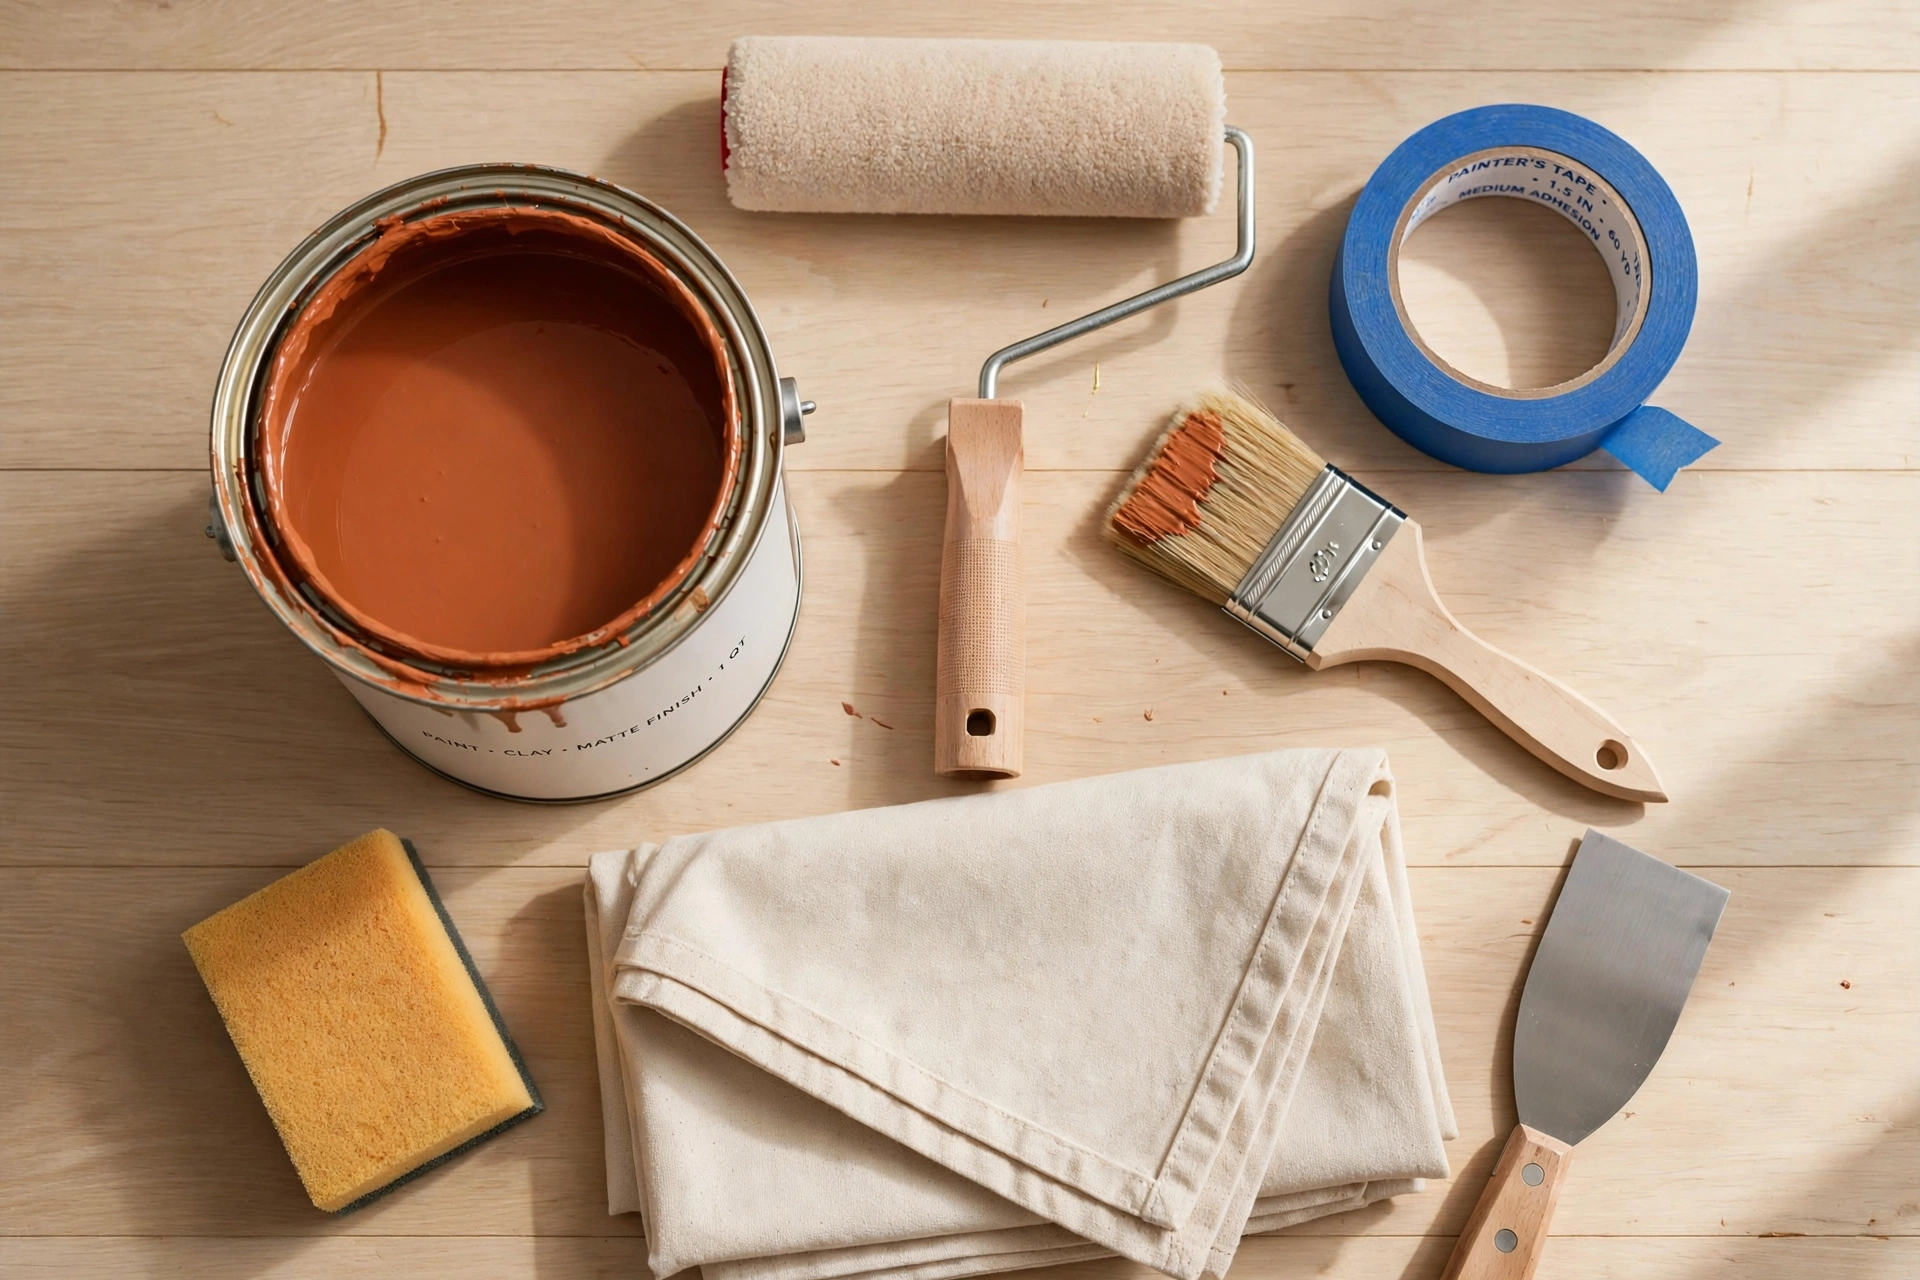
Buy one extra roller cover — a fresh cover for the second coat lays down noticeably smoother than a reused one.
A 3/8-inch nap roller cover is the universal wall choice — thinner naps starve the wall, thicker naps leave orange-peel texture.
STEP 05Prepping the Room
Prep is 70% of a paint job. Move furniture three feet from the wall, lay the drop cloth flat — canvas grips the floor while plastic slides — and remove outlet covers (one screwdriver, two minutes each; bag the screws and tape them to the plate).
Now tape: run painter’s tape along ceiling, baseboards, and trim, pressing firmly — run a credit card along every edge to seal it. Paint bleeds under loose tape. In a small room this takes 45 minutes; skipping it guarantees paint where you don’t want it.
Remove outlet covers instead of taping around them — two minutes per plate, and the result looks professional instead of painted-around.
Seal tape edges with a credit card before painting — pressed tape gives razor lines, loose tape gives fuzzy ones.
STEP 06Cleaning the Wall
Paint sticks to clean walls and slides off dirty ones. Wipe the wall with a damp microfiber cloth and a drop of dish soap — focus on the bottom third, light switches, and kitchens (grease film). Rinse with a clean damp cloth and let it dry completely; damp walls dilute the first coat.
Fill nail holes with spackle, sand smooth when dry, and wipe the dust off — every unfilled hole shows through the finish, and this is the last cheap moment to fix them. In bathrooms, treat mildew first — paint over it just seals it in.
Let the wall dry fully after washing — even slightly damp drywall dilutes the first coat and weakens adhesion.
Flat paint hides small flaws; satin shows them. The higher your sheen, the more this step matters.
STEP 07Primer: When You Actually Need It
Primer is a $20 insurance policy you need sometimes. You need it when: painting light over dark (old color ghosts through without it), the wall has spackle patches (they absorb unevenly), or you’re covering stains or glossy oil paint.
You can skip primer when painting a similar or darker color over clean latex — modern paints are self-priming for recoats. One coat takes 30 minutes plus dry time. When in doubt, prime — cheaper than the extra gallon you’d burn fighting bleed-through.
When in doubt, prime — one primer coat costs less than the extra gallon you’d burn fighting bleed-through.
Never skip primer over spackle patches — bare spackle absorbs paint differently and flashes as dull spots through the topcoat.
STEP 08Cutting In the Edges
Cutting in — brushing the borders the roller can’t reach — is the skill step. Load your angled sash brush a third up the bristles, tap off the excess, and draw a 2–3 inch band along ceiling, corners, baseboards, and trim. Work in 12–18 inch sections, long edge leading.
The technique: lay paint on thick near the tape, then feather it back so there’s no ridge where the roller overlaps. Cut in one section at a time, then immediately roll it while the edge is still wet — rolling into wet cut-in lines blends them invisibly. Wobbly line? Let it dry and touch it up later.
Cut in one section, then immediately roll it — rolling into a wet cut-in edge blends the two invisibly. Dried edges show as picture-framing.
Don’t overload the brush — drips at the ceiling line are the classic beginner tell. Tap, don’t wipe, and two thin passes beat one loaded one.
STEP 09Rolling Like a Pro
Pour paint into the tray, load the roller with a few passes, then roll it on the tray’s ridges until evenly saturated — not dripping. Start in a W pattern about 3 feet wide, fill it in with parallel strokes, working top to bottom.
Keep a wet edge: always roll into the still-wet previous section. Use light, even pressure — pressing hard leaves ridges. Overlap each pass by half a roller width. One wall takes 20–30 minutes; the trick is steady pace and an evenly loaded roller.
Roll in a W pattern first, then fill — it distributes paint evenly and kills the lap marks that straight up-and-down strokes leave.
Never press hard on the roller — heavy pressure squeezes paint out the ends and leaves ridges that dry into visible stripes.
STEP 10Timing the Second Coat
One coat is never enough — the second coat gives full, even color. But recoat too soon and the roller lifts the tacky first coat into bald patches. Wait until it’s dry to the touch: typically 2–4 hours for latex, per the can’s label.
Humidity is the hidden variable — in damp weather, double the label’s recoat time. Paint on a dry day with the room ventilated (open windows, fan on low). The second coat goes on like the first: cut in, then roll. This is the coat where the color finally reads as the swatch promised.
Read the can’s recoat time and add an hour in humid weather — rolling over a tacky first coat lifts it into bald patches.
Painting in humidity doubles dry time. A fan on low across the room helps; a fan blasting the wall skins the surface and traps wet paint underneath.
STEP 11Removing Tape Cleanly
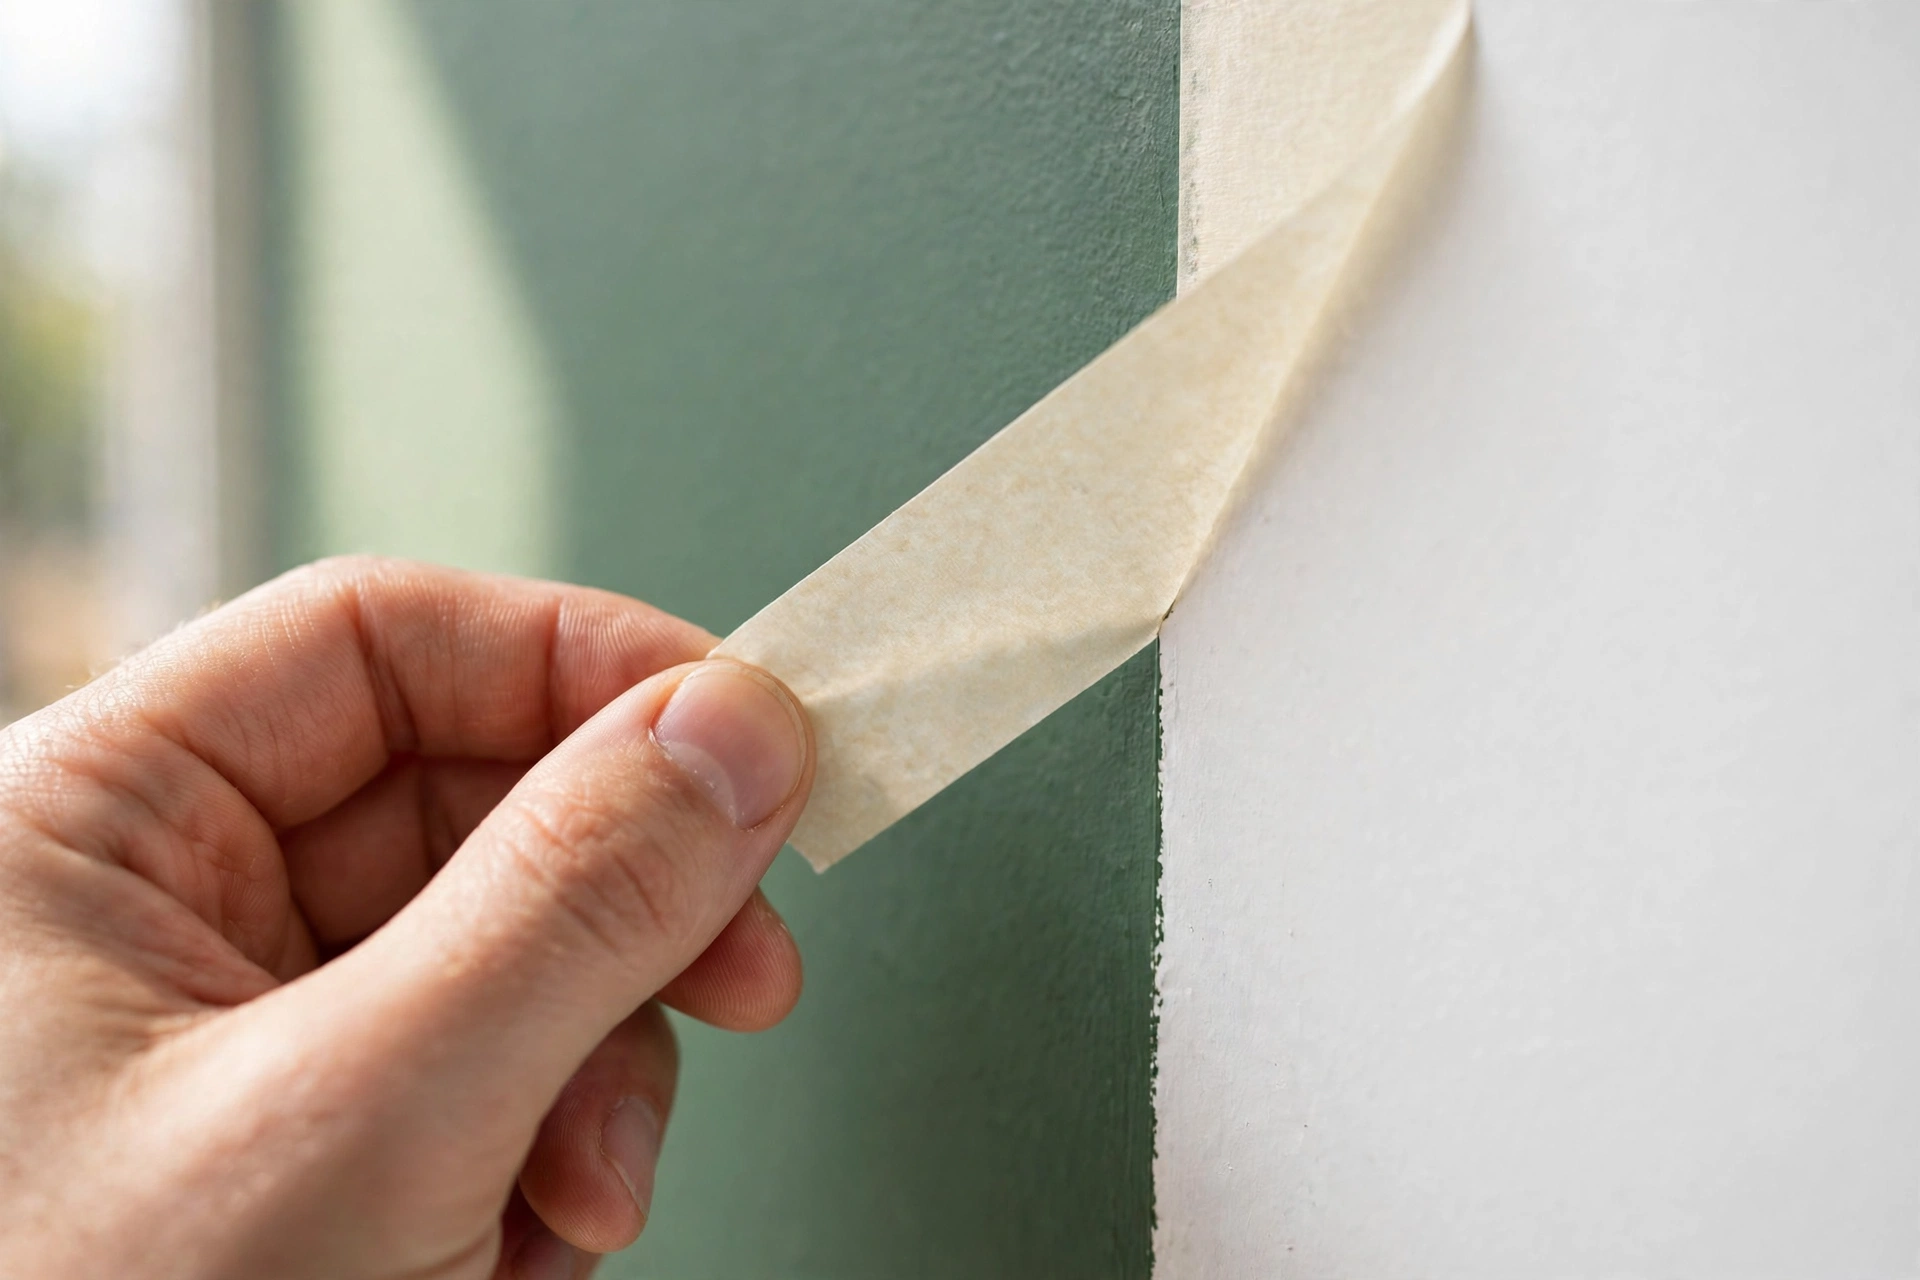
Tape removal is a 10-minute step that makes or breaks the whole wall. Pull the tape while the final coat is still slightly tacky — fully dry paint bonds to the tape and tears; fully wet paint bleeds.
Pull slowly at 45 degrees, back over itself, in one continuous motion per strip. If a section resists, score the edge lightly with a utility knife first. Tiny bleeds wipe off instantly while fresh, and become permanent touch-ups once dry. This single step is the difference between “designed” and “DIY.”
Pull tape while the last coat is slightly tacky — the paint edge is still flexible and releases cleanly. Fully dry paint tears.
Removing tape too late is the #1 cause of ragged lines. Set a timer if you have to — tacky, not dry, not wet.
STEP 12Touch-Ups That Disappear
Every accent wall needs touch-ups — the goal is making them invisible. Use a small artist’s brush: dab (don’t stroke) tiny amounts of paint onto bleeds and chips, feathering the edges so there’s no outline.
Two rules: touch up with the same can (a new can of the “same” color can differ by batch), and keep each fix as small as possible — fresh paint over cured paint can flash a different sheen. Step back six feet after each fix — invisible from there means done.
Touch up with the same can — even the “same” color from a new can can differ by batch and flash as a visible patch.
The six-foot test: step back after each fix. If it disappears from six feet, it’s done — stop fiddling.
STEP 13Drying vs. Curing: Hands Off
Dry and cured are not the same — and this ruins more accent walls than bad technique. Dry to the touch (2–4 hours): safe to brush lightly. Ready for tape or hanging (24 hours): survives careful contact. Fully cured — maximum hardness, washable — takes 2–4 weeks for latex.
Practical rules: nothing hangs or leans on the wall for 48 hours; no scrubbing for a month; in week one, treat it like it’s still wet — chemically, it nearly is. Dark colors cure hardest and longest. Rushing this step is how picture frames end up stuck to the wall.
Nothing touches the wall for 48 hours — no art, no leaning furniture. Frames hung too early bond to uncured paint.
Don’t wash or scrub the wall for a month. Cleaning uncured latex paint dulls the finish permanently.
STEP 14Cleanup and Paint Storage
Clean tools immediately — dried latex ruins brushes. Wash in warm soapy water until it runs clear, shake out the water, and reshape bristles before they dry. Peel the skin off the tray liner and toss it.
For leftover paint: wipe the rim clean, tap the lid shut, and store upside down somewhere cool and dry — the paint seals the lid airtight. Label the can with room, date, and color formula; photograph the formula too. Stored right, latex lasts 2–5 years. Never pour paint down drains.
Store the can upside down — the paint forms an airtight seal against the lid and lasts years longer.
Label every can with room + date and photograph the color formula — future-you will thank present-you at touch-up time.
STEP 15Styling the Finished Wall
The paint is done — now make it look intentional. An accent wall earns its keep when something sits in front of it: the headboard, a console with art above, a reading chair with a lamp. Bare painted walls read as “unfinished”; furnished ones read as “designed.”
Styling rules: contrast the art — light frames pop on dark walls, dark frames anchor light ones. Keep the center clear or hang one large piece. Add texture in front — a plant, a woven basket. And light it: a warm lamp aimed at the wall doubles the drama after dark. Wait 48 hours before hanging anything — then enjoy the room’s new focal point.

Put something in front of it — a painted wall with nothing anchored to it reads as unfinished, not as a feature.
A warm lamp aimed at the wall at night doubles the drama — accent walls are a two-shifts-a-day feature.
Which Wall Should Be the Accent Wall?
The short version of Step 1, with the painter’s specifics: paint the flattest, least broken-up wall in the room’s sight line. Flat matters for paint — every door frame, vent, and outlet you cut around is a chance for a wobbly line, and one clean expanse paints twice as fast as a chopped-up wall.
Rank your candidates: behind the bed (the #1 accent wall — big, flat, already the room’s focus), behind the sofa/TV, entryway wall. Avoid: the window wall (daylight flattens color into glare and shows every lap mark), walls with more than two openings, and the wall behind open shelving. One wall only — in small rooms, a second painted wall reads as “half-painted room,” not design.
Choose the flattest wall in the sight line — every door frame and vent you cut around is a chance for a wobbly line.
Never the window wall: daylight washes color into glare and exposes every roller lap mark you left.
Paint Colors for Small Rooms
Small rooms don’t forbid bold walls — they change the rules. Painting an accent wall in a compact space works best with saturated mid-tones: deep sage, terracotta, dusty navy, warm olive. They give drama without the cave effect of near-black, and recede visually so the wall feels farther away.
The small-room playbook: one accent wall only, keep the other walls light and warm (not stark white — warm white keeps the contrast from feeling harsh), and repeat the accent color in two or three small doses — a cushion, a throw, a plant pot — so the wall feels connected to the room. Dark colors need more light: in low-daylight rooms, stay in the mid-tone range and let lamps do the evening work. Always run the 48-hour poster-board test — small rooms punish color mistakes faster because you’re always close to the wall.
Repeat the accent color in two or three small accessories — a cushion, a throw — so the wall feels connected, not dropped in.
Saturated mid-tones (sage, terracotta, dusty navy) give small rooms drama without the cave effect of near-black.
In low-daylight rooms, skip near-black — without light to play against, dark walls just read as dark, not dramatic.
Renter Rules: Painting in a Rental
- Get written permission first. A text or email from your landlord beats verbal memory at move-out — save it. Many leases allow painting with a repaint clause.
- Know your repaint clause. Most require returning walls to the original color — budget one primer coat plus two topcoats per wall at move-out, roughly $40 and an afternoon.
- Photograph everything. Before-and-after photos protect your deposit in a condition dispute — date-stamped, saved somewhere safe.
- Never paint over problems to hide them. Painting over mildew or water stains without fixing the cause can make you liable — report issues, then paint.
Verbal permission evaporates at move-out inspection. Get the yes in writing — a text message counts.
Budget the move-out repaint now: one primer coat plus two topcoats, about $40 and an afternoon per wall.
5 Mistakes to Avoid
- Skipping primer on dark walls. Light over dark without primer takes four coats and still ghosts. One $20 primer coat saves two topcoats — always prime light-over-dark.
- Cheap brushes and rollers. Bargain brushes shed bristles into the finish; cheap covers leave lint. A $12 angled brush and quality 3/8-inch covers are the highest-ROI upgrade in the project.
- Painting in humidity. Damp air doubles dry times, and a second coat over tacky paint lifts into bald patches. Paint on dry days, ventilate, and add an hour to the can’s recoat time when humid.
- One thick coat instead of two thin ones. Thick coats drip, sag, and cure slowly. Two thin coats dry faster, look smoother, and use less paint — every pro paints thin.
- Removing tape too late. Dry paint bonds to the tape edge and tears, leaving ragged lines. Pull while the final coat is slightly tacky, at 45 degrees, in one continuous pull.
FAQs
01How much paint do I need for one accent wall?
One gallon covers 350–400 square feet — and a standard 10×12 ft wall is about 120 square feet, so one gallon gives you two full coats with paint left for touch-ups. Heavily textured walls drink more, so buy a quart extra. The expensive mistake is buying two gallons “to be safe”; the cheap mistake is buying a quart and running out mid-second-coat.
02Do I need primer before painting an accent wall?
Sometimes — not always. You need primer when painting light over dark, over bare spackle or drywall patches, over stains, or over glossy oil-based paint. You can skip it when recoating clean latex paint in a similar or darker color. One coat takes 30 minutes and costs about $20; when in doubt, prime — it’s cheaper than the extra gallon you’d burn fighting bleed-through.
03How long should I wait between coats of paint?
Wait until the first coat is dry to the touch — typically 2–4 hours for latex at room temperature. Check the can’s recoat time and treat it as a minimum. Humidity changes everything: in damp weather, double the label time. Recoating too soon is a classic DIY failure — the roller lifts the tacky first coat and leaves bald patches no third coat fully fixes.
04Can I paint over a dark accent wall with a lighter color?
Yes — with primer. One coat of quality primer seals the dark color so it can’t ghost through, then two topcoats finish the job. Skipping primer means three to four topcoats and often a faint shadow anyway. Use stain-blocking primer for very saturated colors like deep red or navy, and budget an extra day for the primer’s dry time.
05What is the best paint finish for an accent wall?
Eggshell is the safest default — soft sheen, washable, hides minor flaws. Matte gives the richest color and hides every roller mark — ideal for bedrooms and dark walls — but scuffs more easily. Satin suits hallways and kids’ rooms, though it shows imperfections more. Skip semi-gloss and gloss for DIY — high sheen magnifies every flaw.
06How do I get clean, sharp paint lines?
Three things: quality tape, sealed edges, timely removal. Use real painter’s tape, press every edge with a credit card so paint can’t bleed underneath, and pull the tape while the final coat is slightly tacky — at 45 degrees, one continuous pull. Dry paint tears and leaves ragged edges; for the crispest ceiling line, cut in freehand with a good angled brush.
Key takeaways
- Prep is 70% of the job. Move, cover, tape, clean — every shortcut shows in the finished wall.
- Two thin coats beat one thick coat — faster drying, smoother finish, less paint used.
- Respect the timing: recoat only when dry to the touch, pull tape while tacky, hang nothing for 48 hours, and give the wall a month to fully cure.
- Buy quality paint and tools — a $55 gallon and a $12 brush outperform budget gear on every metric that matters.