 Casacrunched
15 Limewash Accent Wall Ideas With Movement, Not Flat Color
Limewash is what flat paint wishes it was — soft movement, old-world depth, zero glare. Fifteen limewash accent wall ideas, from classic white to terracotta to dark charcoal, with brush technique guidance.
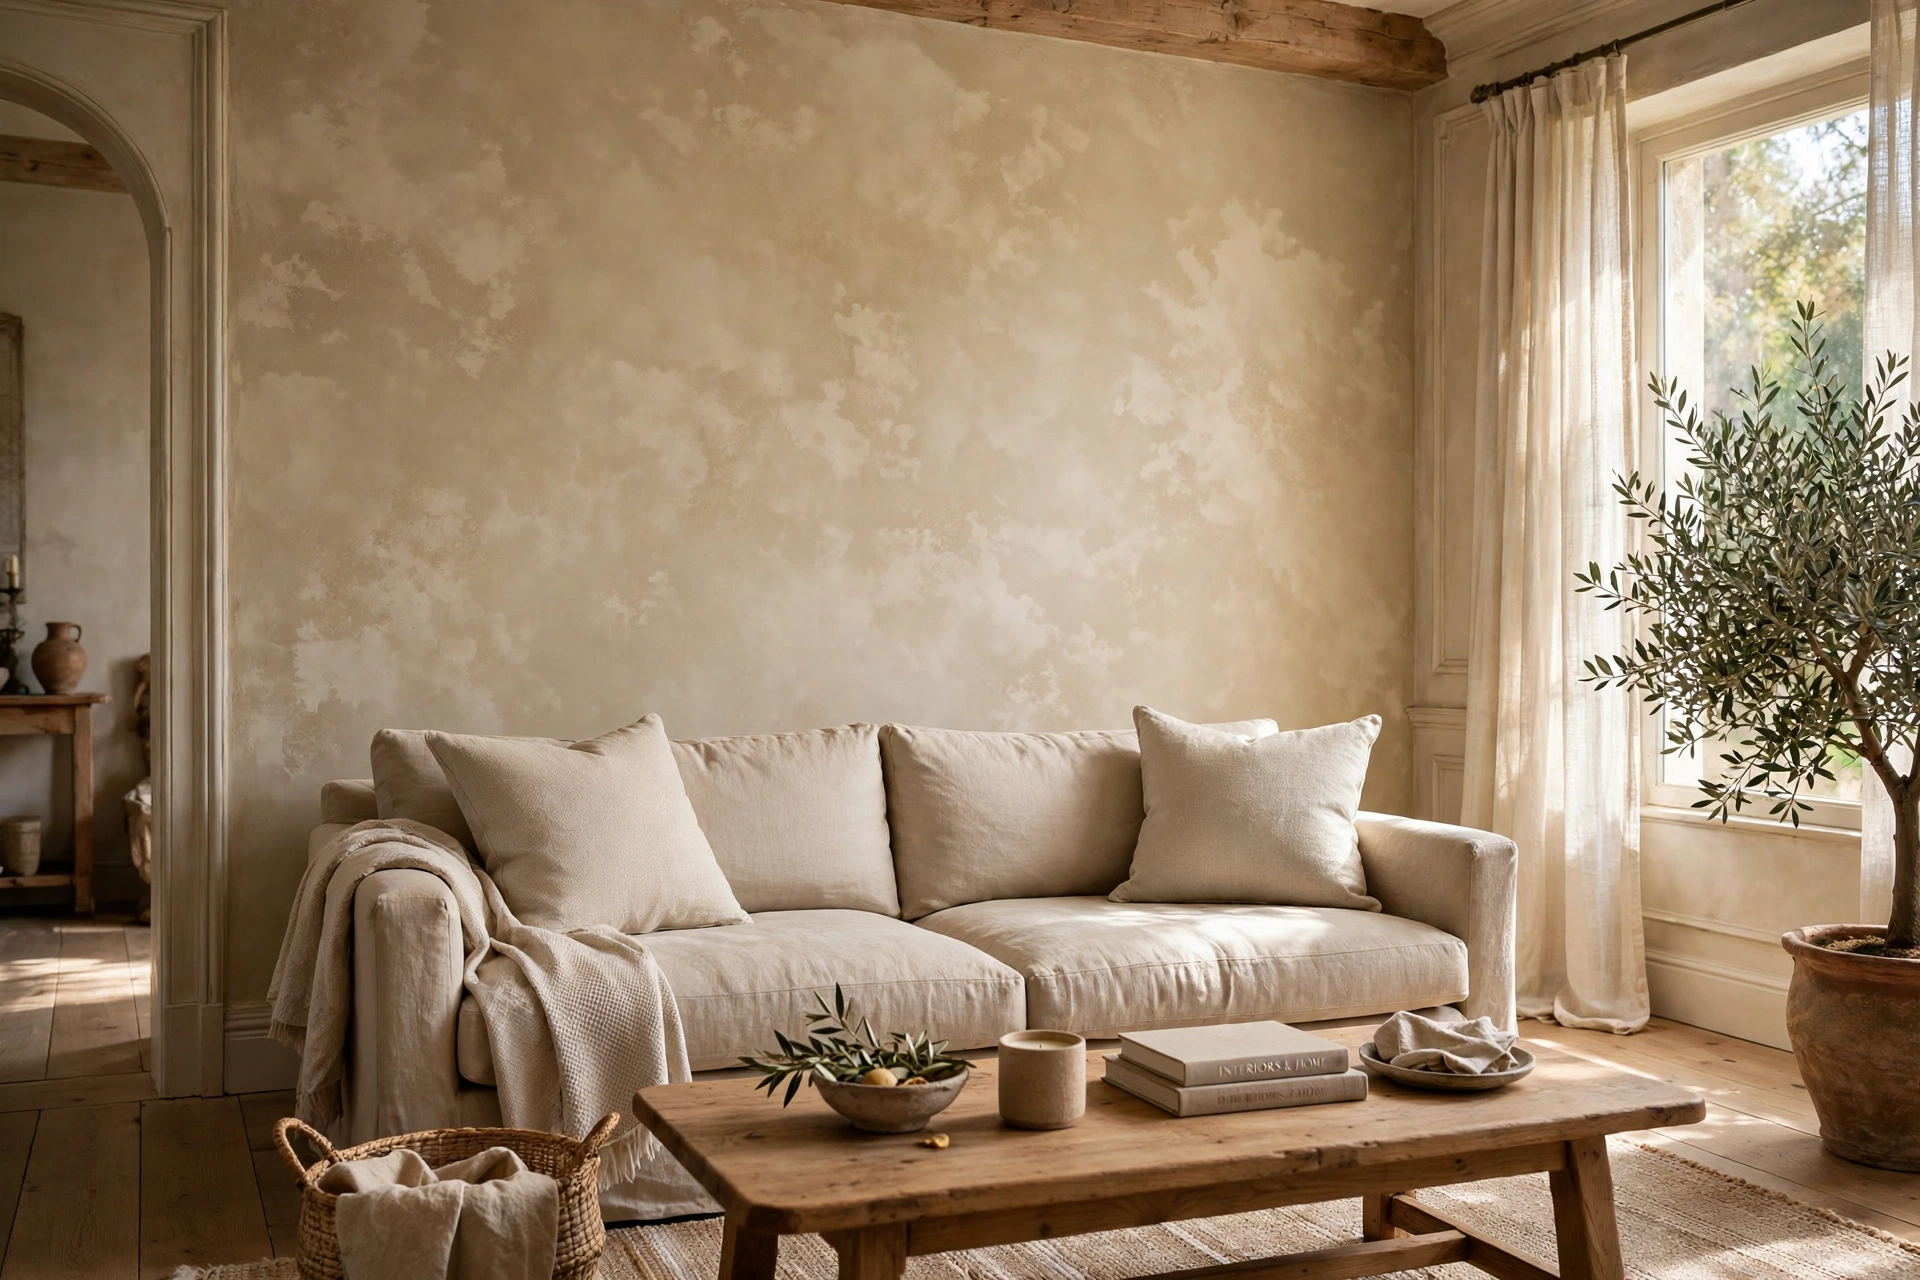
Flat paint covers a wall. Limewash finishes it. The difference is movement: crushed limestone and mineral pigments brushed on in loose, overlapping strokes dry into a soft, cloudy texture — light and shadow shifting across the wall all day, like plaster in an old Mediterranean house. No roller can fake it, and no flat color can match its depth. A limewash accent wall is what flat paint wishes it was: soft movement, old-world depth, and zero glare.
Fifteen limewash ideas, each with brush technique, coat counts, drying notes, real product guidance, and honest costs — so your wall reads like plaster, not like a paint mistake.
On this page
- Quick comparison table
- 1. Classic white limewash
- 2. Warm beige limewash
- 3. Sage green limewash
- 4. Terracotta limewash
- 5. Dark charcoal limewash
- 6. Limewash behind the bed
- 7. Limewash fireplace wall
- 8. Limewash in the bathroom
- 9. Limewash + wood combo
- 10. Limewash ceiling
- 11. Limewash two-tone
- 12. Limewash on brick
- 13. Limewash hallway
- 14. Limewash + arches
- 15. Limewash with plaster texture
- Which wall for limewash?
- The limewash color guide
- Renter rules
- 5 mistakes to avoid
- FAQs
Quick comparison: cost, time, finish, renter score
| # | Idea | Finish / texture | Cost / wall | Time | Renter-friendly? |
|---|---|---|---|---|---|
| 1 | Classic white limewash | Soft cloudy white | $70–$130 | Full day | Yes (repaint) |
| 2 | Warm beige limewash | Sunlit plaster | $70–$130 | Full day | Yes (repaint) |
| 3 | Sage green limewash | Soft mineral green | $70–$130 | Full day | Yes (repaint) |
| 4 | Terracotta limewash | Baked-earth movement | $70–$140 | Full day | Yes (repaint) |
| 5 | Dark charcoal limewash | Moody mineral depth | $80–$150 | Full day | Yes (repaint) |
| 6 | Limewash behind the bed | Cocoon texture | $70–$130 | Full day | Yes (repaint) |
| 7 | Limewash fireplace wall | Soft hearth texture | $80–$150 | Full day | Yes (repaint) |
| 8 | Limewash in the bathroom | Mineral, moisture-safe | $90–$170 | Full day + cure | Ask first |
| 9 | Limewash + wood combo | Soft + warm grain | $120–$250 | Full day | French cleat: yes |
| 10 | Limewash ceiling | Clouded overhead | $80–$150 | Full day | Yes (repaint) |
| 11 | Limewash two-tone | Two mineral tones | $90–$160 | Full day | Yes (repaint) |
| 12 | Limewash on brick | Softened masonry | $80–$150 | Full day | Ask first |
| 13 | Limewash hallway | Glowing passage | $70–$130 | Full day | Yes (repaint) |
| 14 | Limewash + arches | Mediterranean curves | $90–$170 | Full day | Ask first |
| 15 | Limewash with plaster texture | Deepest artisan finish | $130–$260 | 1–2 days | Ask first |
IDEA 01Classic White Limewash — the Old-World Starter
White limewash is where most people meet this finish, and it is the perfect first wall: the same white you already live with, but with depth, shadow, and hand. Where flat white reads as primer, white limewash reads as plaster — soft tonal shifts through the day, edges that catch light differently at noon and at dusk. It is the least risky limewash and the most transformative white you will ever paint.
Technique: one coat of mineral primer first (limewash grips poorly on bare drywall and sealed paint), then two thin coats with a block brush in loose, random crisscross strokes — never straight up and down, never in rows. The randomness is the finish. $70–$130 for primer, limewash, and a block brush, a full day including drying between coats.
White limewash is the best fix for a wall with patched drywall — the texture swallows seams and roller marks that flat paint would advertise.
IDEA 02Warm Beige Limewash — Sunlit Plaster, No Renovation
Warm beige limewash is sunlight you can paint: a sandy, sun-warmed neutral with the cloudy movement that makes it read as old plaster, not new paint. In a living room it does what a vacation rental in the Mediterranean does — it makes the whole room feel warmer without a single warm-colored object in it. This is the limewash for people who love white walls but find them flat.
Technique: two coats over mineral primer, block brush, crisscross strokes with slightly longer, looser passes than white — beige shows stroke direction more, so vary your angles on every pass. Drying warning: beige limewash dries noticeably lighter than it looks wet, so judge the color only after a full dry. $70–$130, a full day.
Beige limewash dries lighter than it looks wet — the wet wall lies. Wait a full 24 hours before deciding the color is too pale.
IDEA 03Sage Green Limewash — the Calm One
Sage in limewash form is the calmest wall in this article: a desaturated green softened further by mineral texture, so it reads less like a color and more like a mood. In a bedroom it is the color equivalent of a deep breath — restful without being boring, present without demanding attention. Sage limewash flatters skin tones, which is why it works behind beds and sofas where people actually sit.
Technique: two coats, block brush, with a lighter touch than beige — sage shows heavy brush pressure as darker streaks, so keep strokes feather-light and overlapping. One coat often looks patchy; the second coat is where sage evens out. $70–$130, a full day.

Sage limewash is the most forgiving color for a first-timer — its desaturation hides uneven strokes better than any dark or warm tone on this list.
IDEA 04Terracotta Limewash — Baked-Earth Warmth
Terracotta is limewash’s natural home: a baked-earth color with mineral texture reads as clay, not paint — the wall looks like it was formed, not coated. In a small room terracotta’s warmth pulls the accent wall slightly toward you, making the space feel wrapped and intentional instead of boxy and blank. It is the north-facing room’s best friend: cool daylight turns most colors chilly, but terracotta glows at golden hour.
Technique: two coats over mineral primer, but go one shade deeper than you would in flat paint — limewash texture softens color, so terracotta loses some punch as it dries. Brush in wide crisscross passes; terracotta rewards bold, visible strokes. $70–$140, a full day. Pairs with: cream linen, light oak, black metal, olive plants.

Terracotta limewash over white primer without a tinted mineral primer underneath can go patchy — tint the primer toward the finish color for even coverage.
IDEA 05Dark Charcoal Limewash — Moody Mineral
Dark charcoal in limewash is drama with manners: the mineral texture breaks up the darkness so it reads as depth, not a void — the difference between a cave and a cocoon. The cloudy finish catches lamplight in a way flat charcoal never does, so the wall stays alive after dark instead of disappearing into it. This is the limewash for bedrooms and living rooms where mood is the point.
Technique: mineral primer is non-negotiable here — dark limewash over white primer streaks badly. Two full coats, block brush, crisscross strokes, and do not rush the second coat: dark limewash needs the first coat fully dry or the second coat lifts it. $80–$150, a full day.
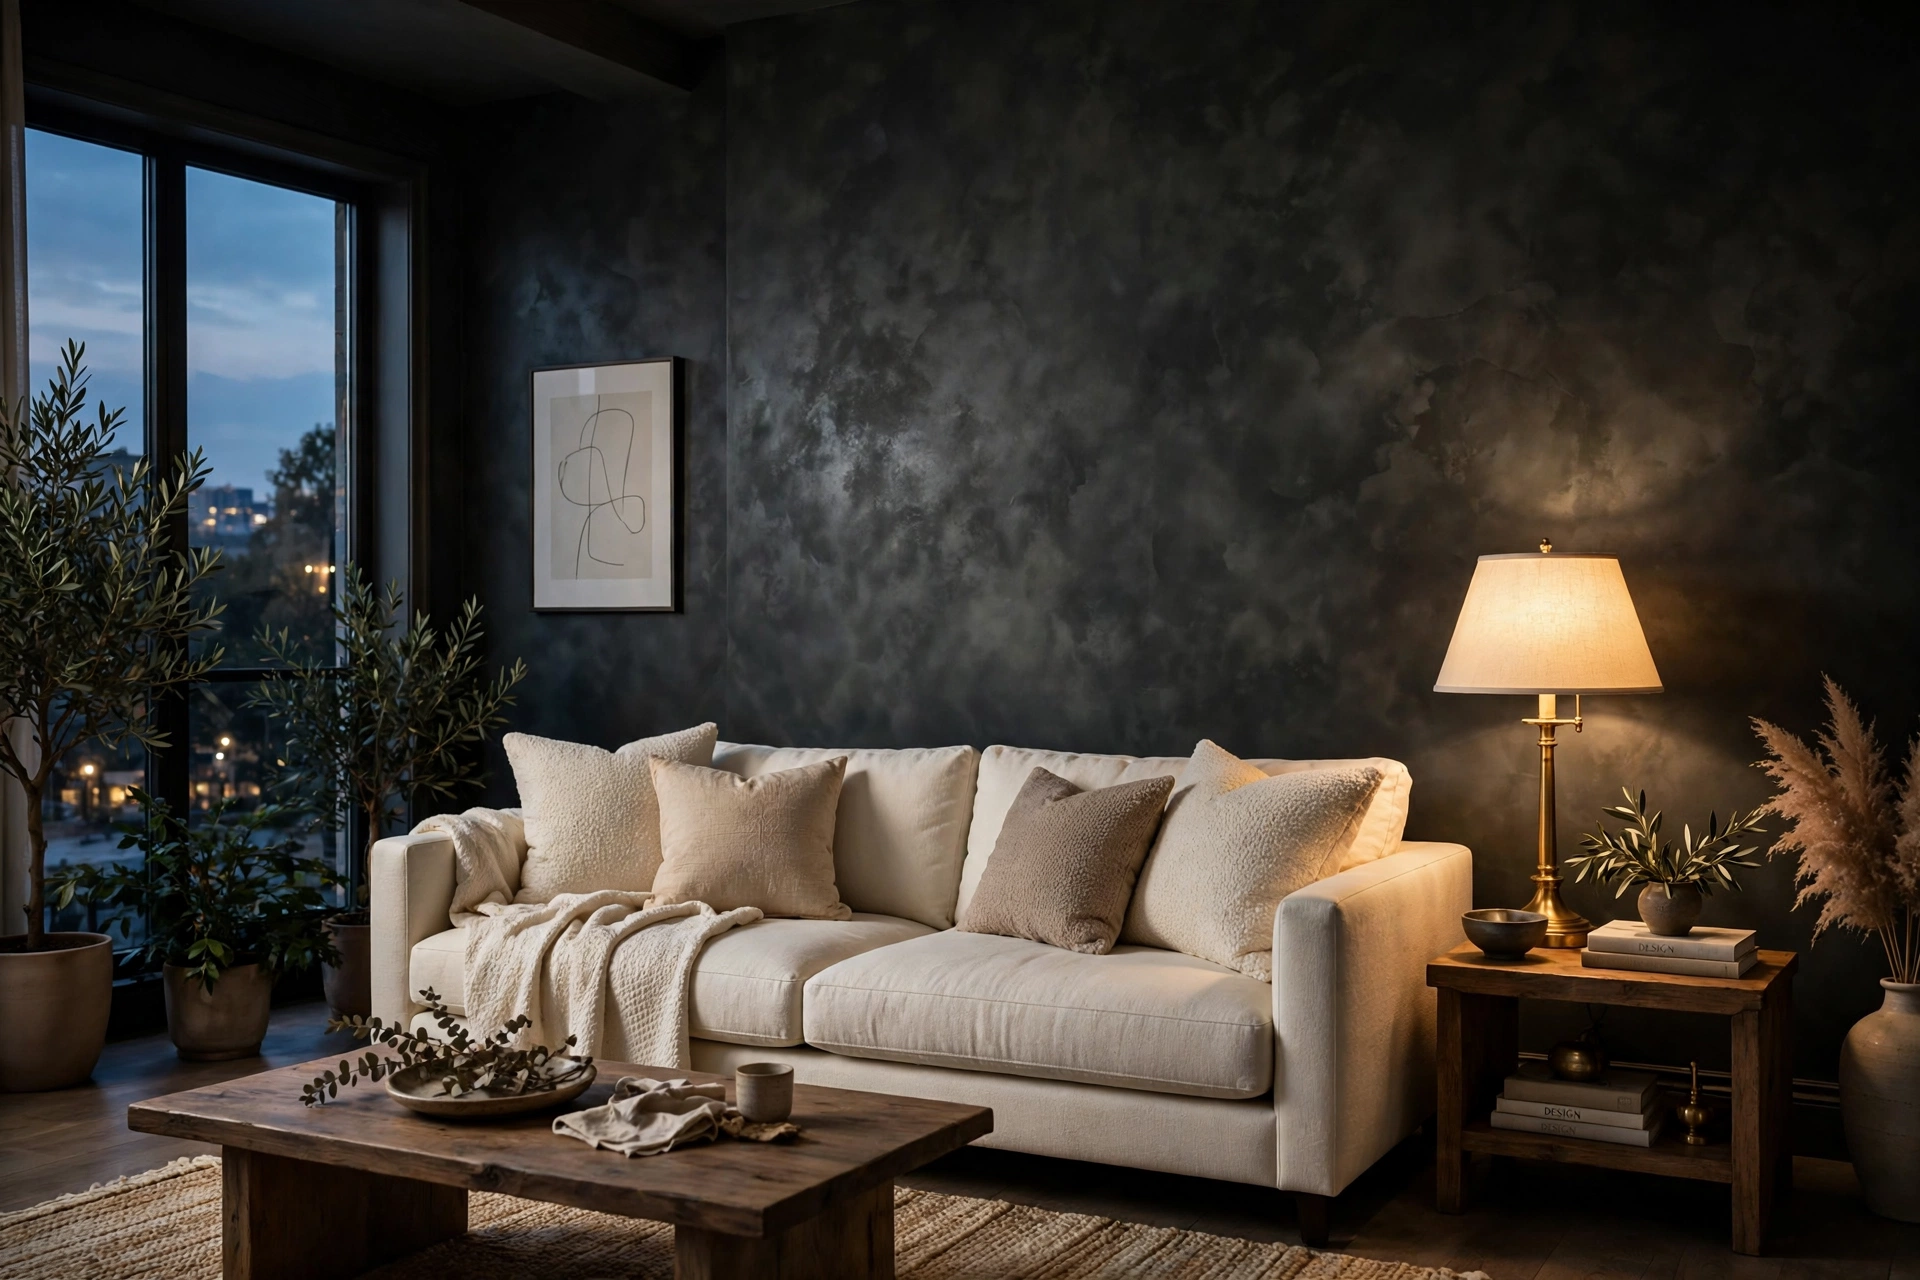
Dark limewash in a windowless room with warm bulbs turns into a cave. If the room is dark, pick idea 2 or 3 instead.
IDEA 06Limewash Behind the Bed — the Cocoon Wall
The bed wall is limewash’s best stage: it is the wall you see first from the doorway, the wall behind your head for eight hours a night, and the wall that sets the bedroom’s whole mood. Limewash texture behind a bed reads as a headboard the size of the wall — soft, enveloping, and far more interesting than a flat painted wall with a wooden headboard bolted to it.
Best colors: sage (idea 3) for calm, warm beige (idea 2) for warmth, charcoal (idea 5) for drama — in that order of safety. Technique: two coats, block brush, working top to bottom so drips fall onto wet paint, not dry. The headboard hides the lower third, so spend your best strokes on the visible upper two-thirds. $70–$130, a full day.
Paint the bed wall before the headboard goes back up — cutting in around a mounted headboard is how limewash gets its only visible mistakes.
IDEA 07Limewash Fireplace Wall — Hearth, Softened
A fireplace wall in limewash solves the hearth’s classic problem: brick or stone fireplaces can dominate a small room, and flat paint over them looks like a cover-up. Limewash softens without hiding — the mineral finish sits on masonry like it belongs there, because it does: limewash was made for stone and plaster centuries before drywall existed. The result is a fireplace that feels original to the house, not renovated onto it.
Technique: masonry needs a mineral primer rated for brick and stone, not the drywall version — check the label. Two coats with a block brush, working the mortar joints as part of the texture rather than fighting them. Heat note: keep limewash off the firebox surround itself — that surface wants heat-rated paint. $80–$150, a full day.
Never limewash inside the firebox or on surfaces that get direct flame heat — mineral paint is durable, not fireproof. Keep it to the wall and mantel surround.
IDEA 08Limewash in the Bathroom — Mineral Paint Rules
Limewash in a bathroom sounds wrong until you learn what it is: mineral paint is naturally alkaline, so it resists mold and mildew in a way latex paint can only dream of. Mediterranean bathrooms have used lime-based finishes for centuries, and the soft cloudy texture turns a small bathroom from clinical to spa-like in one wall. The catch is moisture management — limewash breathes, which is a feature, not a flaw, but only if the wall can dry.
Rules: use a limewash formulated for wet areas (not every limewash qualifies — check for bathroom or wet-room rating), keep it off the direct splash zone, and make sure the bathroom has working ventilation. Two coats over mineral primer, full cure before the first steamy shower — usually 48 hours. $90–$170, a full day plus cure time.
Limewash breathes — moisture passes through it instead of trapping behind it, which is why it survives bathrooms where latex paint peels. The wall must be able to dry between showers, so ventilation matters more than the product.
Direct, constant water contact defeats any limewash. Keep it on the dry wall — the vanity wall or the wall opposite the shower — never inside the shower enclosure.
IDEA 09Limewash + Wood Combo — Soft Meets Warm
Limewash’s classic complaint is that it can feel too soft, too ethereal — a room of clouds with nothing to hold onto. Wood is the anchor. A limewash wall with oak slats, a walnut shelf, or a timber console against it gains instant grounding: the wood’s grain and warmth give the eye something solid, and the limewash makes the wood read richer by contrast. It is the combination behind half of modern Mediterranean design.
Best pairing: warm beige limewash (idea 2) with light oak — tones match, nothing fights. Sage limewash with walnut is the moodier version. Wood placement: slats on a French-cleat backer over the finished limewash, or a single floating oak shelf breaking the mineral field. $120–$250 depending on timber, a full day. Renters: the cleat backer comes down clean.
Finish the limewash and let it cure fully before mounting anything — hardware pressed into uncured limewash leaves marks that never brush out.
IDEA 10Limewash Ceiling — the Fifth Wall, Clouded
The ceiling is the most overlooked accent surface in the house, and limewash is the best reason to finally use it: a clouded mineral ceiling turns a flat white lid into sky — soft, shifting, and quietly spectacular in a room with a statement light fixture hanging below it. In a small room, a limewashed ceiling in a pale tone adds perceived height, because the eye reads texture as distance.
Technique: this is the one limewash job where a roller plus block-brush finishing beats brush-only — rolling the first coat overhead saves your shoulders, then cross-brushing while wet creates the movement. Two coats, mineral primer, drop cloths everywhere: limewash drips are thinner than latex and travel further. $80–$150, a full day.
Ceiling limewash drips travel — cover everything below, including light fixtures, or the cloudy finish ends up on your sofa too.
IDEA 11Limewash Two-Tone — Light Above, Dark Below
Two limewash tones on one wall — light sage above, deep terracotta below, split at chair-rail height — give a room architecture mineral paint alone can’t: the darker lower half grounds the furniture, the lighter upper half keeps the ceiling feeling high, and both halves carry the cloudy texture that ties them together. It is the oldest dining-room trick, rebuilt in mineral paint.
Rules: the split line sits at 30–36 inches (chair-rail height) or at two-thirds up for a modern color block. Keep both tones in the same family — warm with warm, earthy with earthy — or the wall reads as two unrelated colors. A thin wood chair rail hides the seam. $90–$160 for two colors plus primer, a full day.
Seal the tape edge with the base tone first — the darker limewash can’t bleed under sealed tape, and the line stays razor-sharp.
IDEA 12Limewash on Brick — Taming Raw Brick
Raw brick is a commitment: red, rough, and loud in a small room. Limewash tames it without erasing it — a thinned limewash coat (sometimes called a German schmear’s mineral cousin) softens the red into rose and lets the brick texture show through, so the wall keeps its character at half the volume. It is the fix for a brick wall you inherited and can’t remove.
Technique: brick drinks limewash, so budget extra product — porous masonry can take twice the coverage estimate. One coat thinned for a wash effect, two for fuller coverage, block brush worked into the mortar joints. Test a hidden corner first: brick color varies, and the same limewash reads differently on red versus brown brick. $80–$150, a full day.
Limewash on brick is effectively permanent — it bonds with the masonry. Never do this in a rental without written permission, and never on a wall you might want red again.
IDEA 13Limewash Hallway — the Corridor That Glows
Hallways are where limewash quietly outperforms every other finish: narrow, often windowless, and lit by a single ceiling light — exactly the conditions where flat paint looks dead and limewash glows. The cloudy texture catches the overhead light and gives the corridor depth it has no right to have, turning the most ignored space in the house into one people comment on.
Best colors: warm beige (idea 2) and classic white (idea 1) — hallways need light tones, because dark limewash in a windowless corridor is a tunnel. Technique: two coats, block brush, working in short sections so wet edges never dry mid-wall — a dried lap line in limewash is permanent. $70–$130, a full day.
In a long hallway, work in 4-foot sections and feather each wet edge into the next — dried lap lines are limewash’s only unforgiving mistake.
IDEA 14Limewash + Arches — Mediterranean Curves
Arches and limewash were made for each other: the curve is the Mediterranean’s signature shape, and the mineral finish is its signature surface. A limewashed arched niche, doorway surround, or painted arch panel on a flat wall turns a plain room into a house that feels like it has a history — the arch gives the shape, the limewash gives the age.
Technique: paint the arch shape first in flat mineral primer (the edge is what matters), then limewash inside the arch with a smaller block brush — the curve needs short, careful strokes, not the wide passes of a flat wall. For a painted arch panel: tape the outline, limewash inside, peel the tape while the second coat is still slightly damp for the cleanest edge. $90–$170, a full day.
Peel arch tape while the second coat is still slightly damp — fully dry limewash can lift with the tape and take the crisp edge with it.
IDEA 15Limewash With Plaster Texture — the Deepest Finish
The deepest limewash finish starts before the limewash: a thin mineral plaster base coat — trowelled on, slightly uneven, with visible trowel sweeps — gives the limewash something to grip and something to show through. The result is the most artisanal wall in this article: real relief under cloudy color, shadow in the low spots, light on the high spots, a wall that looks a hundred years old on the day it dries.
Technique: one thin plaster base coat (mineral plaster, not joint compound — limewash bonds to mineral, not to gypsum dust), cured per the label, then mineral primer, then two limewash coats with a block brush following the plaster’s own direction. This is the slowest, most expensive idea here and the most forgiving of bad walls — plaster hides everything. $130–$260, one to two days.
Use real mineral plaster as the base, not joint compound — limewash bonds to mineral surfaces and can peel off gypsum dust. The label matters here.
Which Wall for Limewash? Placement Rules
Limewash is pickier about placement than flat paint, because its whole value is texture that light can play on. Rule one: the wall that catches light. Limewash needs raking light — sun or a lamp hitting the wall at an angle — to show its cloudy movement. A wall in flat, even light looks almost flat, and you paid for texture you can’t see. Stand in the room at 4 p.m. and pick the wall with visible light and shadow on it. Rule two: bedrooms and living rooms first. These are the rooms where you linger, where texture rewards looking — hallways second, kitchens and high-traffic walls last.
Rule three: never the window wall. A limewash wall with a window cut into it reads as fragments, and backlight flattens the texture you paid for. Rule four: avoid high-traffic scuff walls. Limewash’s dead-matte surface marks more easily than latex — the wall behind a scraping dining chair, or a hallway at shoulder height, will show wear fast. Rule five: one wall, full stop. Limewash’s power is contrast against flat walls; two limewash walls read as an unfinished plaster job. The one exception: a tiny powder room, where wrapping all walls in pale limewash turns it into a jewel box.
The 4 p.m. test: stand in the doorway at late afternoon and look at each wall. The one with visible light and shadow playing across it is your limewash wall.
Limewash on a wall that gets scraped daily — behind a dining chair, at hallway shoulder height — will show wear within months. Pick a wall people look at, not a wall people bump into.
The Limewash Color Guide: Earthy Neutrals, Sage, Terracotta, and Dark Drama
Limewash colors behave differently from flat paint colors, and the differences decide everything. Earthy neutrals (warm beige, classic white, pale stone) are the safest limewash colors — the mineral texture adds warmth to neutrals that flat paint leaves cold, and they suit every light direction. Sage is the calm middle: desaturated green softened further by texture, best for bedrooms and north-facing rooms. Terracotta is the warmest choice — baked-earth color that reads as clay, best for north-facing rooms and living rooms that need wrapping warmth. Dark drama (charcoal, deep green, near-black) is the boldest choice — the texture keeps dark walls alive after dark, but dark limewash demands one strong light source and one pale element, or it becomes a cave.
The key warning, repeated because it ruins more limewash jobs than any other mistake: limewash lightens as it dries, and the wet wall lies. A coat that looks rich and dark when wet can dry two shades lighter. Judge the color only after a full 24-hour dry — 48 for dark tones — and never repaint a wall that was already right. Related rule: go one shade deeper than you would in flat paint, because texture softens color. And test properly: a 2-foot square on the actual wall, checked at morning, afternoon, and evening light, after a full dry. Finish: dead matte, always — that zero glare is half its value on TV walls and bright rooms.
Limewash’s mineral pigments age differently from latex colorants: they fade more gracefully and never go chalky or plastic-looking, which is why old limewashed walls look better at year ten than new flat paint looks at year three.
Buy a sample pot and paint a 2-foot test square on the actual wall before committing to a gallon — limewash color shifts more between chip and wall than any flat paint does.
The most common limewash disaster: repainting a wall that was already right, because the wet coat looked too pale. Wait the full dry time. Every time.
Renter Rules: What You Can and Can’t Do
- Always safe: one-wall limewash in a light tone (primer plus landlord white covers everything at move-out), limewash on a removable panel or leaning board, hardware swaps you reverse.
- Safe with care: dark limewash (budget two primer coats at move-out — dark mineral pigment ghosts through one coat), limewash + wood on a French-cleat backer, limewash ceilings in light tones.
- Ask first, in writing: limewash on brick (effectively permanent), limewash with a plaster base coat (a permanent texture change), built arched niches, bathroom limewash. Photograph the wall on move-in day.
- Never: limewash on brick or plaster texture in a rental without written permission, or assume one coat of primer hides charcoal — dark mineral colors need two coats of quality primer, and textured walls show repairs. Keep the original paint color name for the move-out repaint.
Dark limewash is the repaint landlords notice most — budget two primer coats at move-out, or the mineral color ghosts through the new paint for years.
A $70–$130 limewash wall is one of the cheapest lease negotiations in existence — and a tasteful mineral accent is the one repaint landlords rarely object to, since it reads as an upgrade.
5 Mistakes to Avoid
- Expecting flat color. Limewash is movement, not uniform color. If you want a perfectly even wall, buy flat paint — judging limewash by flat-paint standards guarantees disappointment with a finish that was actually perfect.
- The one-coat shortcut. One coat of limewash looks patchy, streaky, and unfinished — because it is. The second coat is where the cloudy finish evens out and the texture becomes intentional. Skipping it is the single most common beginner error.
- Wrong brush technique. Straight up-and-down strokes, neat rows, or roller-only application all kill the finish — the texture comes from loose, random, overlapping crisscross strokes with a block brush. Neatness is the enemy here.
- Skipping the mineral primer. Limewash grips poorly on bare drywall and sealed latex paint. Without mineral primer it streaks, lifts, and bonds unevenly — and dark tones over white primer go patchy in a way no second coat fixes.
- Dark limewash + no light. A dark mineral wall in a windowless room with warm bulbs doesn’t read as moody — it reads as a cave. Dark limewash needs one strong light source and one pale element, or it fails the way flat dark paint fails, just more expensively.
FAQs
01What is limewash paint?
Limewash is a mineral paint made from crushed limestone, water, and natural pigments — one of the oldest wall finishes in the world, used on Mediterranean plaster and stone for centuries. Unlike latex paint, which forms a plastic film on the wall, limewash bonds with the mineral surface underneath and dries to a soft, cloudy, matte texture with visible brush movement. It breathes, letting moisture pass through instead of trapping it.
02How is limewash different from regular paint?
Three differences matter. Texture: limewash dries cloudy and hand-brushed, while regular paint dries flat and uniform — movement versus evenness. Finish: limewash is dead matte with zero glare, while latex comes in eggshell, satin, and gloss. Behavior: limewash bonds with mineral surfaces and breathes, so it resists mold naturally, while latex forms a sealed film that can trap moisture and peel.
03How much does a limewash accent wall cost?
For one standard 10-by-12-foot wall, budget $70–$150 DIY: mineral primer ($30–$50), a gallon of limewash ($50–$90), and a block brush ($20–$40). Dark colors, bathrooms, and masonry walls run higher ($90–$170) because they need tinted primer or wet-rated formulas. The plaster-texture finish (idea 15) runs $130–$260 with the base coat included. Hiring a painter roughly doubles the budgets.
04Can I use limewash in a bathroom?
Yes — with two conditions. First, use a limewash formulated for wet areas, since not every limewash carries a bathroom rating. Second, keep it off the direct splash zone — the wall opposite the shower or the vanity wall, never inside the shower enclosure. Limewash’s mineral alkalinity naturally resists mold, and because it breathes, moisture passes through instead of peeling it the way latex peels. The bathroom needs working ventilation, and the finish needs a full 48-hour cure before the first steamy shower.
05What are the best renter-friendly limewash options?
Ranked by impact and reversibility: one-wall limewash in a light tone (primer plus landlord white covers everything at move-out), limewash on a removable panel or leaning board (the texture with zero wall commitment), and limewash plus wood on a French-cleat backer (comes down clean). Avoid in rentals without written permission: limewash on brick, plaster-texture base coats, and built arched niches — all three are effectively permanent. Photograph the wall on move-in day, and budget two primer coats at move-out for dark tones.
06How do I apply limewash?
Five steps, in order. One: prep the wall — fill, sand, and clean it, since limewash texture hides small flaws but not big ones. Two: roll on one coat of mineral primer and let it dry fully. Three: brush the first limewash coat with a block brush in loose, random crisscross strokes — never straight lines or neat rows. Four: let it dry completely (the wet wall lies — it dries lighter), then brush a second coat the same way. Five: judge the color only after a full 24-hour dry, and leave the wall alone for 48 hours before hanging anything on it.
Key takeaways
- Limewash is movement, not flat color. A limewash accent wall succeeds on its cloudy, hand-brushed texture — judge it by plaster standards, not flat-paint standards, or you will repaint a wall that was already perfect.
- Two coats, mineral primer, block brush, crisscross strokes. Skip any one of those four and the finish fails — patchy, streaky, or lifting. The technique is the product.
- The wet wall lies. Limewash lightens as it dries — wait a full 24 hours (48 for dark tones) before judging the color, and go one shade deeper than you would in flat paint.
- One wall, raking light, dead matte. Pick the wall light plays across, keep it to one wall, and let the zero-glare mineral finish do the rest.