 Casacrunched
15 Accent Wall Behind Bed Ideas for a Stunning Bedroom
The wall behind your bed is the natural accent wall — it’s the first thing you see from the door. Fifteen ideas built around headboards, sight lines, and scale.
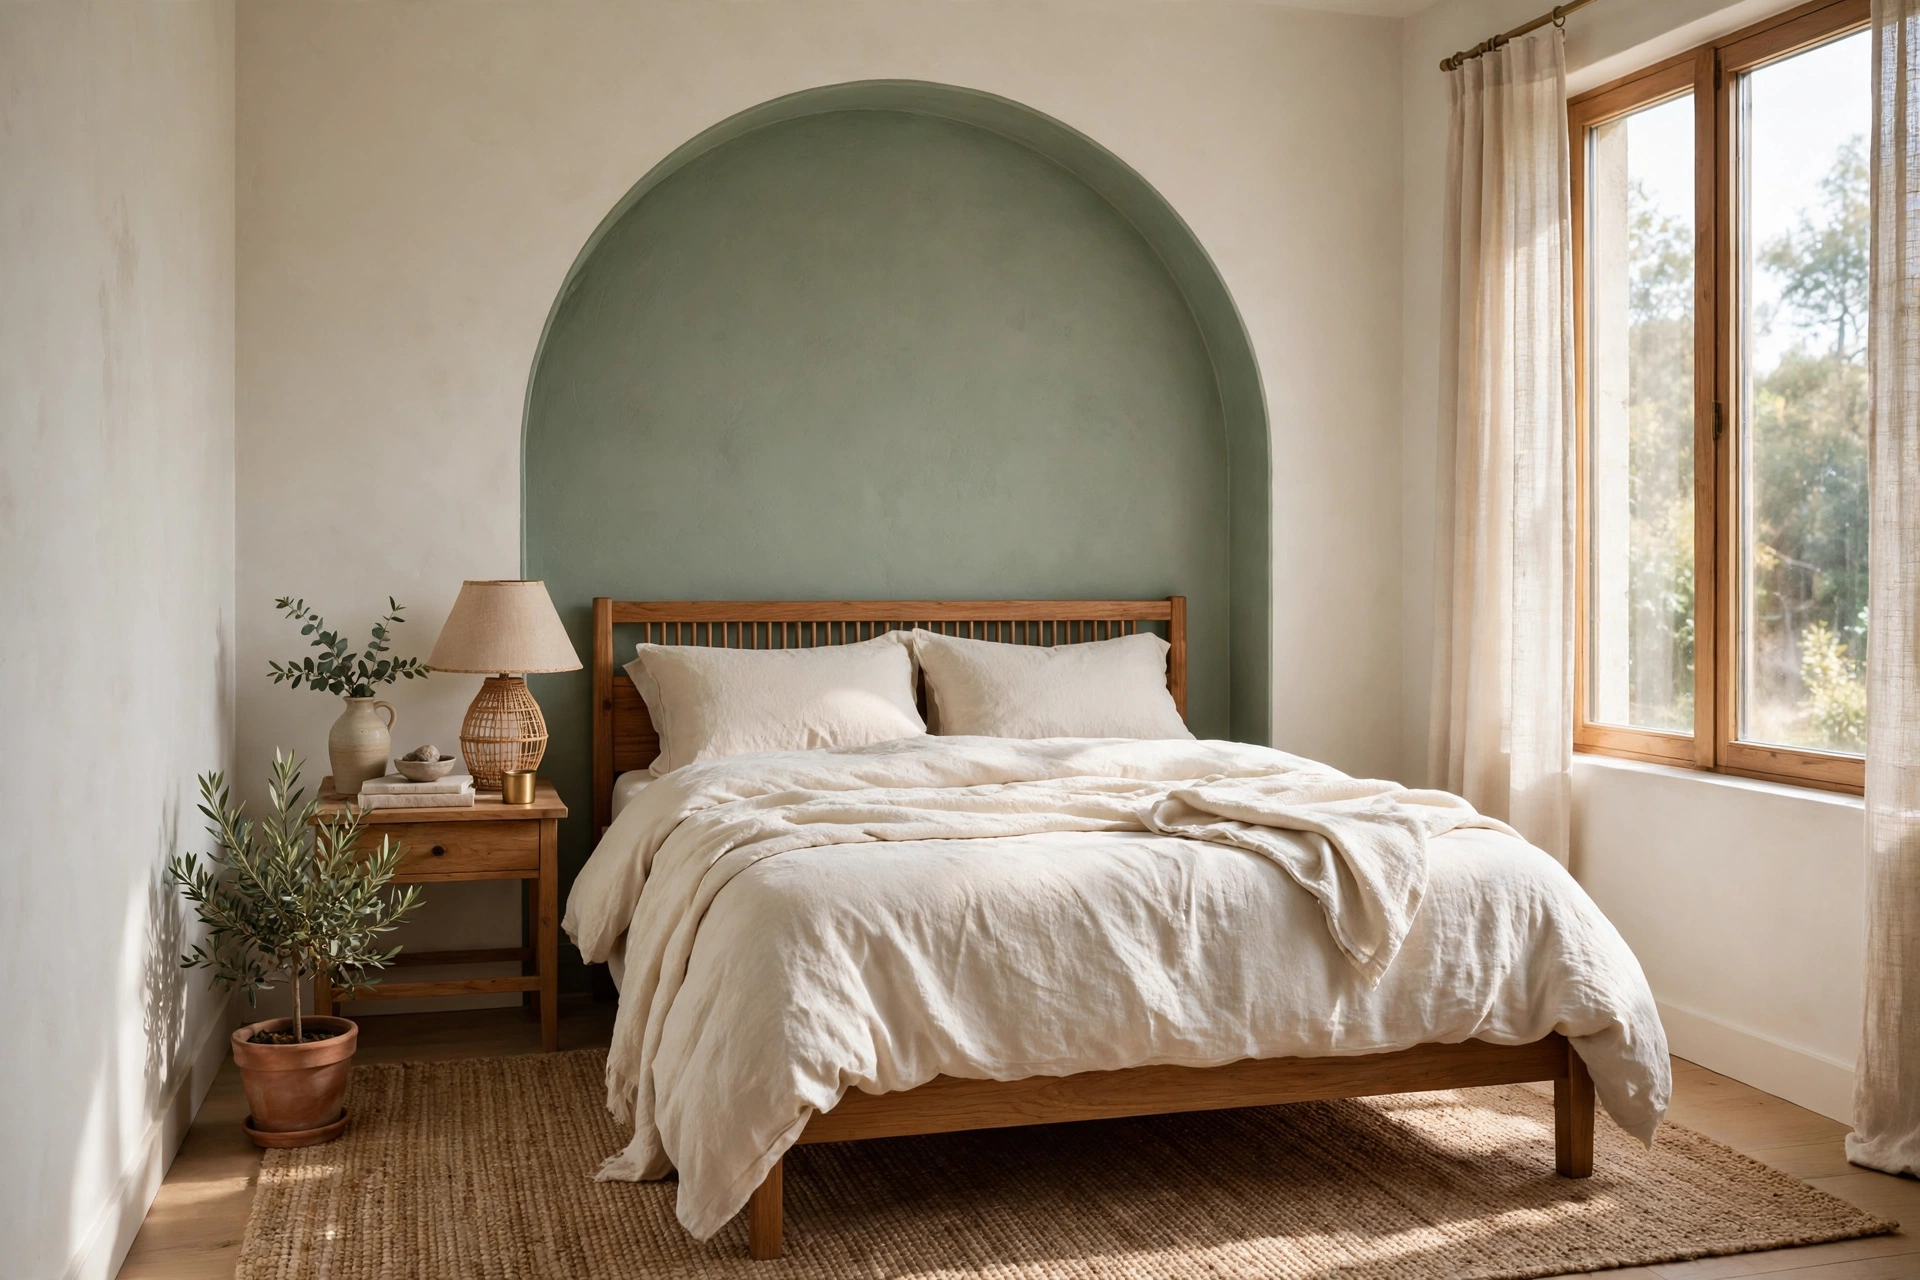
Every bedroom already has an accent wall — the one behind the bed. It’s the wall you face when you walk in, the wall the headboard anchors to, the wall your eyes land on every morning. Choosing a different wall means fighting the room’s natural focal point; choosing this one means amplifying it. That’s why an accent wall behind bed is the most common, most searched, and most forgiving accent project: the bed does half the composition work for you.
Fifteen ideas built specifically for this one wall — how each plays with the headboard, the sight line from the door, and the bed’s scale — with honest costs, times, and renter-safe options for every one.
On this page
- Quick comparison table
- 1. Painted arch
- 2. Board and batten
- 3. Upholstered / fabric panels
- 4. Wood slats
- 5. Wallpaper mural
- 6. Limewash
- 7. Dark moody color
- 8. Two-tone horizontal split
- 9. Picture-frame molding
- 10. Shiplap
- 11. Peel-and-stick for renters
- 12. Ombre
- 13. Stenciled pattern
- 14. Gallery + paint combo
- 15. Ceiling extension
- Bedroom wall rules
- Bedroom color psychology
- Renter rules
- 5 mistakes to avoid
- FAQs
Quick comparison: cost, time, renter score
| # | Idea | Cost / wall | Time | Renter-friendly? |
|---|---|---|---|---|
| 1 | Painted arch | $25–$45 | Half day | Yes (repaint) |
| 2 | Board and batten | $60–$150 | Full day | Removable trim: yes |
| 3 | Upholstered / fabric panels | $60–$200 | Half day | Fully removable |
| 4 | Wood slats | $80–$250 | Full day | French cleat: yes |
| 5 | Wallpaper mural | $80–$250 | 3–5 hours | Peel-and-stick: yes |
| 6 | Limewash | $50–$90 | Half–full day | Yes (repaint) |
| 7 | Dark moody color | $35–$70 | Half day | Yes (repaint) |
| 8 | Two-tone horizontal split | $30–$60 | Half day | Yes (repaint) |
| 9 | Picture-frame molding | $50–$120 | Full day | Removable trim: yes |
| 10 | Shiplap | $80–$200 | Full day | Adhesive: partial |
| 11 | Peel-and-stick for renters | $40–$120 | 2–3 hours | Fully removable |
| 12 | Ombre | $30–$60 | Full day | Yes (repaint) |
| 13 | Stenciled pattern | $30–$70 | Half–full day | Yes (repaint) |
| 14 | Gallery + paint combo | $40–$150 | Half day | Command strips: yes |
| 15 | Ceiling extension | $35–$70 | Half–full day | Yes (repaint) |
IDEA 01Painted Arch Behind the Headboard — the One-Afternoon Statement
The arch works because of the headboard: a painted arch frames the bed like a halo, turning a plain headboard into a composed vignette. Cheapest real transformation here ($25–$45 — one quart, tape, a level) and it scales to any bed: arch width = bed width plus 6–12 inches each side, top 12–24 inches above the headboard.
Two methods: freehand for organic wobble (forgiving, trendy) or tape-and-string for a crisp radius (classic). From the doorway, the arch reads as architecture the landlord didn’t have to approve. Renters: one quart, one afternoon, one repaint. Deep terracotta, sage, or clay against white walls is the can’t-miss palette.
Mark the arch’s center with the bed’s center before moving the bed back — a 2-inch offset screams mistake from the doorway.
Don’t make the arch narrower than the headboard — a halo that the headboard overflows reads as a miscalculation, not a design.
IDEA 02Board and Batten — Instant Architecture
Board and batten’s trim grid gives the bed wall paneled depth flat paint can’t: shadows fall in the grooves, the wall gains rhythm, and the headboard sits against something with presence. Behind a low upholstered headboard it reads classic; behind a wooden one, craftsman.
Layout rule: verticals wider than the bed by one panel each side, horizontals at chair-rail height or full-height — full-height suits tall headboards, two-thirds suits low ones. $60–$150 in 1×2 or 1×3 pine, painted wall-color (tone-on-tone = calm) or a shade deeper (definition). One full day with a miter saw and nail gun. Renters: heavy-duty removable strips, or a freestanding panel the bed hides behind.
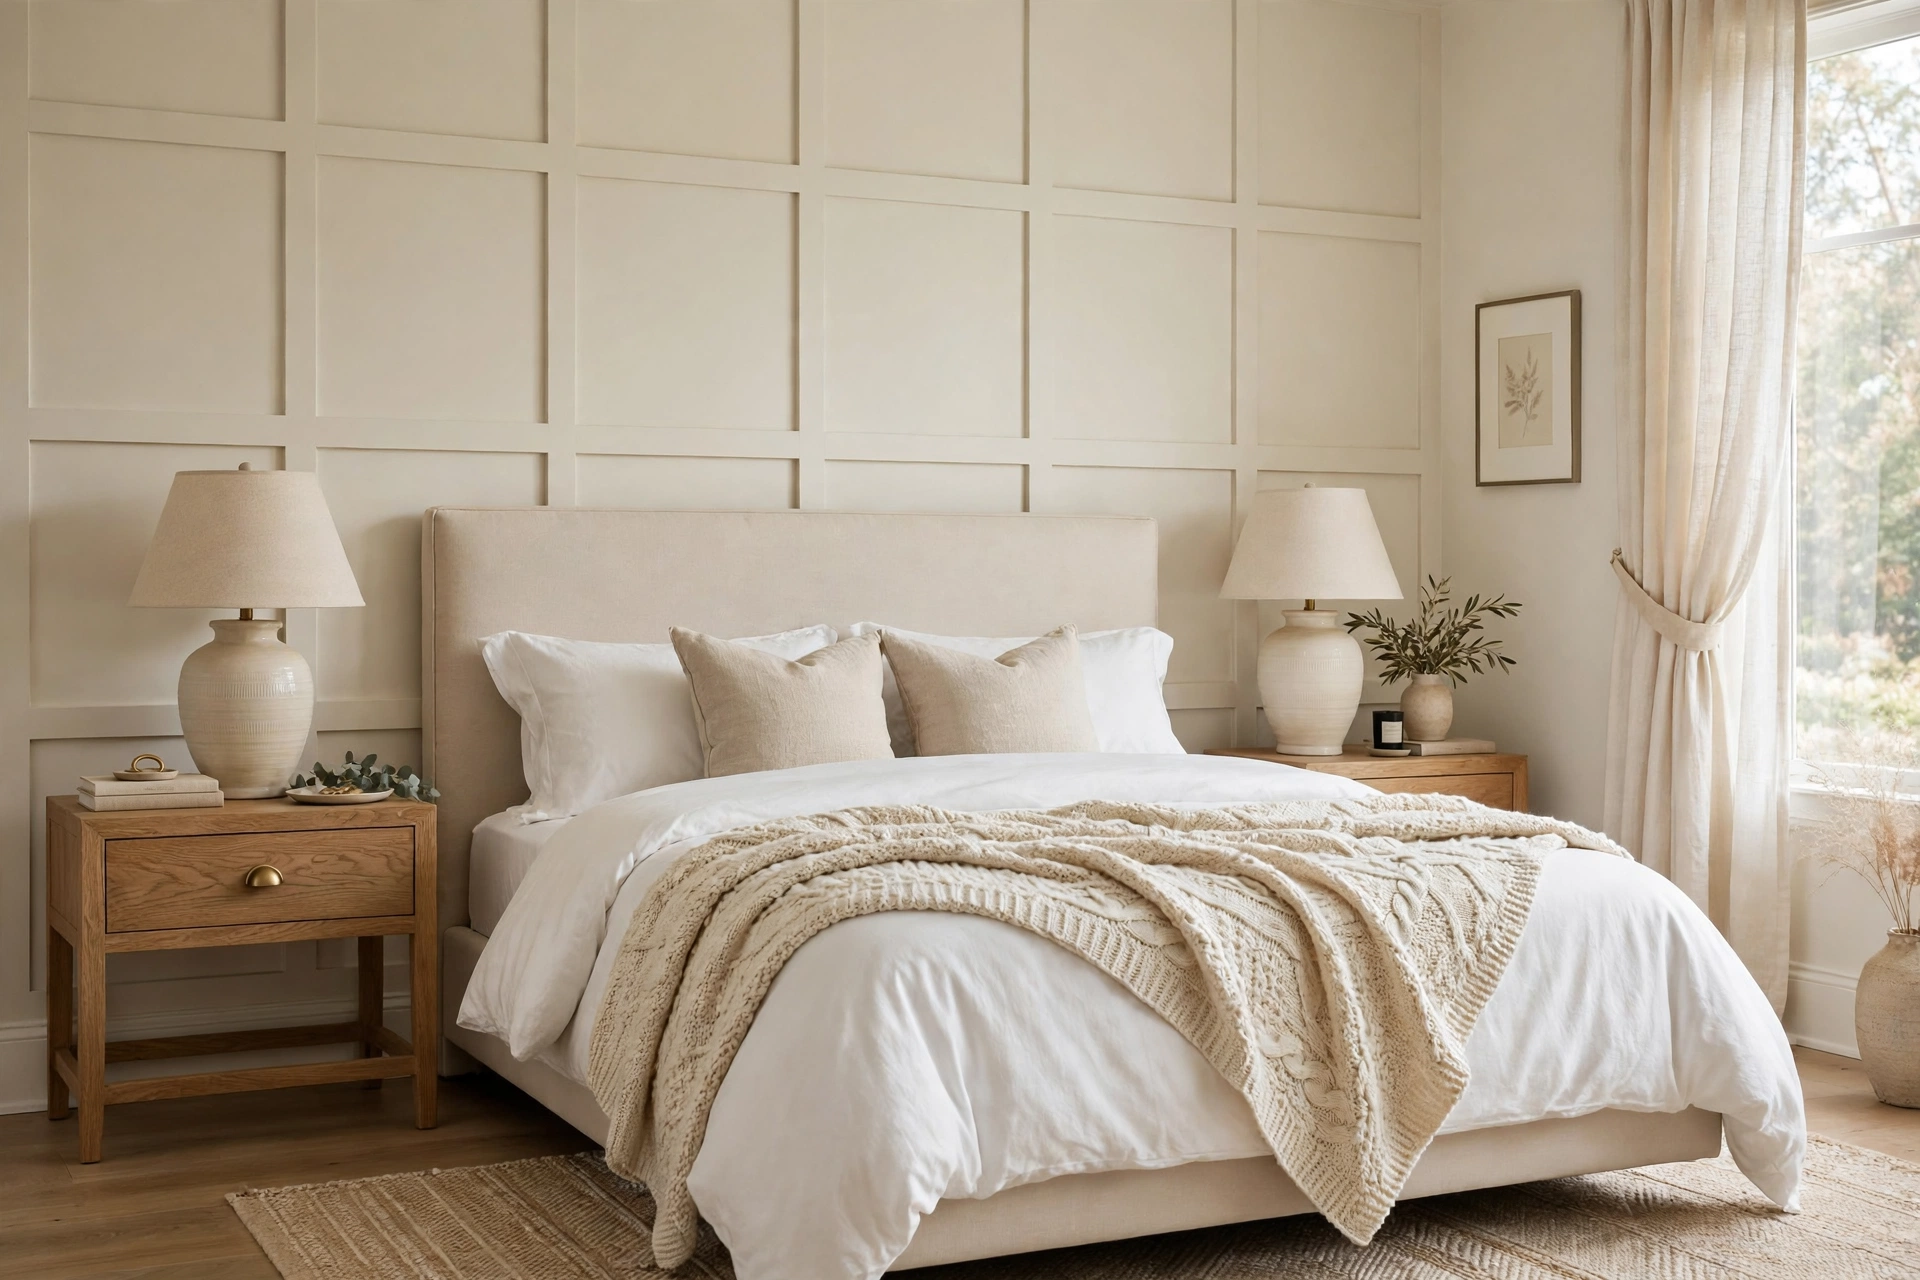
Paint the wall behind the trim first in the final color — gaps between boards disappear and the grid reads seamless.
Uneven panel spacing is the #1 giveaway of a DIY batten job — dry-lay the full grid with painter’s tape on the wall before cutting a single board.
IDEA 03Upholstered / Fabric Panels — the Softest Wall Here
The headboard’s logic extended to the whole wall: plywood panels wrapped in fabric, mounted in a grid behind the bed. It reads as a giant custom headboard — boutique-hotel energy — while adding real acoustic softness to echo-prone small bedrooms. Linen, velvet, or performance fabric over 2-inch foam; buttons or clean seams.
Panel height: extend 12–18 inches above the headboard so the treatment visibly continues past it. $60–$200 depending on fabric. Mount on French cleats or heavy-duty strips — fully removable, the rare luxury look that’s also the renter’s friend. Bonus: fabric hides wall imperfections paint would broadcast.
Choose fabric two shades deeper than bedding — it reads as intentional layering instead of a matchy-matchy set.
Thin cotton over bare plywood shows every staple and seam — use foam backing and wrap around the panel edges, not just the face.
IDEA 04Wood Slats — Warmth Without Weight
Vertical wood slats bring the warmth of a full wood wall at a fraction of the cost and visual weight — the gaps between slats keep it airy, and the vertical lines quietly stretch a low ceiling. Behind the bed it reads as a designed backdrop: the slats and headboard share a material language without matching.
1×2 or 1×3 furring strips ($80–$250 for one wall), spaced 1/2 to 1 inch apart on a painted backer — paint the backer dark (charcoal, deep green) so gaps read as shadow, not drywall. Full day with a nail gun. Light oak for calm, walnut stain for drama. Renters: build the slats on a plywood backer hung from a French cleat — the whole wall comes down in minutes.
Run slats behind nightstands too — stopping them at the nightstand edges makes the wall read narrower than it is.
Slats spaced wider than 1 inch start reading as fence, not design — keep gaps tight and even, and pre-finish every strip before mounting.
IDEA 05Wallpaper Mural — Art at Room Scale
A mural is the only idea here that’s art at room scale: misty forests, abstract landscapes, oversized botanicals — printed wall-size, hung in panels. Behind the bed it does what a gallery wall can’t: one continuous image with the headboard sitting inside the composition.
Composition rule: the mural’s quiet zone goes behind the headboard — calm centers, detail at the edges, so pillows cover the calm part and the drama frames the bed. $80–$250 for a one-wall mural, 3–5 hours. Paste-the-wall is renter-feasible; peel-and-stick is renter-perfect. Measure twice: murals print to your wall size.

Order the mural sized to your exact wall — trimming a busy design on the fly is where murals go wrong.
A mural with its busiest detail dead-center behind the headboard wastes the focal point on something pillows will hide — quiet center, drama at the edges.
IDEA 06Limewash — Old-World Walls in an Afternoon
Limewash’s hand-brushed, cloud-like texture gives the bed wall movement that flat paint can’t — the wall shifts subtly with the light, which reads as depth in small bedrooms. Behind a simple wooden or linen headboard it’s pure Mediterranean calm: warm white, clay, sage, or dusty rose.
$50–$90 and half to a full day with a block brush — the technique is forgiving by design (the “mistakes” are the texture). Bedrooms have no moisture worries, so leave it unsealed for true matte depth. Renters: it repaints like any paint. Keep bedding simple — limewash plus busy patterns fights for attention.
Work in 3-foot sections with a loaded brush — limewash dries fast, and reworking a dry edge leaves lap lines the texture can’t hide.
IDEA 07Dark Moody Color — the Cocoon Effect
A single dark wall behind the bed does something counterintuitive in a small bedroom: it recedes. Deep forest green, charcoal, or navy blurs the wall’s edges in low light, and the brain reads the room as deeper — while the bed, lit by lamps, glows forward. The cocoon effect.
$35–$70, half a day — the highest drama-per-dollar here. Two conditions: bedding goes light (dark wall + dark bedding = cave) and lighting goes warm and layered — bedside sconces or lamps at pillow height, because dark walls swallow lumens. Eggshell or satin; matte dark shows every touch. Renters: primer + one repaint covers it.

Mount sconces on the dark wall at pillow height — the warm pools of light against the dark color are the whole look.
Dark wall + overhead-only lighting = interrogation room, not cocoon. Layer bedside light or don’t go dark.
IDEA 08Two-Tone Horizontal Split — Geometry in Two Cans
A crisp horizontal line splitting the wall into two colors is the fastest architectural trick here: darker below, lighter above (or vice versa) creates a dado-rail effect with zero carpentry. Behind the bed, align the split with the headboard top — the line extends the headboard’s silhouette across the whole wall.
$30–$60 for two quarts, half a day. The line is everything: laser level, quality tape, and seal the tape edge with the base color first so the top color can’t bleed under. Classic split at 36 inches; bolder at two-thirds height. Deep below anchors the bed; deep above lifts the ceiling — pick the illusion your room needs.
Paint the lighter color first across the whole wall, then tape and roll the darker half — the light base seals the tape edge for a razor line.
A wavy split line ruins the entire effect — this is the one idea where a $30 laser level isn’t optional.
IDEA 09Picture-Frame Molding — Parisian Walls, DIY Price
Thin trim boxes applied directly to the wall read as Parisian paneling for the price of a few sticks of molding. Behind the bed it’s especially effective: the frames echo the bed’s rectangle at a larger scale, giving the wall a tailored, upholstered look — no fabric required.
$50–$120 in lightweight trim, painted wall-color (tone-on-tone = quiet luxury) or a shade deeper (definition). Symmetry is the whole game: mirror frames around the bed’s centerline, and keep frame width proportional — huge empty frames on a small wall read as a mistake. Full day with a miter box and adhesive. Renters: lightweight trim on removable strips, painted to match.
Mock the full layout in painter’s tape first and live with it a day — molding you’ve glued is molding you’re keeping.
Frames that aren’t mirrored around the bed’s center look accidental — measure from the bed’s centerline, not the wall’s.
IDEA 10Shiplap — Farmhouse Lines That Frame the Bed
Shiplap’s clean horizontal (or vertical) lines add instant architecture to the flat box behind the bed — and unlike a full wood wall, the shadow gaps keep it from feeling heavy. Horizontal planks widen a narrow bedroom; vertical planks lift a low ceiling. Behind a simple headboard it reads as the bed’s natural backdrop.
$80–$200 in 1×6 or 1×8 boards, a full day. Paint it: white for coastal, black for modern farmhouse drama, sage for the middle path. Run it wall-to-wall, not bed-width — stopping at the nightstands shrinks the room. Renters: adhesive-mounted lightweight planks on smooth walls, removed with heat.
Caulk the top edge where shiplap meets the ceiling — the shadow line there is where DIY shiplap looks unfinished.
Butt joints landing randomly across the wall scream DIY — stagger them like brickwork, never stacked in a column.
IDEA 11Peel-and-Stick Wallpaper — the Renter’s Power Move
The bedroom’s renter champion: vinyl peel-and-stick wallpaper on the bed wall delivers mural-level impact with a clean exit. Botanicals, geometrics, textured grasscloth-looks — the bed wall is the perfect single-wall commitment because the headboard and bedding ground even the boldest print.
$40–$120 for 2–3 rolls, two to three hours. Behind-bed rules: scale the pattern to the bed — king beds carry large-scale prints; a twin drowns in them. Hang with the bed pushed aside, smooth from the center out, trim at the baseboard. Fully removable, zero repaint — no landlord conversation needed.
Start the first panel at the bed’s centerline and work outward — the seam pattern stays symmetrical where it matters most.
Textured or dirty walls defeat the adhesive — wipe the wall down and let it dry fully before a single panel goes up.
IDEA 12Ombre — the Gradient Wall
An ombre — color melting from deep at the bottom to pale at the top (or the reverse) — is the most painterly idea here: no pattern, no trim, just color doing something walls don’t usually do. Behind the bed, dark-at-the-bottom grounds the headboard like a shadow; light-at-the-top lifts the ceiling.
$30–$60 for two to three quarts of the same hue in different depths, a full day of blending with dry brushes. Technique: work wet-into-wet in horizontal bands, feathering each into the next — no tape lines, the blend is the skill. Renters: it’s just paint. Keep bedding solid — ombre plus pattern is visual noise.
Mix all three depths in labeled cups before starting — running out mid-blend and remixing is where ombres go muddy.
Ombre over a wall with patches or repairs shows every flaw in the gradient — skim and sand first, because the blend magnifies texture.
IDEA 13Stenciled Pattern — Wallpaper Looks for $40
A repeating stencil over a painted wall delivers wallpaper’s rhythm at a tenth of the price — damask, Moroccan tile, art-deco fans. Behind the bed it’s ideal because the headboard covers the center: any slight wobble hides where nobody looks, while the visible edges read crisp.
$30–$70 for a stencil, paint, and a dense foam roller. Start at the bed’s centerline and work outward so partial motifs land at the corners. Metallic over matte = subtle luxe; tone-on-tone = texture without noise. Half to a full day. Renters: repaints clean. The stencil is reusable — one purchase, many walls.
Offload the roller on cardboard before each pass — the #1 stencil mistake is too much paint bleeding under the edges.
Moving the stencil while paint is wet smears the motif — let each repeat dry to the touch before repositioning.
IDEA 14Gallery + Paint Combo — Art as the Accent
Sometimes the accent isn’t the wall — it’s what’s on it. Paint the bed wall a rich supporting color (deep green, warm clay, ink blue), then hang a tight gallery of framed art above the headboard. The paint makes the frames pop; the frames make the paint deliberate. Two cheap moves, one composed wall.
$40–$150 depending on frames (thrift + spray paint = cheapest gallery on earth). Layout: one large anchor piece centered, smaller frames radiating — or a strict grid for modern calm. Bottom of frames 6–10 inches above the headboard. Renters: Command strips rated for each frame’s weight. Swap art seasonally; the painted wall stays.
Lay the gallery on the floor first and photograph it — what looks balanced on the floor translates directly to the wall.
Tiny frames scattered wide read as clutter, not gallery — keep the arrangement tight, roughly the headboard’s width.
IDEA 15Ceiling Extension — the Wrap-Around
The boldest move here: carry the accent color from the bed wall onto the ceiling — 12 to 24 inches in, or the whole ceiling. The wall stops being a rectangle and becomes a wrap, and the bed sits inside a color envelope. In small bedrooms it’s transformative: the room reads as designed in three dimensions, not decorated in two.
$35–$70, half to a full day — just paint, taken one surface further. Same color, flat finish on the ceiling (flat hides ceiling flaws; the wall can be eggshell). Deep colors envelop; light colors lift. The edge line where wall meets ceiling must be laser-straight — it’s now a design line. Renters: it’s still just paint.
Paint the ceiling portion first, then cut the wall color up to it — gravity is on your side in that order.
A wavy wrap line where wall meets ceiling destroys the effect — this line is now the design, so it gets the laser level treatment.
Bedroom Wall Rules: Why the Bed Wall Wins
The bed wall is the accent wall by physics, not opinion. Rule one: it’s the sight-line wall. You see it the moment you enter — the bed faces the door in most layouts, so the wall behind it is the room’s billboard. An accent anywhere else competes with this focal point; an accent here amplifies it. Rule two: the bed anchors it. The headboard gives the accent a base — every idea above uses the bed as composition, not competition.
Rule three: symmetry starts at the bed. Center every treatment — arches, moldings, murals, galleries — on the bed’s centerline, not the wall’s. Beds sit off-center in real rooms; centering on the wall is the #1 behind-bed mistake. Rule four: respect headboard height. Low headboard? The accent carries the upper wall (arches, murals, tall panels). Tall headboard? The accent frames it (batten, slats, two-tone aligned to its top).
Stand in the doorway and squint — the blur test. If the accent reads clearly at a squint, its scale is right; if it dissolves, it’s too timid for the wall.
Never accent the window wall instead of the bed wall in a bedroom — curtains fight the accent, light washes it out, and the bed wall sits there looking unfinished.
Bedroom Color Psychology: Restful vs. Bold
Bedrooms are for rest — but “restful” doesn’t mean “boring.” Cool, muted tones (sage, dusty blue, soft clay) lower stimulation; deep saturated tones (forest, ink, oxblood) create enclosure, which the sleeping brain reads as safe. What doesn’t work: high-energy brights (safety orange, electric yellow) at full saturation — they fight sleep on the wall you face while falling asleep.
LRV above 50 keeps small bedrooms airy — warm whites, pale sages. LRV below 30 creates the cocoon, but demands layered warm light (bedside lamps at pillow height, 2700–3000K) or the room reads as a cave. Finish: eggshell everywhere — matte shows touch marks behind pillows; semi-gloss is too shiny for sleep. Sample on a board at night under your lamps — bedroom light is warm and dim, and chips lie in daylight.
The 60-30-10 of the bed wall: 60% wall color, 30% bedding in a related tone, 10% contrast in lamps or art. Break it and the wall fights the bed.
Test the color behind your actual pillows — hold the swatch between pillow and wall. If the pillows disappear into it, go a shade deeper or lighter.
Painting the bed wall to match the bedding exactly creates a visual blob — the bed needs contrast against its backdrop to read as furniture, not camouflage.
Renter Rules: What You Can and Can’t Do
- Always safe: repainting the bed wall (primer covers everything), peel-and-stick wallpaper and murals, leaning oversized art, fabric panels on cleats or strips, Command-strip galleries, freestanding panels tucked behind the bed. The bed hides mounting hardware.
- Safe with care: lightweight trim on removable strips (test hidden first — “removable” varies by paint age), adhesive shiplap on smooth walls (heat to remove), stenciling with permission.
- Ask first, in writing: anything nailed or screwed (batten, slats, cleats). Photograph the wall on move-in day so “original condition” is documented.
- Never: assume spackle hides everything — large anchors need proper patching, and textured walls show repairs. Keep the original color name: “landlord white” is a real paint-matching headache.
The bed wall takes the most abuse in a rental — pillows scuff it, headboards rub it. Photograph it on move-in day or you’ll pay for “damage” that was already there.
A $40 gallon of paint plus $15 of primer is the cheapest lease negotiation in existence. Keep receipts — some landlords reimburse “improvements.”
5 Mistakes to Avoid
- Accenting the wrong wall. The bed wall is the accent wall. Putting it on the window wall or a side wall while the bed wall sits blank splits the room’s focus and strands the bed — the most common bedroom mistake.
- Headboard clashing with the pattern. A busy mural behind an ornate headboard is visual war. Rule: one of them leads. Statement headboard → quiet wall (limewash, tone-on-tone). Statement wall → simple headboard.
- Too-busy pattern behind the pillows. The busiest zone must not sit where pillows land — it reads as clutter at sleep distance. Murals: quiet center. Stencils: calmer motif in the middle. Arches: solid color, always.
- Ignoring scale. A tiny gallery on a huge wall, an arch narrower than the headboard, molding frames too small for the expanse — the bed wall is big, and timid treatments shrink against it. When in doubt, go 20% bigger than feels safe.
- Dark color + no lighting plan. Dark bed walls demand light: bedside lamps or sconces at pillow height, warm (2700–3000K). Dark wall + single overhead = cave. Match boldness to real light, or upgrade the light first.
FAQs
01Should the accent wall be behind the bed?
In almost every bedroom, yes. The bed wall is the room’s natural focal point — the sight-line wall from the door, with the headboard anchoring the composition. Accenting a different wall splits the room’s focus and strands the bed. The one exception: a bed under a window, where curtains fight the accent — then the largest solid wall takes the role.
02What is the best color for an accent wall behind the bed?
It depends on the mood. Restful: sage, dusty blue, warm clay, soft terracotta — muted tones that lower stimulation. Cocooning: forest green, charcoal, navy, oxblood — deep tones that enclose and feel safe, but demand layered warm bedside lighting. Avoid full-saturation brights (electric yellow, safety orange) — they fight sleep. Eggshell finish; sample at night under your own lamps.
03Should I use wallpaper or paint behind the bed?
Paint wins on cost ($25–$70), speed (half a day), and reversibility — arches, two-tones, dark colors are all paint. Wallpaper wins on pattern and texture: murals, grasscloth looks, bold geometrics. The hybrid: paint the wall, add one wallpapered element. Renters: peel-and-stick gives the wallpaper look with a clean exit.
04What are the best renter-friendly options for the wall behind the bed?
Ranked by impact and reversibility: peel-and-stick wallpaper or mural (fully removable, biggest transformation), one-wall repaint (primer covers everything), fabric panels on cleats, lightweight molding on removable strips, leaning art and Command-strip galleries. The bed hides mounting hardware, which makes this the most renter-forgiving accent wall in the house. Photograph the wall on move-in day.
05How far should the accent paint go — just the wall, or the ceiling and sides too?
The classic scope is wall only, edge to edge — corner to corner, floor to ceiling. Two upgrades: wrap 12–24 inches onto the ceiling (idea 15) for a 3D cocoon, or carry the color 6–12 inches onto the side walls at the corners. Never stop mid-wall with a visible vertical edge — it reads as a mistake, not a design.
06What works behind the bed in a really small bedroom?
Small bedrooms reward vertical thinking: painted arches that draw the eye up, vertical slats or stripes that lift the ceiling, light-to-mid tones (LRV 50+) that stay airy. The dark-wall cocoon works too — dark recedes — but only with real bedside lighting. Avoid tiny art, fussy small patterns, and anything stopping short of the wall’s edges. Scale up 20% past what feels safe.
Key takeaways
- The bed wall is the accent wall. Sight line from the door, headboard as anchor — every accent wall behind bed idea here amplifies the room’s natural focal point instead of fighting it.
- Center on the bed, not the wall. Arches, moldings, murals, galleries — all measured from the bed’s centerline, since real beds sit off-center.
- One of them leads. Statement headboard → quiet wall. Statement wall → simple headboard. Never both shouting.
- Scale up. The bed wall is big; timid treatments shrink against it. Go 20% bigger than feels safe.